Younger readers may not recall the days when every mall had a music store — not the kind where tapes and LPs were sold, but the kind where you could buy instruments. These places inevitably had an employee belting out mall-music to all and sundry on an electric organ. And more often than not, the organist was playing a Hammond organ, with the distinct sound of these instruments generated by something similar to this tonewheel organ robot.
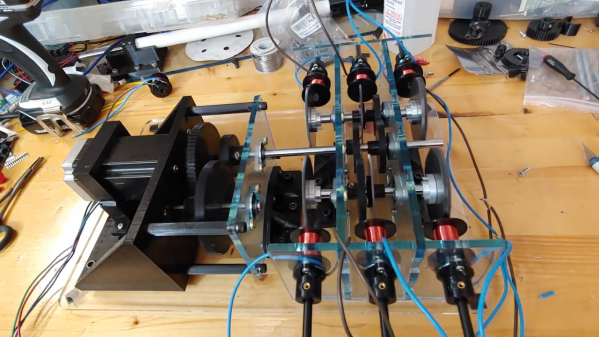
Tonewheels are toothed ferromagnetic wheels that are rotated near a pickup coil. This induces a current that can be amplified; alter the tooth profile or change the speed of rotation, and you’ve got control over the sounds produced. While a Hammond organ uses this technique to produce a wide range of sounds, [The Mixed Signal]’s effort is considerably more modest but nonetheless interesting. A stepper motor and a 1:8 ratio 3D-printed gearbox power a pair of shafts which each carry three different tonewheels. The tonewheels themselves are laser-cut from mild steel and range from what look like spur gears to wheels with but a few large lobes. This is a step up from the previous version of this instrument, which used tonewheels 3D-printed from magnetic filament.
Each tonewheel has its own pickup, wound using a coil winder that [TheMixed Signal] previously built. Each coil has a soft iron core, allowing for the addition of one or more neodymium bias magnets, which dramatically alters the tone. The video below shows the build and a demo; skip ahead to 16:10 or so if you just want to hear the instrument play. It’s — interesting. But it’s clearly a work in progress, and we’re eager to see where it goes. Continue reading “Tonewheels Warble In This Organ-Inspired Musical Instrument”