The V Programming Language: Vain Or Virtuous?

If you stay up to date with niche software news, your ears may recently have twitched at the release of a new programming language: V. New hobby-project programming languages are released all the time, you would correctly argue; what makes this one special? The answer is a number of design choices which promote speed and safety: V is tiny and very fast. It’s also in a self-proclaimed alpha state, and though it’s already been used to build some interesting projects, is still at an early stage.

Continue reading “The V Programming Language: Vain Or Virtuous?”

I Love The Smell Of ABS Plastic In The Morning

One lesson we can learn from the Vietnam War documentary Apocalypse Now is that only crazy people like terrible smells just for fun. Surely Lt. Col. Kilgore would appreciate the smell of 3D printers as well, but for those among us who are a little less insane, we might want a way to eliminate the weird (and not particularly healthy) smell of melting ABS plastic.

While a simple solution would be a large fume hood or a filter to prevent inhaling the fumes, there are more elegant solutions to this problem. [Mark]’s latest project uses an electrostatic precipitator (ESP) to remove the volatile plastic particles from the air. Essentially it is a wire with a strong voltage applied to it enclosed in a vessel of some sort. The voltage charges particles, which then travel to a collecting electrode. Commercial offerings also include an X-ray generator to help clean the air, but [Mark] found this to be prohibitively expensive.

The ESP is built into a small tube through with the air can flow, and the entire device itself is housed in the printing enclosure. The pictures show the corona discharge in the device, and [Mark] plans to test it over the next few months to determine its effectiveness. He does note, however, that the electrostatic discharge creates ozone, which has its own set of problems, so he recommends against building one on your own. Ozone at least still smells like victory.

Vacuum Sputtering With A Homemade Magnetron

“You can never be too rich or too thin,” the saying goes, and when it comes to coatings, it’s true that thinner is often better. The way to truly thin coatings, ones that are sometimes only a few atoms thick, is physical vapor deposition, or PVD, a technique where a substance is transformed into a vapor and condensed onto a substrate, sometimes using a magnetron to create a plasma.

It sounds complicated, but with a few reasonable tools and a healthy respect for high voltages, a DIY magnetron for plasma sputtering can get you started. To be fair, [Justin Atkin] worked on his setup for years, hampered initially by having to settle for found parts and general scrap for his builds. As with many things, access to a lathe and the skills to use it proved to be enabling, allowing him to make custom parts like the feedthrough for the vacuum chamber as well as a liquid-cooled base, which prevents heat from ruining the magnets that concentrate the plasma onto the target metal. Using a high-voltage DC supply made from old microwave parts, [Justin] has been able to sputter copper films onto glass slides, with limited success using other metals. He also accidentally created a couple of dichroic mirrors by sputtering with copper oxides rather than pure copper. The video below has some beautiful shots of the ghostly green and purple glow.

A rig such as this opens up a lot of possibilities, from optics to DIY semiconductors. It may not be quite as elaborate as some PVD setups we’ve seen, but we’re still pretty impressed.

Continue reading “Vacuum Sputtering With A Homemade Magnetron”

Gesture Controlled Doom

DOOM will forever be remembered as one of the founding games of the entire FPS genre. It also stands as a game which has long been a fertile ground for hackers and modders. [Nick Bild] decided to bring gesture control to iD’s classic shooter, courtesy of machine learning.

The setup consists of a Jetson Nano fitted with a camera, which films the player and uses a convolutional neural network to recognise the player’s various gestures. Once recognised, an API request is sent to a laptop playing Doom which simulates the relevant keystrokes. The laptop is hooked up to a projector, creating a large screen which allows the wildly gesturing player to more easily follow the action.

The neural network was trained on 3300 images – 300 per gesture. [Nick] found that using a larger data set actually performed less well, as he became less diligent in reliably performing the gestures. This demonstrates that quality matters in training networks, as well as quantity.

Reports are that the network is fairly reliable, and it appears to work quite well. Unfortunately, playability is limited as it’s not possible to gesture for more than one key at once. Overall though, it serves as a tidy example of how to do gesture recognition with CNNs.

If you’re not convinced by this demonstration, you might be interested to learn that neural networks can also be used to name tomatoes. If you don’t want to roll your own pose detection, check out this selfie drone that uses CMU’s OpenPose library. Video after the break.

Continue reading “Gesture Controlled Doom”

High Precision Analog IO With Digital Pins

Reading the temperature of your environment is pretty easy right? A quick search suggests the utterly ubiquitous DHT11, which speaks a well documented protocol and has libraries for every conceivable microcontroller and platform. Plug that into your Arduino and boom, temperature (and humidity!) readings. But the simple solution doesn’t hit every need, sometimes things need to get more esoteric.

The technique summarized by an image from Microchip Appnote AN685

For years we’ve been watching [Edward]’s heroic efforts to build accessible underwater sensing hardware. When we last heard from him he was working on improving the accuracy of his Arduino’s measurements of the humble NTC thermistor. Now the goal is the same but he has an even more surprising plan, throw the ADC out entirely and sample an analog thermistor using digital IO. It’s actually a pretty simple trick based on an intuitive observation, that microcontrollers are better at measuring time than voltage. 

The basic circuit

The circuit has a minimum of four components: a reference resistor, the thermistor, and a small capacitor with discharge resistor. To sense you configure a timer to count, and an edge interrupt to capture the value in the timer when its input toggles. One sensing cycle consists of discharging the cap through the discharge resistor, enabling the timer and interrupt, then charging it through the value to measure. The value captured from the timer will be correlated to how long it took the cap to charge above the logic-high threshold when the interrupt triggers. By comparing the time to charge through the reference against the time to charge through the thermistor you can calculate their relative resistance. And by performing a few calibration cycles at different temperatures ([Edward] suggests at least 10 degrees apart) you can anchor the measurement system to real temperature.

For all the gory details, including tips for how to save every last joule of energy, check out [Edward]’s post and the Microchip appnote AN685 he references. Besides this series [Edward]’s Cave Pearl Project has already yielded an impressive number of Hackday posts. For more great hardware writeups check out a general hardware build for a single sensing node, or the “temperature sensor” [Edward] made with no external parts at all!

Make Your Own SPL DB Meter With A Microphone And MCU

Measuring equipment such as SPL (Sound Pressure Level) decibel meters may seem daunting, but this article by [Shawon M. Shahryiar] shows that making your own need only have two essential ingredients: a microphone and a microcontroller. Obviously the microphone is for measuring the sound pressure level, and its output is then fed into the ADC of the microcontroller which does some math before sending the result to a display.

[Shawon] runs through all of the theory behind the calculations that have to be performed, before showing the C code that runs on the PIC18F242 8-bit MCU targeted by the prototype setup. The display is a graphical LCD type, capable of displaying the text with values as well as bar graphs indicating the measured levels. For the measurements themselves, the RMS value is taken of 16 ADC samples while the algorithm takes into account the specifications of the Seeed-sourced microphone module, specifically its average 50 dB sensitivity rating.

Although a full schematic is not provided, the essentials are all there for anyone to build their own SPL dB meter using virtually any microphone and MCU with built-in ADC. As the article also notes, opting for a higher quality microphone will yield better result and of course a faster MCU will offer more options, including FFT processing. Since the code itself is fairly basic, it should be easy enough to port it to an ARM-based MCU, which would allow one to use for example a TFT LCD.

Take a peek after the break for a video of the article’s SPL dB meter in action.

Continue reading “Make Your Own SPL DB Meter With A Microphone And MCU”

Developing An Automatic Tool For CAN Bus Hacking

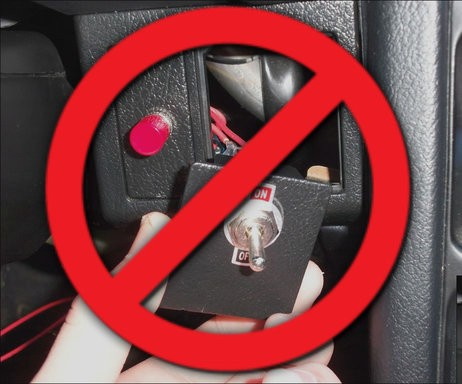
In the old days, a physical button or switch on the dashboard of your car would have been wired to whatever device it was controlling. There was potentially a relay in the mix, but still, it wasn’t too hard to follow wires through the harness and figure out where they were going. But today, that concept is increasingly becoming a quaint memory.

Assuming your modern car even has physical buttons, pushing one of them likely sends a message over the CAN bus that the recipient device will (hopefully) respond to. Knowing how intimidating this can be to work with, [TJ Bruno] has been working on some software that promises to make working with CAN bus user interfaces faster and easier. Ultimately, he hopes that his tool will allow users to rapidly integrate custom hardware into their vehicle without having to drill a hole in the dashboard for a physical control.

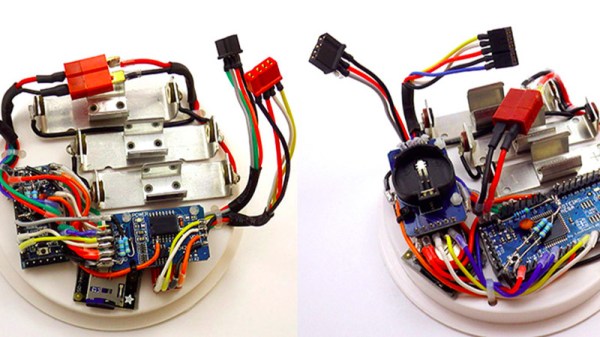
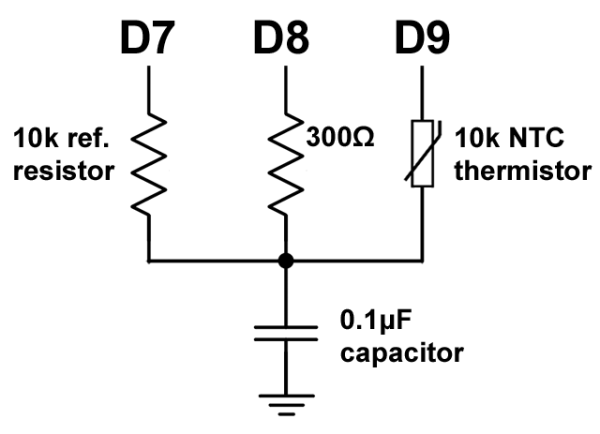
But if you’re the kind of person who doesn’t like to have things done for them (a safe bet, since you’re reading Hackaday), don’t worry. [TJ] starts off his write-up with an overview of how you can read and parse CAN messages on the Arduino with the MCP2515 chip. He breaks his sample Sketch down line by line explaining how it all works so that even if you’ve never touched an Arduino before, you should be able to get the gist of what’s going on.

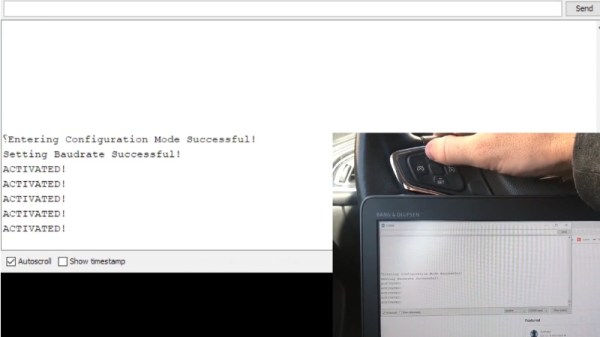
As it turns out, reading messages on the CAN bus and acting on them is fairly straightforward. The tricky part is figuring out what you’re looking for. That’s where the code [TJ] is working on comes in. Rather than having to manually examine all the messages passing through the network and trying to ascertain what they correspond to, his program listens while the user repeatedly presses the button they want to identify. With enough samples, the code can home in on the proper CAN ID automatically.

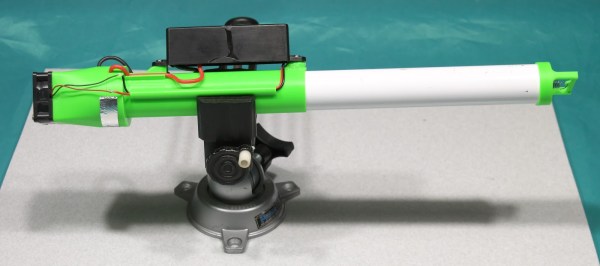
The upside to all this is that you can activate aftermarket functions or hardware with your vehicle’s existing controls. Need an example? Check out the forward-looking camera that [TJ] added to his his 2017 Chevy Cruze using the same techniques.

Continue reading “Developing An Automatic Tool For CAN Bus Hacking”