Spite, Thrift, And The Virtues Of An Affordable Logic Analyzer

[Larry Wall], the father of Perl, lists the three great virtues of all programmers: Laziness, Impatience, and Hubris. After seeing that Saleae jacked up the prices on their popular logic analyzers to ludicrous levels, [CNLohr] added a fourth virtue: Spite. And since his tests with a Cypress FX3 over the last few days may lead to a dirt-cheap DIY logic analyzer, we may soon be able to add another virtue: Thrift.

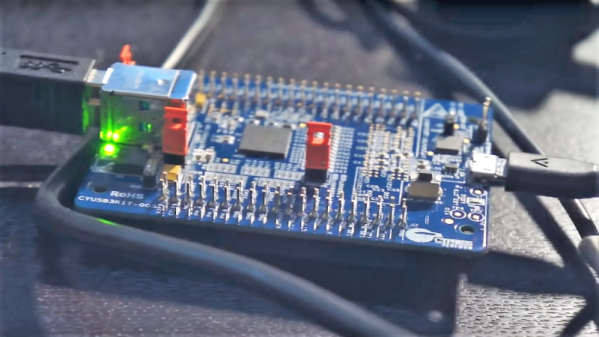
The story begins a year or two ago when [CNLohr] got a Cypress FX3 development board for $45. The board sat unused for want of a Windows machine, but after seeing our recent article on a minimalist logic analyzer based on an FX2, he started playing with the board to see if it could fan the flames of his Saleae hatred. The FX3 is a neat little chip that has a 100-MHz General Programmable Interface (GPIF) bus that basically lets it act like an easy to use FPGA.

Prepared to spend months on the project, he was surprised to make significant progress on his mission of spiteful thrift within a few days, reading 16 bits off the GPIF at over 200 megabytes per second and dumping it over the USB 3.0 port. [Charles]’ libraries for the FX3 lay the foundation for a lot of cool stuff, from logic analyzers to SDRs and beyond — now someone just has to build them.

The search for a cheap but capable logic analyzer is nothing new, of course. Last year, both [Jenny List] and [Bil Herd] looked at the $22 iCEstick as a potential Saleae beater.

Continue reading “Spite, Thrift, And The Virtues Of An Affordable Logic Analyzer”

Why Sony’s Trinitron Tubes Were The Best

If you’re old enough to remember Cathode Ray Tube (CRT) Televisions, you probably remember that Sony sold the top products. Their Trinitron tubes always made the best TVs and Computer Monitors. [Alec Watson] dives into the history of the Sony Trinitron tube.

Sony Color TVs didn’t start with Trinitron — for several years, Sony sold Chromatron tubes. Chromatron tubes used individually charged wires placed just behind the phosphor screen. The tubes worked, but they were expensive and didn’t offer any advantage over common shadow mask tubes. It was clear the company had to innovate, and thanks to some creative engineering, the Trinitron was born.

Closeup of a Trinitron tube shows unbroken vertical stripes which led to a brighter picture.

All color TV’s shoot three electron guns at a phosphor screen. Typical color TVs use a shadow mask — a metal sheet with tiny holes cut out. The holes ensure that the electron guns hit only the red, green and blue dots of phosphor. Trinitrons use vertical bars of single phosphor color and a picket fence like aperture grille. The aperture grill blocks less of the electron beam than a shadow mask, which results in a much brighter image. Trinitrons also use a single electron gun, with three separate cathodes.

[Alec] is doing some amazing work describing early TV systems and retro consumer electronics over on his YouTube channel, Technology Connections. We’ve added him to our Must watch subscription list.

Interested in retro CRTs? Check out Dan’s article on cleaning up the fogged plastic safety screen on the front of many CRTs.

Continue reading “Why Sony’s Trinitron Tubes Were The Best”

Rescue An Old Washing Machine With Modern Controls

The humble washing machine is an appliance that few of us are truly passionate about. They’re expected to come into our lives and serve faithfully, with a minimum of fuss. In the good old days, it was common for a washing machine to last for well over 20 years, and in doing so ingratiate itself with its masters. Sadly now while the simple mechanical parts may still be serviceable, the electronics behind the scenes can tend to fail. This is a Russian story (Google Translate link) about giving a new brain to an old friend.

The machine in question is known as an Oriole, and had served long and hard. Logic chips and entire controllers had been replaced, but were continuing to fail. Instead, a replacement was designed to keep the machine operational for some time yet. Rather than relying on recreating the full feature set of the machine it was decided to eliminate certain things for simplicity. Settings for different fabric types or wash modes were eliminated, which is an easy choice if like most people all your washes are done in the same mode anyway. A water level sensor was found to be no longer functioning properly and was simpler to eliminate than repair.

The brain is a PIC microcontroller, with an ESP12 acting as a webserver for monitoring and control. Additionally, a glass lens was taken from some former medical equipment and neatly installed in the control panel of the machine before an OLED display, giving the machine far more feedback than before. Control is still done with the machine’s original buttons. Temperature sensors were added as well to allow the machine to shut itself down in the event of an overheating problem. It’s all tied together on what looks to be a classic single-sided homebrew PCB.

It’s a great project that shows it’s easy to bring modern electronic might to bear on vintage mechanical hardware, with great results. A washing machine lives to see another day, another load – and the landfill remains just that much lighter, to boot.

We’ve seen controller builds for old washing machines before, too – like replacing mechanical control with an Arduino.

[Thanks to Tirotron for sending this in!]

Print A Sacrificial Magnet Square

Here’s your quick and dirty hack for the day. Sometimes you just need something that will work for what you’re trying to do, and you don’t want to go through the motions of doing what’s prescribed. When this happens, it’s a cheap, disposable tool that fits the bill. No, we’re not talking about Harbor Freight—we mean those need-driven tools you make yourself that get the job done without fuss. If you’re really lucky, you can use them a couple of times before they break.

This is one of those tools. [Jake’s Workshop] wanted to be able to quickly tack a corner weld without getting out the clamps, so he thought, why not print some magnet squares? [Jake] hollowed out the triangle to save filament, but this also gives it a nice advantage over store-bought magnet squares: instead of grasping and pulling it off,  you can hook your finger through it and then hang it on the pegboard for next time.

[Jake] got lucky with the pocket sizes and was able to press fit the magnets in place, but it would be worth it to add a drop of CA glue to help with strain. He seems to have forgotten to upload the files for his various styles, but a hollow triangle with chamfers and magnet pockets should be easy enough to replicate in OpenSCAD or  SolidWorks, which he used in the video below.

There’s something special about a cheap tool you make yourself. Even though you know it won’t last forever, it’s just more meaningful than some cheap, rage-inducing tchotchke or assemblage from a place where the air is ~85% offgasses. We love necessity-driven self-built tools around here so much that we gave them their own Hacklet.

Continue reading “Print A Sacrificial Magnet Square”

Remember When Scratch-Built Robots Were Hard?

Even simple robots used to require quite a bit of effort to pull together. This example shows how far we’ve come with the tools and techniques that make things move and interact. It’s a 3D printed rover controlled by the touchscreen on your phone. This achieves the most basic building block of wheeled robotics, and the process is easy on you and your pocketbook.

We just can’t stop loving the projects [Greg Zumwalt], aka[gzumwalt], is turning out. We just saw his air-powered airplane engine and now this little rover perks our ears up. The design uses the familiar trick of two powered wheels with a ball bearing to avoid problems with differential turning. But the simplicity is all in the implementation.

This bot is 3D printed using eight very simple pieces: four gears, two axles, a cap and a single tray to mount everything. The cap captures the ball bearing which pokes out a hole in the bottom of the tray to form an omnidirectional wheel. Two 9G servos modified for continuous rotation. The mating teeth of the gears are found on the wheel sections which have grooves for neoprene O-rings to provide traction. The entire thing is driven by an ESP8266 in the form of an Adafruit Feather Huzzah. This is programmed using the Arduino IDE and your phone can connect directly or through a WiFi router.

We’re not crazy, right? Robots didn’t used to be this easy to pull together? This goes for the power of 3D printing versus traditional basement fabrication methods, but in the availability of powerful yet inexpensive embedded systems and the available tools and libraries to program them. Kudos to you [Greg] for showing us how great the currently available building blocks are in the hands of anyone who wants to channel their engineering creativity. He certainly has… this chassis ultimately powers Santa’s sleigh.

Need a bigger printing challenge? Here’s a 3D printed rover that goes all-in with the suspension system.

Continue reading “Remember When Scratch-Built Robots Were Hard?”

SID Organ Pulls Out All The Stops

Someone left this organ out in the rain, but [Tinkartank] rescued it and has given it a new life as a SID controller. What’s a SID, you ask? That’s the sound chip Commodore used in the C64, a remarkable chip revered among retro gamers that was way ahead of its time.

He threw out everything but the keyboard assembly for the build. Each key press now drives a momentary button, and those are all wired up to an Arduino Mega through some I/O expansion boards left over from another project. The Mega drives the MOS6581 SID chip which generates those sweet chiptunes. There are four CV outs for expanding the organ’s horizons with Eurorack modules.

Our favorite part is the re-use of the stop knobs — particularly that they are actuated the same way as before. The knobs still technically control the sound, but in a new way — now they turn pots that change the arpeggio, frequency, or whatever he wants ’em to do.

The plans for the future revolve around switching to a Teensy to help out with memory issues. Although it’s a work in progress, this organ already has a ton of features. Be sure to check them out after the break.

Once you dive down the chiptunes rabbit hole, you might want to take them everywhere.  When you get to that point, here’s a portable SID player. A SIDman, if you will.

Continue reading “SID Organ Pulls Out All The Stops”

Samy Kamkar: Reverse Engineering For A Secure Future

Show of hands: how many of you have parked your car in the driveway, walked up to your house, and pressed your car’s key fob button thinking it would open the front door? We’ve probably all done it and felt a little dopey as a result, but when you think about it, it would be tremendously convenient, especially with grocery bags dangling off each arm and the mail clenched between your teeth. After all, we’re living in the future —  shouldn’t your house be smart enough to know when you’re home?

Reverse engineer par excellence Samy Kamkar might think so, but given his recent experiences with cars smart enough to know when you’re standing outside them, he’d probably have some reservations. Samy dropped by the 2017 Hackaday Superconference in November to discuss the finer points of exploiting security flaws in passive car entry systems, and also sat down with our own Elliot Williams after his talk for a one-on-one interview. Samy has some interesting insights on vehicle cybersecurity, but the practical knowledge he’s gained while exploring the limits of these systems teach some powerful lessons about being a real-world reverse engineer.

Continue reading “Samy Kamkar: Reverse Engineering For A Secure Future”