On paper, bicycling is an excellent form of transportation. Not only are there some obvious health benefits, the impact on the environment is much less than anything not directly powered by a human. But let’s face it: riding a bike can be quite scary in practice, especially along the same roads as cars and trucks. It’s hard to analyze the possible threats looming behind you without a pair of eyes in the back of your head.
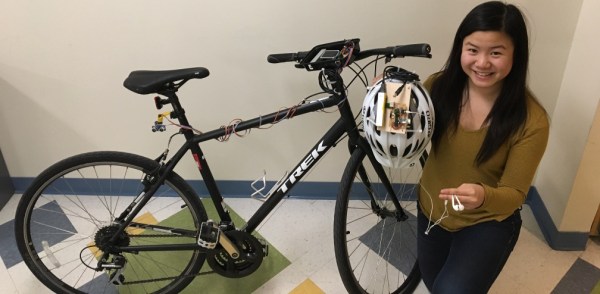
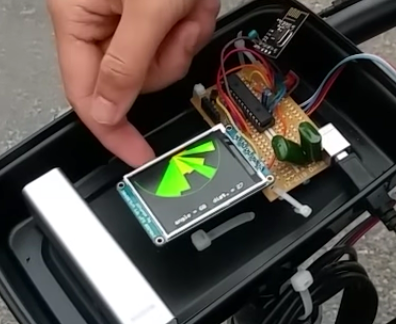 [Claire Chen] and [Mark Zhao] have come up with the next best thing—bike sonar. It’s a two-part system that takes information from an ultrasonic rangefinder and uses it to create sound-localized pings in a rider’s ears. The rangefinder is attached to a servo mounted on the seat post. It sweeps back and forth to detect objects within 4 meters, and this information is displayed radar-sweep-style graphic on a TFT screen via a PIC32.
Though the graphic display looks awesome, it’s slow feedback and a bit dangerous to have to look down all the time — the audio feedback is by far the most useful. The bike-side circuits sends angle and distance data over 2.4GHz to another PIC mounted on a helmet. This PIC uses sound localization to create a ping noise that matches the distance and location of whatever is on your tail. The ping volume is relative to the distance of the object, and you just plug headphones into the audio jack to hear them. Bunny-hop your way past the break to check it out.

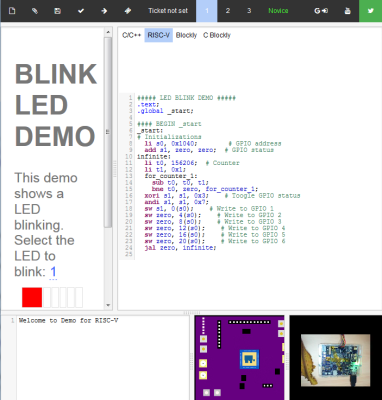 You can now program the