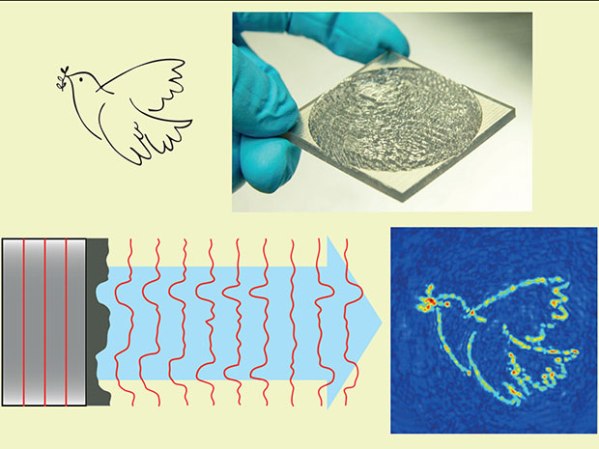
3D Printed Acoustic Holograms: Totally Cool, Not Totally Useless

If you wave your hand under the water’s surface, you get a pattern of ripples on the surface shortly thereafter. Now imagine working that backwards: you want to produce particular ripples on the surface, so how do you wiggle around the water molecules underneath?

That’s the project that a crew from the University of Navarre in Spain Max Planck Institute for Intelligent Systems undertook. Working backwards from the desired surface waves to the excitation underwater is “just” a matter of math and physics. The question is then how to produce the right, incredibly irregular, wavefront. The researchers’ answer was 3D printing.

The idea is that, by creating the desired ripples on the water’s surface, the researchers will be able to move things around. We’ve actually seen this done before in air by [mikeselectricstuff], and a more sophisticated version from the University of Navarre in Spain uses multiple ultrasonic transducers and enables researchers to move tiny objects around in mid-air.

What’s cool about the work done underwater by the Navarre Max Planck Institute group is that all they’re doing is printing out a 3D surface and wiggling it up and down to make the waves. The resulting surface wave patterns are limited in comparison to the active systems, but the apparatus is so much simpler that it ought to be useful for hackers with 3D printers. Let the era of novelty pond hacking begin!

Automatic Resistance: Resistors Controlled By The Environment

Resistors are one of the fundamental components used in electronic circuits. They do one thing: resist the flow of electrical current. There is more than one way to skin a cat, and there is more than one way for a resistor to work. In previous articles I talked about fixed value resistors as well as variable resistors.

There is one other major group of variable resistors which I didn’t get into: resistors which change value without human intervention. These change by environmental means: temperature, voltage, light, magnetic fields and physical strain. They’re commonly used for automation and without them our lives would be very different.

Continue reading “Automatic Resistance: Resistors Controlled By The Environment”

Ghetto Ribbon Connector

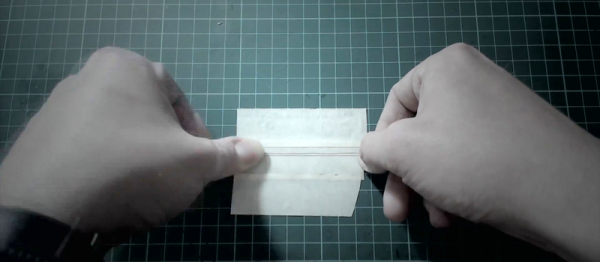
[Marcel] was trying to shoehorn a few new parts into his trusty Nexus 5 phone. If you’ve ever opened one of these little marvels up, you know that there’s not much room under the hood to work with. Pulling out some unnecessary parts (like the headphone jack) buys some space, but then how to wire it all up?

[Marcel] needed a multi-wire connector that’s as thin as possible, but he wasn’t going to go the order-Kapton-flex route. Oh no! He built one himself from masking tape and the strands from a stranded wire. Watch the video how-to if that alone isn’t enough instruction.

Continue reading “Ghetto Ribbon Connector”

Putting Sand, Water, And Metal Into A 3D Print

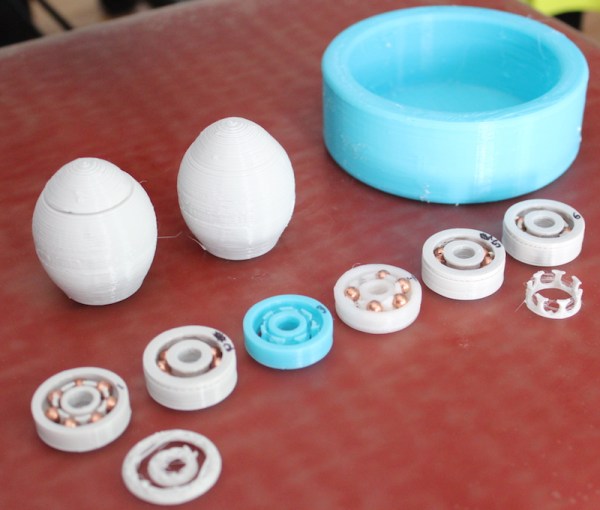
[Adam] over at Makefast Workshop writes about some of the tests they’ve been running on their 3D printer. They experimented with pausing a 3D print midway and inserting various materials into the print. In this case, sand, water, and metal BBs.

The first experiment was a mixture of salt and water used to make a can chiller for soda or beer (the blue thing in the upper right). It took some experimentation to get a print that didn’t leak and was strong. For example, if the water was too cold the print could come off the plate or delaminate. If there was too much water it would splash up while the printer was running and cause bad layer adhesion.

They used what they learned to build on their next experiment, which was filling the print with sand to give it more heft. This is actually a common manufacturing process — for instance, hollow-handled cutlery often has clay, sand, or cement for heft. They eventually found that they had to preheat the sand to get the results they wanted and managed to produce a fairly passable maraca.

The final experiment was a variation on the popular ball bearing prints. Rather than printing plastic balls they designed the print to be paused midway and then placed warmed copper BBs in the print. The printer finished its work and then they spun the BB. It worked pretty well! All in all an interesting read.

The Hackaday Prize: An Open Electric Wheelchair

[Irene Sans] and [Alvaro Ferrán Cifuentes] feel that electric wheelchairs are still too expensive. On top of that, as each person’s needs are a little different, usually don’t exactly fit the problems a wheelchair user might face. To this end they’ve begun the process of creating an open wheelchair design which they’ve appropriately dubbed OpenChair.

As has been shown in the Hackaday Prize before, there’s a lot of things left to be desired in the assistive space. Things are generally expensive. This would be fine, but often insurance doesn’t cover it or it’s out of the range of those in developing nations.  As always, the best way to finish is to start, so that’s just what [Irene] and [Alvaro] has done.

They based their initial design on the folding wheel chair we all know. It’s robust enough for daily use and is fairly standard around the world. They designed a set of accessories to make the wheelchair more livable for daily use as well as incorporating the controls.

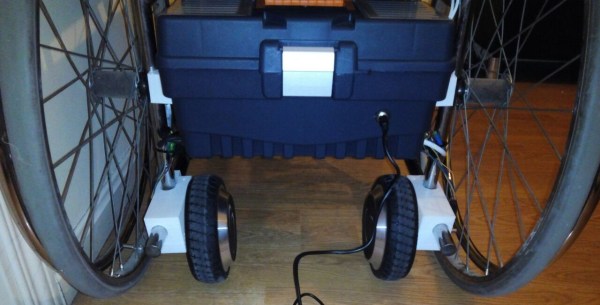
The next problem was locomotion. Finding an off-the-shelf motor that was powerful enough without breaking the budget was proving  difficult, but they had an epiphany. Why not use mass production toy crap to their advantage. The “hoverboards” that were all the rage this past commerical holiday season were able to roll a person around, so naturally a wheelchair would be within the power range.

They extracted the two 350 watt hub motors, batteries, and control boards. It took a bit of reverse engineering but they were able to get the hub drive motors of the hoverboard integrated with the controls on their wheelchair.

In the end they were able to cut the price of a regular electric wheelchair in half with their first iteration and set the foundation for future work on an open electric wheelchair system. Certainly more work could bring even better improvements.

PIC32 DMA SPI

[Mike] wanted to drive several SPI peripheral from a PIC32. He shows how much latency his conventional interrupt handlers were taking away from his main task. He needed something more efficient. So he created the SPI channels using DMA. He also made a video (see below) with a very clear explanation about why he did it and shows oscilloscope traces about how it all works.

Although the project is specific to the PIC32, the discussion about DMA applies to any computer with direct memory access. The only thing missing is the code. However, there are plenty of examples on the web you can look at, including a Microchip webinar.

Continue reading “PIC32 DMA SPI”

Shop Made Squareness Comparator

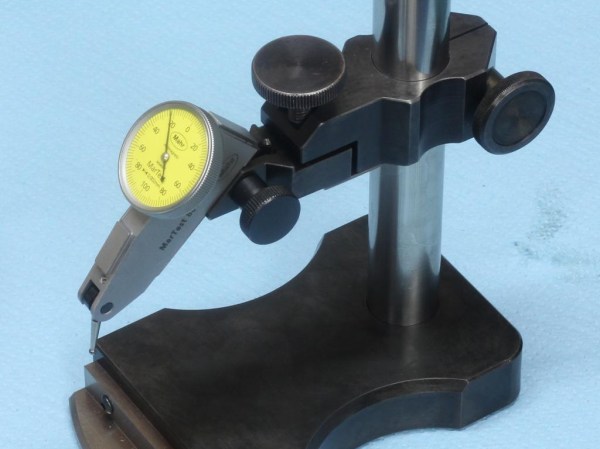
[Stefan Gotteswinter] has a thing for precision. So it was no surprise when he confessed frustration that he was unable to check the squareness of the things he made in his shop to the degree his heart desired.

He was looking enviously at the squareness comparator that [Tom Lipton] had made when somone on Instagram posted a photo of the comparator they use every day. [Stefan] loved the design and set out to build one of his own. He copied it shamelessly, made a set of drawings, and got to work.

[Stefan]’s videos are always a trove of good machine shop habits and skills. He always shows how being careful, patient, and doing things the right way can result in really astoundingly precise work out of a home machine shop. The workmanship is beautiful and his knack for machining is apparent throughout. We chuckled at one section where he informed the viewer that you could break a tap on the mill when tapping under power if you bottom out. To avoid this he stopped at a distance he felt was safe: 0.5 mm away.

The construction and finishing complete, [Stefan] shows how to use the comparator at the end of the video, viewable after the break.

Continue reading “Shop Made Squareness Comparator”