Friday Hack Chat: Open Hardware For Science

Scientific equipment is expensive. It can cost hundreds of thousands of dollars to set up a lab. Simply the cost of machines, like data acquisition units or even a simple load cell, can cost hundreds of dollars. This makes research cost prohibitive, and that’s the case even if you do spend a dozen hours a week writing grant proposals. Citizen science is right out, because the cost of the tools to do science is so high.

For this week’s Hack Chat, we’re going to be talking about Open Hardware for science. This is the chat that’s all about Open Source equipment, hardware modular electronics, and Open designs to make the tools that make science.

Our guest for this week’s Hack Chat is [Dr. Alexxai Kravitz]. He has a PhD in Neuroscience from UPenn and completed a postdoc at the Gladstone Institutes in San Fransisco. [Lex]’s research focuses on understanding the reward circuitry in the brain, and his publications use a variety of experiments to examine this, including behavioral testing, in vivo electrophysiology, and optogenetics.

For this Hack Chat, we’re going to about how Open Source has made more science possible. Of note, we’ll be discussing:

  • What Open Source science equipment is being used today
  • The initiatives behind Open Source Hardware for science applications
  • Scientific application that could benefit from Open Hardware

You are, of course, encouraged to add your own questions to the discussion. You can do that by leaving a comment on the Hack Chat Event Page and we’ll put that in the queue for the Hack Chat discussion.join-hack-chat

Our Hack Chats are live community events on the Hackaday.io Hack Chat group messaging. This week is just like any other, and we’ll be gathering ’round our video terminals at noon, Pacific, on Friday, May 11th.  Here’s a clock counting down the time until the Hack Chat starts.

Click that speech bubble to the right, and you’ll be taken directly to the Hack Chat group on Hackaday.io.

You don’t have to wait until Friday; join whenever you want and you can see what the community is talking about.


Sophie Wilson: ARM And How Making Things Simpler Made Them Faster & More Efficient

Sophie Wilson is one of the leading lights of modern CPU design. In the 1980s, she and colleague Steve Furber designed the ARM architecture, a new approach to CPU design that made mobile computing possible. They did this by realizing that you could do more, and quicker, with less. If you’ve use a Raspberry Pi, or any of the myriad of embedded devices that run on ARM chips, you’ve enjoyed the fruits of their labor.

It all began for Sophie Wilson with an electric lighter and a slot machine (or fruit machine, as they are called in the UK) in 1978. An aspiring thief had figured out that if you sparked an electric lighter next to the machine, the resulting wideband electromagnetic pulse could trigger the payout circuit. Electronics designer Hermann Hauser had been tasked with fixing the problem, and he turned to Wilson, a student working at his company.

Wilson quickly figured that if you added a small wideband radio receiver to detect the pulse, you could suppress the false payout, foiling the thief. Impressed with this innovation, Hauser challenged Wilson to build a computer over the summer holidays, based in part on a design for an automated cow feeder that Wilson had created at university. Wilson created this prototype computer that looked more like a hand-wired calculator than a modern computer, but the design became the basis for the Acorn System 1, the first computer that Hauser’s new company Acorn Computers launched in 1979. Continue reading “Sophie Wilson: ARM And How Making Things Simpler Made Them Faster & More Efficient”

Printed It: Toolbag Essentials

While complex devices assembled from 3D printed components are certainly impressive, it’s the simple prints that have always held the most appeal to me personally. Being able to pick an object up off the bed of your printer and immediately put it to use with little to no additional work is about as close as we can get to Star Trek style replicators. It’s a great demonstration to show off the utility of your 3D printer, but more importantly, having immediate access to some of these tools and gadgets might get you out of a jam one day.

With that in mind, I thought we’d do things a little differently for this installment of Printed It. Rather than focusing on a single 3D model, we’ll be taking a look at a handful of prints which you can put to practical work immediately. I started by selecting models based on the idea that they should be useful to the average electronic hobbyist in some way or another, and relatively quick to print. Each one was then printed and evaluated to determine its real-world utility. Not all made the grade.

Each model presented here is well designed, easy to print, and most critically, legitimately useful. I can confidently say that each one has entered into my standard “bag of tricks” in some capacity, and I’m willing to bet a few will find their way into yours as well.

Continue reading “Printed It: Toolbag Essentials”

Fail Of The Week: Never Assume All Crystals Are Born Equal

You should be used to our posting the hacks that didn’t quite go according to plan under our Fail Of The Week heading, things that should have worked, but due to unexpected factors, didn’t. They are the fault, if that’s not too strong a term, of the person making whatever the project is, and we feature them not in a spirit of mockery but one of commiseration and enlightenment.

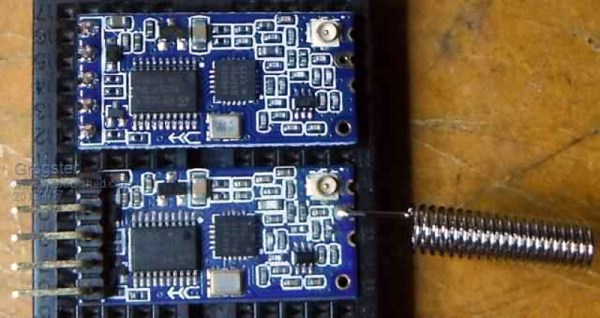
This FOTW is a little different, because it reveals itself to have nothing to do with its originator. [Grogster] was using the widely-available HC-12 serial wireless modules, or clones or even possibly fakes thereof, and found that the modules would not talk to each other. Closer inspection found that the modules with the lack of intercommunication came from different batches, and possibly different manufacturers. Their circuits and components appeared identical, so what could possibly be up?

The problem was traced to the two batches of modules having different frequencies, one being 37 kHz ahead of the other. This was in turn traced to the crystal on board the off-frequency module, the 30 MHz component providing the frequency reference for the Si4463 radio chip was significantly out of spec. The manufacturer had used a cheap source of the component, resulting in modules which would talk to each other but not to the rest of the world’s HC-12s.

If there is a lesson to be extracted from this, it is to be reminded that even when cheap components or modules look as they should, and indeed even when they appear to work as they should, there can still be unexpected ways in which they can let you down. It has given us an interesting opportunity to learn about the HC-12, with its onboard STM8 CPU and one of the always-fascinating Silicon Labs radio chips. If you want to know more about the HC-12 module, we linked to a more in-depth look at it a couple of years ago.

Thanks [Manuka] for the tip.

Ask Hackaday: Whatever Happened To Wire Wrapping?

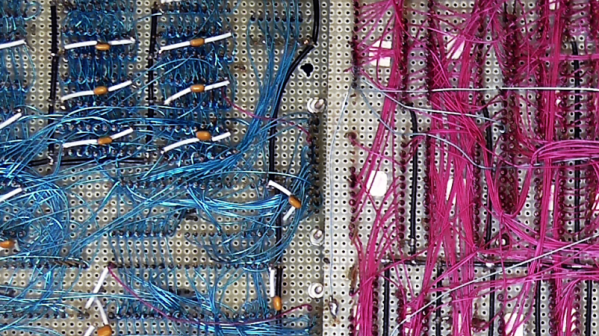
Back in the 70s when I started getting interested in electronics, tons of magazines catered to the hobbyist market. Popular Electronics was my favorite, and I think I remember the advertisements more than anything, probably because they outnumbered articles by a large margin. Looking back, it seemed like a lot of ad space was sold to companies hawking the tools and materials needed for wire wrapping, which was very popular for prototyping in the days before solderless breadboards were readily available. I remember beauty shots of neat rows of small, gold posts, with stripped wires wrapped evenly around them.

To the budding hobbyist, wire wrapping looked like the skill to have. With a huge selection of posts, terminals, and sockets for ICs and discrete components, as well as a wide range of manual and powered wrapping tools, it seemed like you could build anything with wire wrapping. But fast forward just a decade or so, and wire wrapping seemed to drop out of favor. And today — well, does anyone even wire wrap anymore?

Continue reading “Ask Hackaday: Whatever Happened To Wire Wrapping?”

Circuit VR: Sink Or Swim With Current Sources

If you got your start in electronics sometime after 1980 your first project might well have been to light up an LED. Microcontroller projects often light up an LED, too, and a blinking LED is something of the “hello world” program for embedded systems. If you tried lighting up your LED with a 9 V battery directly — not that you’d admit to it — you found it would light up. Once, anyway. The excess current blows up the LED which is why you need a current-limiting resistor. However, those current limiting resistors are really a poor excuse for a current source or sink. In many applications, you need a real current source and luckily, they aren’t hard to create.

As always with Circuit VR, we’ll be using LT Spice to examine the circuits. If you need a quick tutorial, start here and come back after that. If you use Linux, don’t be dismayed. I run LT Spice under WINE and it works great. You can find all the Spice files on GitHub.

Continue reading “Circuit VR: Sink Or Swim With Current Sources”

3D Printering: Which Raspberry Pi Is Best At Slicing In Octoprint?

OctoPrint is arguably the ultimate tool for remote 3D printer control and monitoring. Whether you simply want a way to send G-Code to your printer without it being physically connected to your computer or you want to be able to monitor a print from your phone while at work, OctoPrint is what you’re looking for. The core software itself is fantastic, and the community that has sprung up around the development of OctoPrint plugins has done an incredible job expanding the basic functionality into some very impressive new territory.

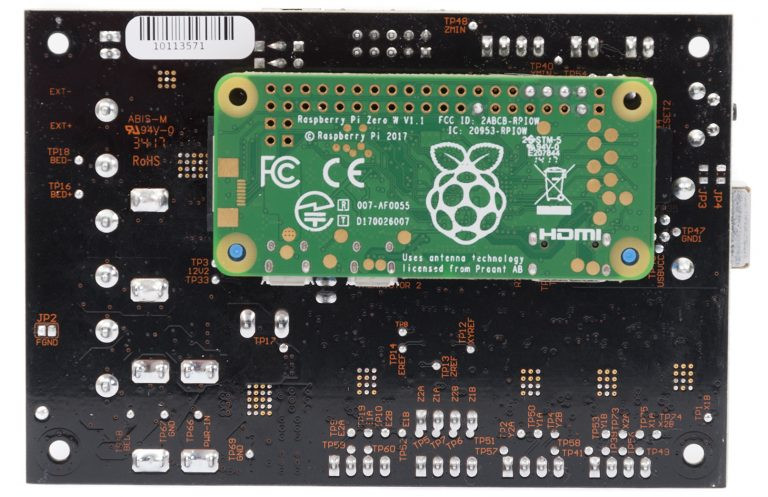
RAMBo 3D controller with Pi Zero Integration

But all that is on the software side; you still need to run OctoPrint on something. Technically speaking, OctoPrint could run on more or less anything you have lying around the workshop. It’s cross platform and doesn’t need anything more exotic than a free USB port to connect to the printer, and people have run it on everything from disused Windows desktops to cheap Android smartphones. But for many, the true “home” of OctoPrint is the Raspberry Pi.

As I’ve covered previously, the Raspberry Pi does make an exceptional platform for OctoPrint. Given the small size and low energy requirements of the Pi, it’s easy to integrate into your printer. The new Prusa i3 MK3 even includes a header right on the control board where you can plug in a Raspberry Pi Zero.

But while the Raspberry Pi is more than capable of controlling a 3D printer in real-time, there has always been some debate about its suitability for slicing STL files. Even on a desktop computer, it can sometimes be a time consuming chore to take an STL file and process it down to the raw G-Code file that will command the printer’s movements.

In an effort to quantify the slicing performance on the Raspberry Pi, I thought it would be interesting to do a head-to-head slicing comparison between the Pi Zero, the ever popular Pi 3, and the newest Pi 3 B+.

Continue reading “3D Printering: Which Raspberry Pi Is Best At Slicing In Octoprint?”