Robo-Flute Whistles MIDI

We aren’t sure this technically qualifies as music synthesis, but what else do you call a computer playing music? In this case, the computer is a Teensy, and the music comes from a common classroom instrument: a plastic recorder. The mistaken “flute” label comes from the original project. The contraption uses solenoids to operate 3D printed “fingers” and an air pump — this is much easier with a recorder since (unlike a flute) it just needs reasonable air pressure to generate sound.

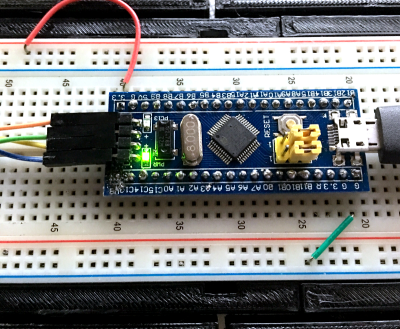
automated-recorder-solenoid-driverA Teensy 3.2 programmed using the Teensyduino IDE drives the solenoids. The board reads MIDI command sent over USB from a PC and translates them into the commands for this excellent driver board. It connects TIP31C transistors, along with flyback diodes, to the solenoids via a terminal strip.

On the PC, a program called Ableton sends the MIDI messages to the Teensy. MIDI message have three parts: one sets the message type and channel, another sets the velocity, and one sets the pitch. The code here only looks at the pitch.

This is one of those projects that would be a lot harder without a 3D printer. There are other ways to actuate the finger holes, but being able to make an exact-fitting bracket is very useful. Alas, we couldn’t find a video demo. If you know of one, please drop the link in the comments below.

We have seen bagpipe robots (in fact, we’ve seen several). We’ve also seen hammering shotguns into flutes, which is certainly more melodious than plowshares.

Newton’s Cradle For Those Too Lazy To Procrastinate

Desk toys are perfect for when you don’t want to work. There’s a particularly old desk toy called the Newton’s cradle. If you don’t know the name, you’d still recognize the toy. It is some ball bearings suspended in midair on strings. If you pull back, say, two balls and let them swing to impact the other balls, the same number of balls on the other side will fly out. When they return, the same number will move on the other side and this repeats until friction wears it all down.

We think [JimRD] might be carried away on procrastination. You see, he not only has a Newton’s cradle, he has automated it with an Arduino. According to [Jim], this is his third attempt at doing so. You can see the current incarnation in the video, below.

Continue reading “Newton’s Cradle For Those Too Lazy To Procrastinate”

Alexa Keeps Pet Snake Thermoregulated

[Chris Grill] got his hands on a pet boa constrictor, which requires a fairly strict temperature controlled environment. Its enclosure needs to have a consistent temperature throughout, or the snake could have trouble regulating its body temperature. [Chris] wanted to keep tabs on the temp and grabbed a few TTF-103 thermistors and an Arduino Yun, which allowed him to log the temperature on each side of the enclosure. He used some code to get the temp reading to the linux side of an Arduino Yun, and then used jpgraph, a PHP graphing library, to display the results.

snakemainBut that wasn’t good enough. Why not get a little fancy and have Amazon’s Echo read the temps back when you ask! Getting it setup was not so bad thanks to Amazon’s well documented steps to get custom commands set up.

He eventually lost the battle to get the Echo to talk to the web server on the Yun due to SSL issues, but he found an existing workaround by using a proxy.

Continue reading “Alexa Keeps Pet Snake Thermoregulated”

Smoothly Modernized Nixie Display

The renaissance of Nixie tube popularity amid the nostalgia surrounding older tech has made them almost prohibitively expensive for individual projects. Seeing an opportunity to modernize the beloved devices, [Connor Nishijima] has unleashed this new, LED edge-lit display that he has dubbed Lixie.

We featured his prototype a few years ago. That design used dots to make up each character but this upgrade smooths that out with sleek lines and a look one would almost expect from a professional device — or at the very least something you’d see in a cyberpunk near-future. The color-changing Neopixel LEDs — moderated by a cleverly designed filter — allow for customization to your heart’s content, and the laser-cut acrylic panes allow for larger displays to be produced with relative ease.

The image above (and the video below) show two revisions of the most recent Lixie prototypes. There is a huge improvement on the right, as the digits are now outlines instead of single strokes and engraved instead of cut completely through the acrylic. The difference if phenomenal, and in our opinion move the “back to the drawing board” effect to “ready for primetime”. [Connor] and his team are working on just that, with a Tindie preorder in place for the first production-ready digits to roll off their line.

Continue reading “Smoothly Modernized Nixie Display”

Vintage IBM Daisywheel Prints Again After Reverse Engineering

Just before the dawn of the PC era, IBM typewriters reached their technical zenith with the Wheelwriter line. A daisy-wheel printer with interchangeable print heads, memory features, and the beginnings of word processing capabilities, the Wheelwriters never got much time to shine before they were eclipsed by PCs. Wheelwriters are available dirt cheap now, and like many IBM products are very hackable, as shown by this simple Arduino interface to make a Wheelwriter into a printer.

[Chris Gregg] likes playing with typewriters – he even got an old Smith Corona to play [Leroy Anderson]’s The Typewriter – and he’s gotten pretty good with these largely obsolete but lovable electromechanical relics. Interfacing a PC to the Wheelwriter could have been as simple as scrounging up an original interface card for the machine, but those are like hen’s teeth, and besides, where’s the sport in that? So [Chris] hooked a logic analyzer to the well-labeled port that would have connected to the interface card and reverse engineered the somewhat odd serial protocol by banging on keys. The interface he came up with for the Wheelwriter is pretty simple – just a Light Blue Bean Plus and a MOSFET to drive the bus high and low for the correct amount of time. The result is what amounts to an alphanumeric printer, but with a little extra code some dot-matrix graphics are possible too.

Having spent a lot of time reverse engineering serial comms, we can appreciate the amount of work this took to accomplish. Looking to do something similar but don’t have the dough for a logic analyzer? Maybe you can free up $22 and get cracking on a similarly impressive hack.

Continue reading “Vintage IBM Daisywheel Prints Again After Reverse Engineering”

Crippled Calculator Features Unlocked With Automated Help

[Aguilera Dario] likes his Casio fx-82ES calculator. However, it was missing a few functions, including complex numbers. A Casio fx-991ES has more functions but, of course, costs more. A quick Google revealed that if you press the right buttons, though, you can transform an fx-82ES into an fx-991ES.

Because it is apparently a buffer overflow exploit, the hack involves a lot of keys and once you cycle the power you have to do it again. [Aguilera] realized this would be a good candidate for automation and added a microcontroller to push his buttons. You can see a video of a breadboard version below. He also has a PCB version in the works that should be better integrated.

Continue reading “Crippled Calculator Features Unlocked With Automated Help”

X Marks The Clock

There’s no shortage of Arduino-based clocks around. [Mr_fid’s] clock, though, gets a second look because it is very unique looking. Then it gets a third look because it would be very difficult to read for the uninitiated.

The clock uses three Xs made of LEDs. There is one X for the hours (this is a 24-hour clock), another for the minutes, and one for the seconds. The left side of each X represents the tens’ digit of the number, while the right-side is the units.

But wait… even with two segments on each side of the X, that only allows for numbers from 0 to 3 in binary, right? [Mr_fid] uses another dimension–color–to get around that limitation. Although he calls this a binary clock, it is more accurately a binary-coded-decimal (BCD) clock. Red LEDs represent the numbers one to three. Green LEDs are four to six. Two blue segments represent seven to nine. It sounds complicated, but if you watch the video, below, it will make sense.

Continue reading “X Marks The Clock”