Here’s The Turbocharged BBQ Grill You’ve Been Waiting For

We’re not actually sure that it’s a good idea at all, but it’s got a heck of a lot of style; [Morgan]’s barbecue grill is turbocharged. Literally.

Keeping with the automotive theme, a serve-motor-driven throttle from a Ford Mustang serves as a (naturally-aspirated) air intake, and a Honda Civic manifold delivers it to the grill. But when he really needs to turn up the heat, a 360 watt fan can force-feed the fire.

Continue reading “Here’s The Turbocharged BBQ Grill You’ve Been Waiting For”

MakerBot Releases Their 6th Generation Of 3D Printers

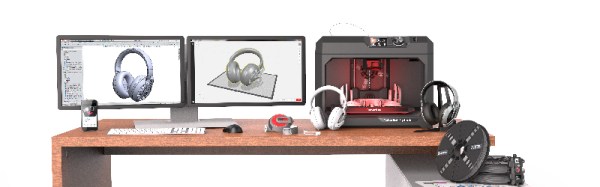
Just in time for the back to school and holiday season, Makerbot has released their latest line of printers. The latest additions to the lineup include the new Makerbot Replicator+ and the Makerbot Replicator Mini+.

The release of these new printers marks MakerBot’s first major product release since the disastrous introduction of the 5th generation of MakerBots in early 2014. The 5th generation of MakerBots included the Replicator Mini, priced at $1300, the Replicator, priced at $2500, and the Replicator Z18, priced at $6500. Comparing the build volume of these printers with the rest of the 3D printer market, these printers were overpriced. The capabilities of these printers didn’t move many units, either (for instance, the printers could only print in PLA). Makerbot was at least wise enough to continue building the 4th generation Replicator 2X, a printer that was capable of dual extrusion and printing more demanding filaments.

The release of the Makerbot Replicator+ and the Makerbot Replicator Mini+ is the sixth generation of MakerBot printers and the first generation of MakerBot’s manufactured overseas. This new generation is a hardware improvement on several fronts and included a complete redesign of the Makerbot Replicator and the Replicator Mini. The Replicator Mini+ features a 28% larger build volume than the original MakerBot Replicator Mini and an easily removable Grip Build Surface that can be flexed to remove a printed part. The Replicator+ features a 22% larger build volume than the MakerBot Replicator and a new Grip Build Surface. The Replicator Mini+ is $1000 ($300 cheaper than its predecessor), and the Replicator+ is $2000 ($500 less expensive). Both new printers, and the old Replicator Z18, now ship with the improved Smart Extruder+.

While the release of two new MakerBots does mean new hardware will make it into the wild, this is not the largest part of MakerBot’s latest press release. The big news is improved software. Makerbot Print is a slicer that allows Windows users to directly import 3D design files from SolidWorks, IGES, and STEP file formats. Only .STL files may be imported into the OS X version of the Makerbot Print software. MakerBot Mobile, an app available through the Apple Store and Google Play, allows users to monitor their printer from a smartphone.

Earlier this year, we wrote the Makerbot Obituary. From the heady days of The Colbert Report and an era where 3D printing would solve everything, MakerBot has fallen a long way. In the first four months of 2016, MakerBot only sold an average of about fifteen per day, well below the production estimated from the serial numbers of the first and second generation Makerbots, the Cupcake and Thing-O-Matic.

While this latest hardware release is improving the MakerBot brand by making the machines more affordable and giving the software some features which aren’t in the usual Open Source slicers, it remains to be seen if these efforts are enough. Time, or more specifically, the Stratasys financial reports, will tell.


An ESP8266 In Every Light Switch And Outlet

[Hristo Borisov] shows us his clever home automation project, a nicely packaged WiFi switchable wall socket. The ESP8266 has continuously proven itself to be a home automation panacea. Since the ESP8266 is practically a given at this point, the bragging rights have switched over to the skill with which the solution is implemented. By that metric, [Hristo]’s solution is pretty dang nice.

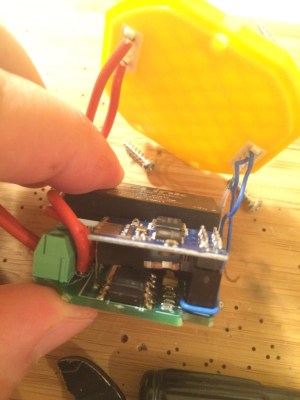
esp8266-smart-lightswitchIt’s all based around a simple board. An encapsulated power supply converts the 220V offered by the Bulgarian power authorities into two rails of 3.3V and 5V respectively. The 3.3V is used for an ESP8266 whose primary concern is the control of a triac and an RGB LED. The 5V is optional if the user decides to add a shield that needs it. That’s right, your light switches will now have their own shields that decide the complexity of the device.
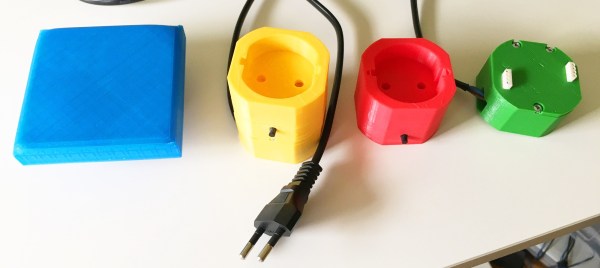
The core module seen to the right contains the actual board. All it needs is AC on one side and something to switch or control on the other The enclosure is not shown (only the lid with the shield connectors is seen) but can be printed in a form factor that includes a cord to plug into an outlet, or with a metal flange to attach to an electrical box in the wall. The modules that mate with the core are also nicely packaged in a 3D printed shield. For example, to convert a lamp to wireless control, you use a shield with a power socket on it. To convert a light switch, use the control module that has a box flange and then any number of custom switch and display shields can be hot swapped on it.

It’s all controllable from command line, webpage, and even an iOS app; all of it is available on his GitHub. We’d love to hear your take on safety, modularity, and overall system design. We think [Hristo] has built a better light switch!

Preparing Your Product For The FCC

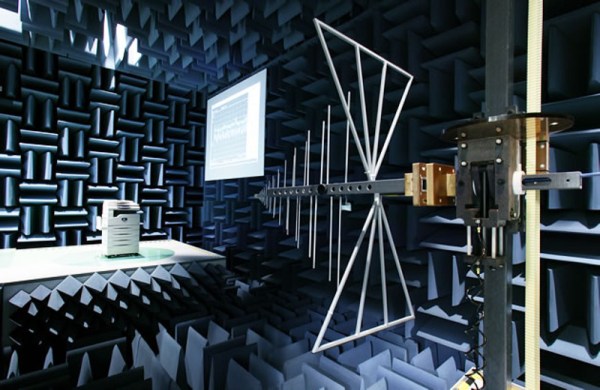
At some point you’ve decided that you’re going to sell your wireless product (or any product with a clock that operates above 8kHz) in the United States. Good luck! You’re going to have to go through the FCC to get listed on the FCC OET EAS (Office of Engineering and Technology, Equipment Authorization System). Well… maybe.

As with everything FCC related, it’s very complicated, there are TLAs and confusing terms everywhere, and it will take you a lot longer than you’d like to figure out what it means for you. Whether you suffer through this, breeze by without a hitch, or never plan to subject yourself to this process, the FCC dance is an entertaining story so let’s dive in!

Continue reading “Preparing Your Product For The FCC”

Spectrum Analyzer With 555 Fits In A Tin

[VK2ZAY] has a thing for 555 chips. Before the ready availability of microcontrollers, the 555 was the hardware hacker’s swiss army knife. After all, even though the chip is supposed to be a timer, it is really a bunch of simple pieces you can use to make a timer: a pair of comparators, a few transistors, and a flip-flop. You can use those parts in many different ways, and a timer is just one of them.

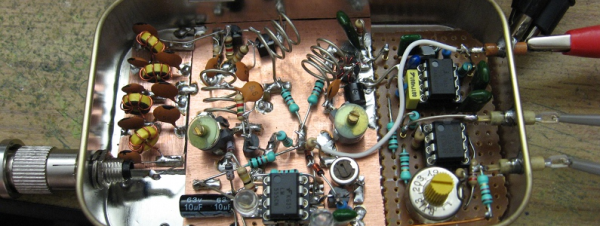
[VK2ZAY] used one as a key component in a simple spectrum analyzer. The 555 generates a ramp voltage which alters the frequency of an oscillator. The oscillator mixes with the input signal and a fixed-frequency superregenerative detector creates an output voltage proportional to the input signal strength. You can see a video of the whole setup, below.

Continue reading “Spectrum Analyzer With 555 Fits In A Tin”

Clustering A Lot Of Raspberry Pi Zeros

It became something of a cliché a few years ago in online discussions, whenever a new single board computer was mentioned someone would pop up and say something like “Imagine a Beowulf cluster…“. Back then it was said largely in jest, but with the current generation of boards it’s a distinct possibility. Who hasn’t looked at a Raspberry Pi and idly thought about a cluster of them, or even created one!

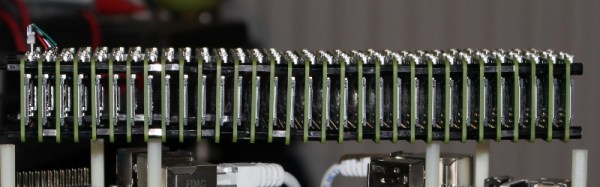
[Electronoob] did just that, creating a variety of Raspberry Pi cluster configurations, the most impressive of which is a stack of 32 Pi Zeros mounted together with stand-offs. The plan was to network it via USB, for which he initially considered building a backplane, but was put off by the cost of vertical USB connectors and instead went for a wired approach. If there is a lesson to be learned from his experiences it is that buying very cheap USB cables is a minefield: his pile of eBay specials turned out to have significant numbers of faults. He’s now faced with a stark choice, solder  32 sets of USB pads on the base of each Zero or buy better cables.

The stack of Zeros is pretty impressive, but so what, you think. It’s still not working properly. But the Zero cluster isn’t his only work. He’s also created a set of very nicely executed Ethernet clusters using the larger Pi boards, and the way he’s mounted them on top of compact Ethernet switches sets them apart from some of the more spaghetti-like Pi clusters.

It’s true a Pi cluster won’t cut it in the world of supercomputers, you could almost certainly buy more bang for your buck without too much effort. But it does represent a very accessible way to learn about cluster computing, and you have to admit it a stack of Zeros does look rather impressive.

We’ve seen quite a few Pi clusters here since 2012, the biggest of which is probably this 120 node behemoth, complete with screens.

Possible Fire Hazard: Wanhao Duplicator I3 3D Printer

A while ago Wanhao was reaching out to its customers and resellers, warning them of a design flaw in their Duplicator i3 that may cause fires. The printers suffered from an issue that caused crimp connections of the nozzle heater cartridge’s supply line to fail due to the mechanical stress in the cable drag chain. In their “Recall” titled note, Wanhao provides instructions on how to fix the issue.

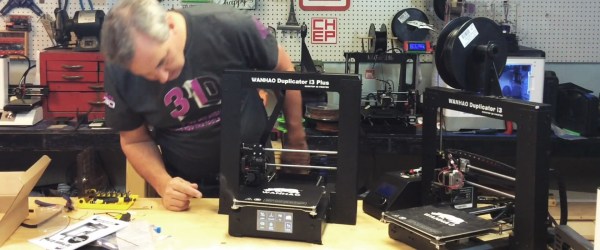
Now, [Chuck Hellebuyck] released an unboxing video on the Duplicator i3 Plus, during which the heated bed emitted magic smoke that could be rationally explained as another design flaw.

Continue reading “Possible Fire Hazard: Wanhao Duplicator I3 3D Printer”