Casual Tetris Comes In At $9

[Michael Pick] calls himself the casual engineer, though we don’t know whether he is referring to his work clothes or his laid back attitude. However, he does like to show quick and easy projects. His latest? A little portable Tetris game for $9 worth of parts. There is an Arduino Pro Mini and a tiny display along with a few switches and things on a prototyping PC board. [Michael] claims it is a one day build, and we imagine it wouldn’t even be that much.

Our only complaint is that there isn’t a clear bill of material or the code. However, we think you could figure out the parts pretty easy and there are bound to be plenty of games including Tetris that you could adapt to the hardware.

Continue reading “Casual Tetris Comes In At $9”

A Tetris To Be Proud Of, With Only A Nano

Tetris may have first arrived in the West on machines such as the PC and Amiga, but its genesis at the hands of [Alexey Pajitnov] was on an Electronika 60, a Soviet clone of an early-1970s DEC PDP-11. Thus those tumbling blocks are hardly demanding in terms of processor power, and a game can be implemented on the humblest of hardware. Relatively modern silicon such as the Atmega328 in [c0pperdragon]’s Arduino Nano Tetris console should then have no problems, but to make that assumption is to miss the quality of the achievement.

In a typical home or desktop computer of the 1980s the processor would have been assisted by plenty of dedicated hardware, but since the Arduino has none of that the feat of creating the game with a 288p video signal having four gray scales and with four-channel music is an extremely impressive one. Beside the Nano there are only a few passive components, there are no CRT controllers or sound chips to be seen.

The entire device is packaged within a clone of a NES controller, with the passives on a piece of stripboard beside the Nano. There is a rudimentary resistor DAC to produce the grey scales, and the audio is not the direct PWM you might expect but a very simple DAC created by charging and discharging a capacitor at the video line frequency. The results can be seen and heard in the video below the break, and though we’re sure we’ve heard something like that tune before, it looks to be a very playable little game.

Continue reading “A Tetris To Be Proud Of, With Only A Nano”

DJ Hero Controller Gets A New Gig

Fans of the Guitar Hero etc. franchise may be interested to hear about Spin Rhythm XD, a similar rhythm game which uses a jog wheel for much of the chase-down-the-notes action. Although it can be played with a keyboard and mouse, the ideal input is a professional DJ MIDI controller — imagine two capacitive “turntables” the size of 45s, and a lot of buttons, knobs, and sliders.

Like most of us, [Dave] doesn’t have one of those. But what he does have is an old DJ Hero controller made for the Wii. It’s a lot like the big boy version of a DJ MIDI controller as far as the inputs go, except that the turntable isn’t capacitive.

Since the Wii brain is just sending I²C over a funny-looking connector, [Dave] was able to replace the Wiimote with a Teensy LC, and write new firmware for the controller inputs using a breakout board built for another project.

[Dave] tried to use as many of the DJ Hero controller’s inputs as he could, so in addition to mapping the wheel and wheel buttons to the main game controls, he wired up the joystick, effects knob, and buttons to navigate through the game menus. The game’s designers had the forethought to map these to keyboard keys, so it was pretty easy to do. He can even use dual turntables and mix or isolate them with the crossfader. Slide past the break to check out the build video, and stick around for a full-length song demo.

Are these games a little too frantic for you? Turn those ‘tables into an Etch-A-Sketch instead.

Continue reading “DJ Hero Controller Gets A New Gig”

Counter-Strike Gets The RGB LED Treatment

Inspired by the over-the-top stage lighting and pyrotechnics used during e-sport events, [Hans Peter] set out to develop a scaled-down version (minus the flames) for his personal Counter-Strike: Global Offensive sessions. It might seem like pulling something like this off would involve hacking the game engine, but as it turns out, Valve was kind enough to implement a game state API that made it relatively easy.

According to the documentation, the CS:GO client can be configured to send out state information to a HTTP server at regular intervals. It even provided example code for implementing a simple state server in Node.js, which [Hans] adapted for this project by adding some conditional statements that analyze the status of the current game.

These functions fire off serial commands to the attached Arduino, which in turn controls the WS2812B LEDs. The Arduino code takes the information provided by the HTTP server and breaks that down into various lighting routines for different conditions such as wins and losses. But things really kick into gear when a bomb is active.

[Hans] wanted to synchronize the flashing LEDs with the beeping sound the bomb makes in the game, but the API doesn’t provide granular enough data. So he recorded the audio of the bomb arming sequence, used Audacity to precisely time the beeps, and implemented the sequence in his Arduino code. In the video after the break you can see that the synchronization isn’t perfect, but it’s certainly close enough to get the point across in the heat of battle.

With the special place that Counter-Strike occupies in the hearts of hackers and gamers alike, it’s little surprise people are still finding unique ways to experience the game.

Continue reading “Counter-Strike Gets The RGB LED Treatment”

Sherbet Custom Game Pad Is Smooth And Sweet

When [Billiam]’s beloved Logitech G13 game pad went to that great spectate room in the sky, he decided to pay homage by designing a custom, more ergonomic replacement from the desk up. Grab a spoon and dig into the story of [Billiam]’s journey toward Sherbet, because it’s a sweet ride.

Here’s the scoop: like a lot of DIY game pads and keyboards, Sherbet is based on the Teensy. We often see the micro USB coming straight off the Teensy, especially in clear acrylic builds, but [Billiam] added a USB breakout board so there’s no direct stress on the Teensy itself.

One of [Billiam]’s design challenges comes from the game pad placement — he has a tall desk and uses a keyboard tray, so it has to fit the space and leave enough room for his hand. Fortunately, there are low-profile mechanical switches out there, although the keycap options are strongly limited. We love that [Billiam] embedded a tiny ceramic bearing into one of them to use as a homing bump, because that’s a great idea.

If you want to take a crack at this project, [Billiam] has all the goodies laid out. [Billiam] wanted to use QMK firmware, but they didn’t have joystick support yet, so he’s got an Arduino sketch running in the meantime.

We love a good custom game pad around here, especially if they can reprogram themselves.

Why Settle For The Standard Catan Board?

Let’s face it, game night can get downright rowdy. Whether your game nights involve wine and cats, beer and dogs, or vodka and bear cubs, things happen. Maybe the robber gets batted irretrievably far under the couch, or someone gesticulates wildly and spills wine all over your sheep. [EEEEEEEEEDEN]’s gatherings were getting way out of hand, and it was time to design a custom Catan board.

But she didn’t stop with the board tiles — this is Catan redesigned from the ground up, including the pieces, the resource cards, and a custom storage box. [EEEEEEEEEDEN] even planned for player expansion by designing a leaf to drop in the middle. There are a few hundred magnets built into the frame, so there shouldn’t be any more lost pieces. And as far as liquor-proofing all the cardboard goes, [EEEEEEEEEDEN] designed new board tiles and cards, laser cut them from acrylic, and painstakingly painted them all with Plasti-Dip spray.

We think it’s gorgeous, but understand that maybe this minimalist style isn’t for everyone. If you want to go custom, it’s hard to argue against the beauty of 3D Catan.

Thanks to [Johannes] for the tip! via /r/DIY

3D Printing For Wire Paths Yields An Arduboy Minus The PCB

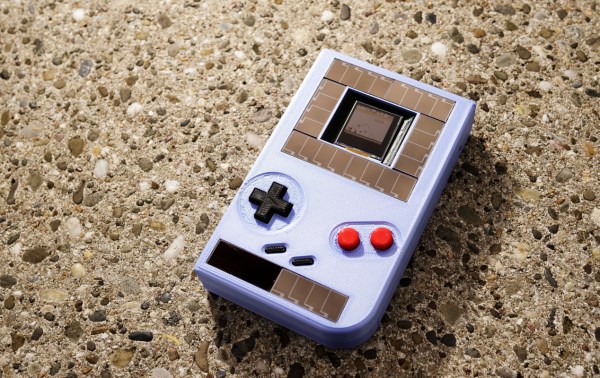
What is part way between a printed circuit board and a rats-nest of point-to-point wiring? We’re not sure, but this is it. [Johan von Konow] has come up with an inspired solution, 3D printing an Arduboy case with channels ready-made for all the wires. The effect with his 3DPCBoy is of a PCB without the PCB, and allows the console to be made very quickly and cheaply.

The Arduboy — which we originally looked at back in 2014 — is a handheld gaming console in a somewhat Gameboy-like form factor. Normally a credit-card sized PCB hosts all the components, including a microcontroller, display, and buttons. Each has a predictable footprint and placement so they can simply be wired together with hookup wire, if you don’t mind a messy result.

Here the print itself has all the holes ready-created for the components, and the path of the wires has a resemblance to the sweeping traces of older hand-laid PCBs. The result is very effective way to take common components — and Arduino pro micro board for the uC, an OLED breakout board, and some buttons — and combine them into a robust package. This technique of using 3D prints as a combination of enclosure and substrate for components and wiring has an application far beyond handheld gaming. We look forward to seeing more like it.

[Via the Arduboy community forum, thanks Kevin Bates for the tip.]