This Is A 3D Ink Jet Printer

We spend a lot of time thinking of how to create 3D objects, but what about being able to print full color graphics on the objects we create? This isn’t just multicolor, this is full-color! Here’s one elegant solution that uses ink jets to print full color images on 3D terrain models.

Admittedly we are very late to the party on this one as the technology was spotted on season 22, episode 7 of How It’s Made that aired way back in 2013. The segment shows terrain models — think of the physical contour map under glass that you might see at a National Park or at the main lodge of a ski resort. It’s easy enough to envision how the elevation is carved out of foam by a CNC. But the application of color printing to those surfaces is what caught our eye this time around. It’s a custom rig that a company called Solid Terrain Modeling built for this purpose. Since the height at any point on the work material is already known from the milling process, four ink heads (black, cyan, magenta, yellow) have been added to individual Z-axis actuators, applying a raster image as they traverse the surface.

Part of what makes this work is the post-processing steps that follow milling. The model is very carefully cleared of debris before being sprayed with primer. Another coat of an undetermined material (“a specialty coating to receive the ink”) gets the piece ready for the ink. The final step after printing is a protective clear coat. In the How It’s Made episode, buildings and other structures are then 3D-printed and added.

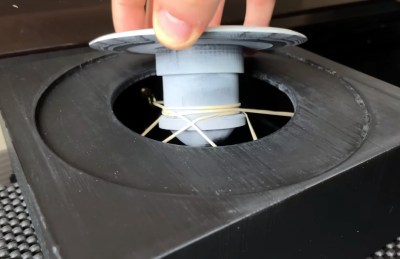
It seems like the trick is to get the heads to have as small of a footprint as possible for clearance when printing in sloped areas. We’re not experts in all the available consumer ink-jet printers out there, but finding a setup where the heads are separated from the reservoirs would be key. Watching this segment made us so excited to think of the person/people who got to hack this rig together as part of their job.

Looking for other ways to abuse ink jet parts? [Sprite_TM] came up with a way to make them handheld so you print on anything from latte foam to your buddy’s forearm. There’s no better name for that than the Magic Paintbrush.

Continue reading “This Is A 3D Ink Jet Printer”

Hackaday Links Column Banner

Hackaday Links: July 4, 2021

With rescue and recovery efforts at the horrific condo collapse in Florida this week still underway, we noted with interest some of the technology being employed on the site. Chief among these was a contribution of the Israeli Defense Force (IDF), whose secretive Unit 9900 unveiled a 3D imaging system to help locate victims trapped in the rubble. The pictures look very much like the 3D “extrusions” that show up on Google Maps when you zoom into a satellite view and change the angle, but they were obviously built up from very recent aerial or satellite photos that show the damage to the building. The idea is to map where parts of the building — and unfortunately, the building’s occupants — ended up in the rubble pile, allowing responders to concentrate their efforts on the areas most likely to hold victims. The technology, which was developed for precision targeting of military targets, has apparently already located several voids in the debris that weren’t obvious to rescue teams. Here’s hoping that the system pays off, and that we get to learn a little about how it works.

Radio enthusiasts, take note: your hobby may just run you afoul of authorities if you’re not careful. That seems to be the case for one Stanislav Stetsenko, a resident of Crimea who was arrested on suspicion of treason this week. Video of the arrest was posted which shows the equipment Stetsenko allegedly used to track Russian military aircraft on behalf of Ukraine: several SDR dongles, a very dusty laptop running Airspy SDR#, an ICOM IC-R6 portable communications receiver, and various maps and charts. In short, it pretty much looks like what I can see on my own desk right now. We know little of the politics around this, but it does give one pause to consider how non-technical people view those with technical hobbies.

If you could choose a superpower to suddenly have, it really would take some careful consideration. Sure, it would be handy to shoot spider webs or burst into flames, but the whole idea of some kind of goo shooting out of your wrists seems gross, and what a nuisance to have to keep buying new clothes after every burn. Maybe just teaching yourself a new sense, like echolocation, would be a better place to start. And as it turns out, it’s not only possible for humans to echolocate, but it’s actually not that hard to learn. Researchers used a group of blind and sighted people for the test, ranging in age from 21 to 79 years, and put them through a 10-week training program to learn click-based echolocation. After getting the basics of making the clicks and listening for the returns in an anechoic chamber, participants ran through a series of tasks, like size and orientation discrimination of objects, and virtual navigation. The newly minted echolocators were also allowed out into the real world to test their skills. Three months after the study, the blind participants had mostly retained their new skill, and most of them were still using it and reported that it had improved their quality of life.

As with everything else he’s involved with, Elon Musk has drawn a lot of criticism for his Starlink satellite-based internet service. The growing constellation of satellites bothers astronomers, terrestrial ISPs are worried the service will kill their business model, and the beta version of the Starlink dish has been shown to be flakey in the summer heat. But it’s on equipment cost where Musk has taken the most flak, which seems unfair as the teardowns we’ve seen clearly show that the phased-array antenna in the Starlink dish is being sold for less than it costs to build. But still, Musk is assuring the world that Starlink home terminals will get down in the $250 to $300 range soon, and that the system could have 500,000 users within a year. There were a couple of other interesting insights, such as where Musk sees Starlink relative to 5G, and how he’s positioning Starlink to provide backhaul services to cellular companies.

Well, this is embarrassing. Last week, we mentioned that certain unlucky users of an obsolete but still popular NAS device found that their data had disappeared, apparently due to malefactors accessing the device over the internet and forcing a factory reset. Since this seems like something that should require entering a password, someone took a look at the PHP script for the factory restore function and found that a developer had commented out the very lines that would have performed the authentication:

    function get($urlPath, $queryParams=null, $ouputFormat='xml'){
//        if(!authenticateAsOwner($queryParams))
//        {
//            header("HTTP/1.0 401 Unauthorized");
//            return;
//        }

It’s not clear when the PHP script was updated, but support for MyBook Live was dropped in 2015, so this could have been a really old change. Still, it was all the hacker needed to get in and wreak havoc; interestingly, the latest attack may be a reaction to a three-year-old exploit that turned many of these devices into a botnet. Could this be a case of hacker vs. hacker?

Volumetric 3D Television Is Here!

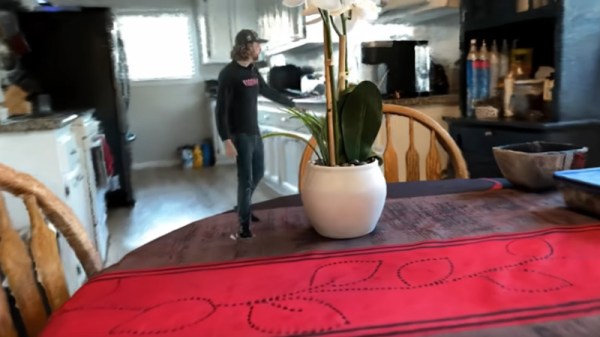
Volumetric 3D displays that allow the viewing of full 3D images without special glasses are not unknown in our community, usually taking the form of either a 3D LED matrix or a spinning rotor either with an image projected onto it or holding an LED array. They are impressive projects, but they are often limited in what they can display. Pretty patterns and simple 3D models are all very well, but they are hardly 3D television. Thus we’re quite impressed with [Evlmnkey]’s bachelor’s degree project, which combines motion capture and a volumetric display for a genuine volumetric 3D closed-circuit television system.

Finding the details takes a bit of dredging through the Reddit thread, but the display is an off-the-shelf Adafruit single-sided LED matrix driven by an ESP32, all mounted on a motor with a pair of slip rings for power. Data is fed to the ESP via WiFi, with the PC responsible for grabbing the image sending it as uncompressed frames. There’s little detail on the 3D capture, but since he mentions a Kinect library we suspect that may be the source.

This is perhaps not the highest resolution TV you’ll ever have seen, indeed we’d liken it to the flickering 30 lines of 1930s mechanical TV, but it’s still a functioning volumetric 3D live CCTV system. If you’re interested by 3D displays, you might like to see our examination of the subject.

Thanks [nandkeypull] for the tip.

Hello, Holograms

Holograms are tricky to describe because science-fiction gives the name to any three-dimensional image. The science-fact versions are not as flashy, but they are still darn cool. Legitimate holograms are images stored on a photographic medium, and they retain a picture of the subject from certain angles. In other words, when [Justin Atkin] makes a hologram of a model building, (video, embedded below) you can see the east side of the belfry, but when you reorient, you see the west side, or the roof if you point down. Holography is different from stereoscopy, which shows you a 3D image using two cameras. With a stereoscopic image, you cannot tilt it and see a new part of the subject, so there is a niche for each method.

There are a couple of different methods for making a hologram at home. First, you probably want a DIY hologram kit since it will come with the exposure plate and a known-good light source. Far be it for us to tell you you can’t buy plates and a laser pointer to take the path less traveled. Next, you need something that will not move, so we’re afraid you cannot immortalize your rambunctious kitty. The last necessity is a stable platform since you will perform a long-exposure shot, and even breathing on the setup can ruin the image. Different colors come from the coherent light source, so getting the “Rainbow Holograms” advertised in the video is a matter of mixing lights. Since you can buy red, green, and blue laser pointers for a pittance, you can do color remixes to your content.

Another type of hologram appears on things like trading cards as those wildly off-color (chromatic, not distasteful) images of super-heroes or abstract shapes. They’re a different variety, which can be printed en-masse, unlike the one-off [Justin] shows us how to make.

If you’re yearning for volumetric displays, we are happy to point you to this beauty capable of showing a jaw-dropping 3D model or this full-color blocky duck.

Continue reading “Hello, Holograms”

Hyper Links And Hyperfunctional Text CAD

Strong opinions exist on both sides about OpenSCAD. The lightweight program takes megabytes of space, not gigabytes, so many people have a copy, even if they’ve never written a shape. Some people adore the text-only modeling language, and some people abhor the minimal function list. [Johnathon ‘Zalo’ Selstad] appreciates the idea but wants to see something more robust, and he wants to see it in your browser. His project CascadeStudio has a GitHub repo and a live link so you can start tinkering in a new window straight away.

Continue reading “Hyper Links And Hyperfunctional Text CAD”

3D On The ZX Spectrum 48K

There are times when a project becomes such a big part of a maker’s life that they find themselves revisiting it even years later. [Thanassis] combined this phenomena with his love for the ZX Spectrum when he ported one of his old 3D rendering projects to the ZX Spectrum 48K. The video below shows the result, and they speak for themselves.

The roots of this project go back around three years, when [Thanassis] posted a similar project for the ATMega328 which employed fixed point math tricks for achieving the graphics. The code needed to be even tighter to run on the Spectrum, eventually getting boiled down to just a handful of calculations. This got the proof of concept working with the z88dk compiler, but it wasn’t quite fast enough.

In the end, hand assembly optimizations nearly doubled the performance to a blistering 10 frames per second. There’s also a version that kicks it all the way up to 40 FPS, but only if you give it a few minutes to do the calculations ahead of time. With a few teaks and the right display, this project could produce some very cool retro visuals.

Continue reading “3D On The ZX Spectrum 48K”

The Smart Home Gains An Extra Dimension

With an ever-growing range of smart-home products available, all with their own hubs, protocols, and APIs, we see a lot of DIY projects (and commercial offerings too) which aim to provide a “single universal interface” to different devices and services. Usually, these projects allow you to control your home using a list of devices, or sometimes a 2D floor plan. [Wassim]’s project aims to take the first steps in providing a 3D interface, by creating an interactive smart-home controller in the browser.

Note: this isn’t just a rendered image of a 3D scene which is static; this is an interactive 3D model which can be orbited and inspected, showing information on lights, heaters, and windows. The project is well documented, and the code can be found on GitHub. The tech works by taking 3D models and animations made in Blender, exporting them using the .glTF format, then visualising them in the browser using three.js. This can then talk to Hue bulbs, power meters, or whatever other devices are required. The technical notes on this project may well be useful for others wanting to use the Blender to three.js/browser workflow, and include a number of interesting demos of isolated small key concepts for the project.

We notice that all the meshes created in Blender are very low-poly; is it possible to easily add subdivision surface modifiers or is it the vertex count deliberately kept low for performance reasons?

This isn’t our first unique home automation interface, we’ve previously written about shAIdes, a pair of AI-enabled glasses that allow you to control your devices just by looking at them. And if you want to roll your own home automation setup, we have plenty of resources. The Hack My House series contains valuable information on using Raspberry Pis in this context, we’ve got information on picking the right sensors, and even enlisting old routers for the cause.