Adding Energy Use And Cost To “Laundry Done” Notifications

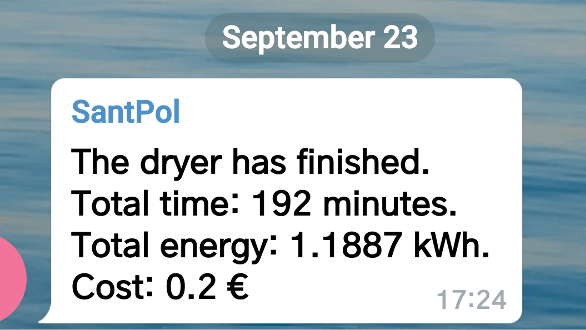
Some time ago [Xose Pérez] got interested in generating a notification when his washer had completed a cycle, and now with added features like reporting power usage and cost, he’s put it all together into a Node-Red node that makes it easy to modify or integrate with other projects.

[Xose] started this journey with a Laundry Monitor he created that effectively used cheap hardware (and his own firmware) to monitor his washing machine’s current usage. That sensor was used as the basis for sending notifications informing him whenever the appliance’s cycle was done. Since then, he has continued to take household power monitoring seriously, and with a bit of added work can not only tell when a given appliance has been started and stopped, but can also summarize the energy usage and cost of the appliance, making the notifications more useful. The package is named node-red-contrib-power-monitor and is also hosted on GitHub.

Cheap WiFi-enabled smart switches are making it possible for even the dumbest of appliances to join the Internet of Things, so don’t ignore [Xose]’s complementary work on ESPurna, which is an alternative open-source firmware for a wide variety of ESP8266 and ESP8285 based smart switches, lights and sensors.

The Linux Throwie: Powering A Linux Server With A 0.3W Solar Panel

Have you ever had one of those moments, when you’re rummaging through your spare parts heap, and have a rather bizarre project idea that you can’t quite get out of your head? You know, the ones that have no clear use, but simply demand to be born, of glass and steel and silicon?

This time, the stubborn idea in question was sort of like a solar-rechargeable LED throwie, but instead of a blinking light, it has a fully cloud-accessible embedded Linux server in the form of a Raspberry Pi 3 Model B+. Your choice of embedded Linux board should work — I just happen to have a lot of these due to a shipping error.

There were two main challenges here: First, it would have to combine the smallest practical combination of solar panel, power supply, and Li-ion cell that could run the Raspberry Pi. Second, we’ll need to remotely activate and access the Pi regardless of where it is, as well as be able to connect it to WiFi without direct physical access. In this article we’ll be dealing with the first set of problems — stay tuned for the rest.

Continue reading “The Linux Throwie: Powering A Linux Server With A 0.3W Solar Panel”

Code Review Lamp Subtly Reminds You To Help Your Fellow Developer

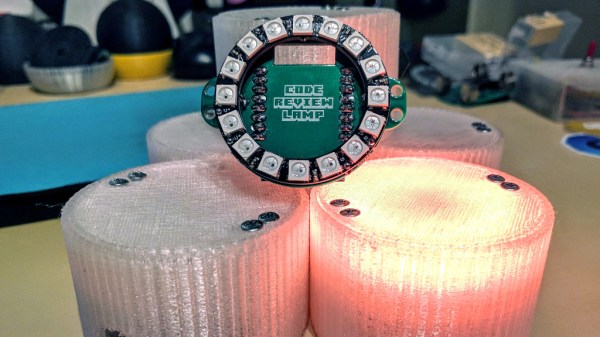
[Dimitris Platis] works in an environment with a peer review process for accepting code changes. Code reviews generally are a good thing. One downside though, is that a lack of responsiveness from other developers can result in a big hit to team’s development speed. It isn’t that other developers are unwilling to do the reviews, it’s more that individuals are often absorbed in their own work and notification emails are easily missed. There is also a bit of a “tragedy of the commons” vibe to the situation, where it’s easy to feel that someone else will surely attend to the situation, but often no one does. To combat this, [Dimitris] built this Code Review Lamp, a subtle notification that aims to prod reviewers into action.

The lamp is based on a ring of RGB LEDs and a Wemos D1 Mini board. The Wemos utilizes the popular ESP8266, so it’s easy to develop for. The LED ring and Wemos are tied together with a slick custom PCB. Mounting the LED ring on the top of the PCB and the Wemos on the bottom allows for easy powering via a USB cable while directing light upward.  The assembly is placed in a translucent 3D printed enclosure creating a pleasant diffuse light source.

Every developer gets a Code Review Lamp. The lamps automatically log in to the change management system to check whether anything is awaiting review. If a review is ready, the Lamp glows in a color specific to the individual developer. All this serves as a gentle but persistent reminder that someone’s work is being held up until a review is completed.

We love the way that the device has a clear purpose: it does its job without any unnecessary features or parts. It’s similar to this ESP8266 IoT Motion Sensor in that it has a single job to do, and focuses on it well.

Continue reading “Code Review Lamp Subtly Reminds You To Help Your Fellow Developer”

Corporate Badgelife: Oracle’s Code Card

We tend to think of elaborate electronic conference badges as something limited to the hacker scene, but it looks like the badgelife movement is starting to hit the big time. Now even the “big boys” are getting into the act, and pretty soon you won’t be able to go to a stuffy professional conference without seeing a sea of RGB LEDs firing off. We’ll let the good readers of Hackaday determine if this means it’s officially post-cool or not.

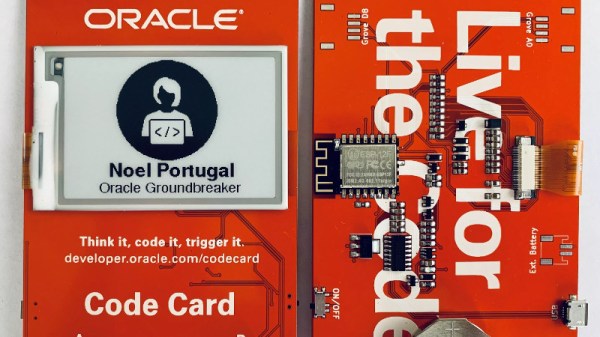
[Noel Portugal] writes in to tell us about how he created the “Code Card” during his tenure with the Oracle Groundbreakers Team. Featuring an ESP8266 and an e-ink screen, the Code Card serves not only as swanky way of identifying yourself, but as a real-world demonstration of physical devices pulling content from Oracle’s Cloud. Gotta keep those corporate overlords happy.

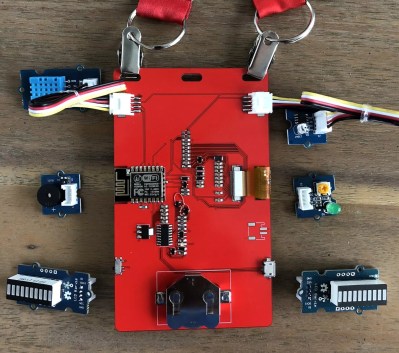
The Code Card is a fairly simple piece of hardware as far as badges go these days, but then the goal was never to be flashy. It does feature dual four-pin Grove System connectors on the backside though, so you can plug in additional sensors and gadgets for the customary badge hacking sessions.

To maximize runtime on the rechargeable coin cell battery, the Code Card only turns on the ESP after the user has pressed one of the buttons on the front. Once the ESP has finished performing whatever task the user requested, its powered back off completely rather than put into standby. Combined with the e-ink screen, power consumption while the device isn’t actively updating the display or pulling down new content is negligible.

[Noel] really went all-out on the software side, going as far as developing a web application which let conference attendees configure their Code Cards from their smartphones. Different functions could be assigned to short and long presses on the badge’s two buttons, and users could even select icons for the various functions from a list of images included in the firmware. A feature where attendees could upload their own images didn’t make the cut, but that surely won’t stop people from hacking around in the published Arduino source code and figuring out how to do it manually.

If you think the Code Card looks a bit familiar, it’s perhaps because it was designed in conjunction with Squarofumi, creators of the Badgy. So even if you aren’t hitting up any of Oracle’s upcoming conferences, you’re not completely out of luck if you want an e-ink badge to play with.

A Multifunction ESP8266 Smartwatch

Most of the DIY smartwatch projects we feature here on Hackaday aren’t exactly what most people would consider practical daily-use devices. Clunky designs, short battery life, limited functions: they’re more a wearable display of geek cred than they are functional timepieces. Oddly enough, the same could be said of many of the “real” smartwatches on the market, so perhaps the DIY versions are closer to the state-of-the-art than we thought.

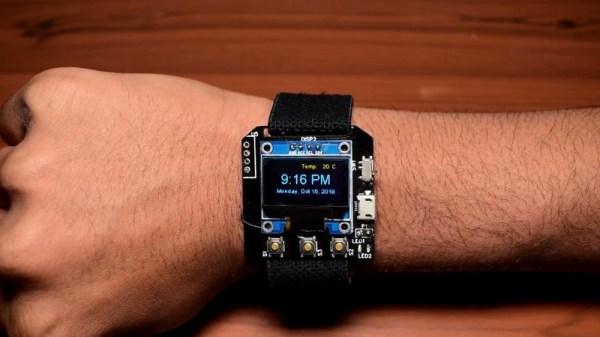
But this ESP8266 smartwatch created by [Shyam Ravi] is getting dangerously close to something you could unironically leave the house with. It’s still missing an enclosure that prevents you from receiving PCB acupuncture while wearing it, but beyond than that it has a more than respectable repertoire of functions. It even seems to be a fairly reasonable size (with the potential to be even smaller). All that with a total build cost of less than $20 USD, and we’re thinking this might be a project to keep an eye on.

Not content with a watch that simply tells the time, [Shyam] added in a weather function that pulls the current conditions for his corner of the globe from the Yahoo weather API and displays it above the time and date on the watch’s multi-color OLED display when the center button is pressed. Frankly, given the state of DIY watches, that would already have been impressive enough; but he didn’t stop there.

The left and right buttons control Internet-connected relays which [Shyam] uses to turn his lights and air conditioner on and off. When he presses the corresponding button, the watch will even display the status of the devices wherever his travels might take him.

A smattering of DIY watches pass by our careful gaze, though it’s been a while since we’ve seen an ESP8266 watch. More recently we’ve seen an Arduino watch, and some downright gorgeous analog creations.

Continue reading “A Multifunction ESP8266 Smartwatch”

HTTPS For The Internet Of Things

Every day, we’re connecting more and more devices over the internet. No longer does a household have a single connected computer — there are smartphones, tablets, HVAC systems, deadbolts — you name it, it’s been connected. As the Internet of Things proliferates, it has become readily apparent that security is an issue in this space. [Andreas Spiess] has been working on this very problem, by bringing HTTPS to the ESP8266 and ESP32. 

Being the most popular platform for IOT devices, it makes sense to start with the ESP devices when improving security. In his video, [Andreas] starts at the beginning, covering the basics of SSL, before branching out into how to use these embedded systems with secure cloud services, and the memory requirements to do so. [Andreas] has made the code available on GitHub so it can be readily included in your own projects.

Obviously implementing increased security isn’t free; there’s a cost in terms of processing power, memory, and code complexity. However, such steps are crucial if IOT devices are to become trusted in wider society. A malfunctioning tweeting coffee pot is one thing, but being locked out of your house is another one entirely.

We’ve seen other takes on ESP8266 security before, too. Expect more to come as this field continues to expand.

[Thanks to Baldpower for the tip!]

IoT Traffic Light Is Cardboard Made Fun

Traffic lights! Kids love them, hackers love them, and they’re useful in industrial contexts to see if the giant machine is currently working or having a bad day. While the real deal are unwieldy and hard to come by, there’s nothing stopping you tackling a fun cardboard build at home.

It’s a great way to teach kids about traffic rules, too.

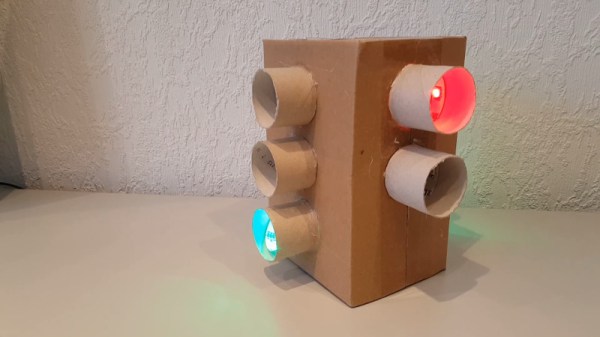
In this case, the light is courtesy of WS2812b LED strips. They’re a great choice, as they interface easily with most microcontrollers thanks to readily available libraries. An ESP8266 runs the show here, serving up a basic web interface over WiFi. This allows the color of the various LEDs to be controlled remotely. It also allows the lights to be switched on and off to direct whatever traffic you may be controlling. The whole project is all wrapped up in a simple cardboard enclosure, mimicking the municipal street furniture which so resolutely commands our movements.

The cardboard traffic light is a project that shows just what can be done with some off-the-shelf parts and some good old-fashioned kindergarten-style arts and crafts. If you find yourself similarly admiring these devices, check out our primer on the North American traffic signal. Video after the break.

Continue reading “IoT Traffic Light Is Cardboard Made Fun”