A Brushless Motor On A PCB, Made From PCB

At Hackaday, we really appreciate it when new projects build on projects we’ve featured in the past. It’s great to be able to track back and see what inspires people to pick up someone else’s work and bring it to the next level or take it down a totally new path.

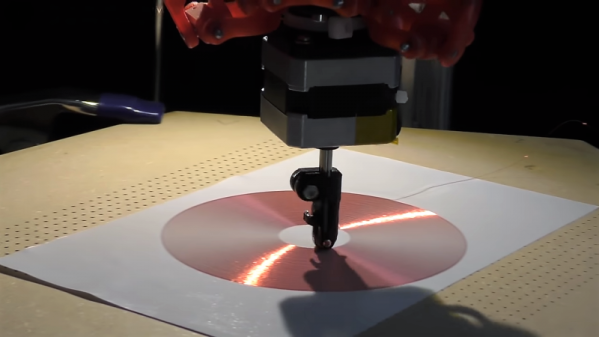
This PCB brushless motor is a great example of the soft collaboration that makes the Hackaday community so powerful. [bobricius] says he was inspired by this tiny PCB BLDC when he came up with his design. His write-up is still sparse at this point, but it looks like his motor is going to be used to drive a small robot. As with his inspiration, this motor has the stator coils etched right into the base PCB. But there are some significant improvements, like increasing the stator coil count from six to eight, as well as increasing the overall size of the motor. [bobricius] has also done away with the 3D-printed rotor of the original, opting to fabricate his rotor from stacked PCBs with cutouts for 5-mm neodymium magnets. We like the idea of using the same material throughout the motor, and it also raises the potential for stacking a second stator on the other side of the rotor, which might help mechanically and electrically. Even still, the prototype seems to hold its own in the video below.

This is [bobricius]’ second entry in the 2018 Hackaday Prize so far, after his not-a-Nixie tube display. Have you entered anything yet? Get to it! Prizes, achievements, and glory await.

Continue reading “A Brushless Motor On A PCB, Made From PCB”

Three Wires = One Motor

Here’s a quick build to show off fundamentals of electric current to new makers — or a cool party trick that might earn you a buck. [Jay] from the [Plasma Channel] shows off how you can make a simple motor with only three pieces of enameled wire in under five minutes.

Start with a roll of 26-guage — or thicker — magnet wire, and a pair of scissors or knife. For the base, wrap fifteen to twenty turns of wire around any spherical object about one and a half inches in diameter, leaving a few inches extra on both ends. Wrap those ends around your coil a few tines to secure it and straighten out the excess length — one will act as a support and the other will connect to your power source. Another piece of wire — similarly wrapped around the base coil — acts as the other support and the other terminal. Scrape off the wire coating from one side on both support wires and curl them into small loops. Halfway done!

Continue reading “Three Wires = One Motor”

Scrap A Hard Drive, Build A Rotary Encoder

There’s something to be said for the feel of controls. Whether it’s the satisfying snap of a high-quality switch or the buttery touch of the pots on an expensive amplifier, the tactile experience of the controls you interact with says a lot about a device.

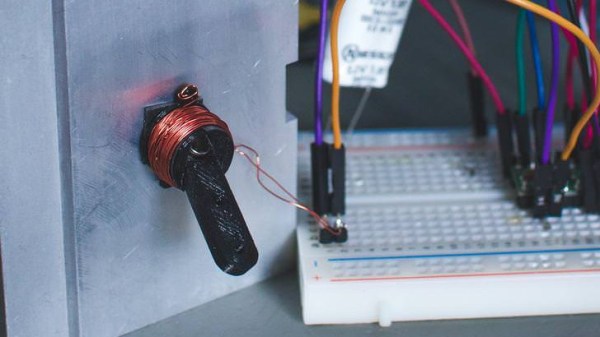
[GreatScott!] knows this, and rather than put up with the bump and grind of a cheap rotary encoder, he decided to find an alternative. He ended up exploring hard drive motors as encoders, and while the results aren’t exactly high resolution, he may be onto something. Starting with a teardown of some old HDDs — save those magnets! — [Scott!] found that the motors fell into either the four-lead or three-lead categories. Knowing that HDD motors are brushless DC motors, he reasoned that the four-lead motors had their three windings in Wye configuration with the neutral point brought out to an external connection. A little oscilloscope work showed the expected three-phase output when the motor hub was turned, with the leading and lagging phases changing as the direction of rotation was switched. Hooked to an Arduino, the motor made a workable encoder, later improved by sending each phase through a comparator and using digital inputs rather than using the Nano’s ADCs.

It looks like [GreatScott!]’s current setup only responds to a full rotation of the makeshift encoder, but we’d bet resolution could be improved. Perhaps this previous post on turning BLDC motors into encoders will help.

Continue reading “Scrap A Hard Drive, Build A Rotary Encoder”

Low-End Parts Make Tesla Coil With A High-End Look

We all know the saying: cheap, fast, or good — pick any two. That rule seems to apply across the spectrum of hackerdom, from software projects to hardware builds. But this DIY Tesla coil build might just manage to deliver on all three.

Cheap? [Jay Bowles]’ Tesla coil is based on a handheld bug zapper that you can find for a couple of bucks, or borrow from the top of the fridge in the relatively bug-free winter months. The spark gap is just a couple of screws set into scraps of nylon cutting board — nothing fancy there. Fast? Almost everything needed to build this is stuff lying around the house, and depending on the state of your junk bin you may not even have to order the polypropylene caps [Jay] recommends. Good? That’s a relative term, of course, and if you define it as a coil capable of putting out pumpkin-slaying lightning bolts or playing “Yakkity Sax”, you’ll likely be disappointed. But there’s no denying that this Tesla coil looks good, from its Lexan base to the door-pull top load. And running off a couple of AA batteries, it’s safe to use too.

[Jay] put a lot of care into winding and dressing the secondary coil neatly, and the whole thing would look great as a desktop toy. Not into the winding part? You can always etch a PCB Tesla coil instead.

Continue reading “Low-End Parts Make Tesla Coil With A High-End Look”

Radio Tuning The Quicksilver Way

Modern radios are often digital affairs, in which the frequency is derived from a stable crystal oscillator and varied through a microprocessor controlled frequency synthesiser. It won’t drift, and it’s exactly on the frequency dialed in. Older radios though relied on a tuned circuit, a combination of capacitor and inductor, for their frequency selection. If you were curious enough to peer inside — and we know you were — you’d have seen the moving vanes of a variable capacitor controlled by the tuning knob.

Of course, there is another way to adjust a tuned circuit: by changing the value of the inductor. Older car radios for instance moved a ferrite slug inside a coil to tune from station to station. But that method is not good enough for [David Mills]. Being in possession of some finely graduated syringes he decided to try liquid tuning by increasing the volume within the coil.

Solutions of salts made little difference, so he reached for some mercury. The result is an RF inductor wound round a syringe body, with a body of mercury whose position can be adjusted by the plunger. He measures the Q factor of the coil with air core or mercury core, and as the inductance decreases with more mercury, so does the Q.

We see home-made parts from time to time, and there’s nothing too special about permeability tuning. However, this unusual take on the matter makes this one rather special. We doubt we’ll see its like very often in the future.

Harvesting Copper From Microwave Ovens

Obsolete appliances were once a gold mine of parts, free for the taking with a few snips of your diagonal cutters. Times have changed, though, and most devices yield only a paltry supply of parts, so much so that only by harvesting raw materials can you get much value out of them. And so we have this example of reclaiming copper from used microwave ovens.

The primary source of copper in most microwaves is the transformer, which we usually see re-tasked for everything from spot welders to material handling electromagnets. But the transformer is not the only source of the red metal; [eWaste Ben] also harvests it from relay coils and the main coil and shading coils of the fan motor.  The bounty is melted down in an electric foundry and cast in a graphite mold into a lovely ingot.

Unless you’re into repeatedly casting copper trinkets, a large bar of reclaimed copper might not be something you have a burning need to possess. But bearing in mind that copper can go for about $2.50 a pound at the scrap yard, there’s some money to be made, especially with dead microwaves essentially free for the taking. As [Ben] points out, taking the extra step to melt and cast the copper harvested from microwaves makes no sense if all you’re going to do is sell the scrap, but it’s nice to know how to do it just the same.

Continue reading “Harvesting Copper From Microwave Ovens”

Hand-Wound Brushless Motors Revive Grounded Quad

You’re happily FPVing through the wild blue yonder, dodging and jinking through the obstacles of your favorite quadcopter racing course. You get a shade too close to a branch and suddenly the picture in your goggles gets the shakes and your bird hits the dirt. Then you smell the smoke and you know what happened – a broken blade put a motor off-balance and burned out a winding in the stator.

What to do? A sensible pilot might send the quad to the healing bench for a motor replacement. But [BRADtheRipper] prefers to take the opportunity to rewind his burned-out brushless motors by hand, despite the fact that new ones costs all of five bucks. There’s some madness to his method, which he demonstrates in the video below, but there’s also some justification for the effort. [Brad]’s coil transplant recipient, a 2205 racing motor, was originally wound with doubled 28AWG magnet wire of unknown provenance. He chose to rewind it with high-quality 25AWG enameled wire, giving almost the same ampacity in a single, easier to handle and less fragile conductor. Plus, by varying the number of turns on each pole of the stator, he’s able to alter the motor’s performance.

In all, there are a bunch of nice tricks in here to file away for a rainy day. If you need to get up to speed on BLDC motor basics, check out this primer. Or you may just want to start 3D printing your own BLDC motors.

Continue reading “Hand-Wound Brushless Motors Revive Grounded Quad”