XInput is an API that is used by applications to interface with the Xbox 360 Controller for Windows. The 360 controller became somewhat of a “standard” PC gamepad, and thus many games and applications support the XInput standard.
[James] is working on an entry for a robotics competition, and wanted a controller to use with their PC that was more suited to their build. They took an RC controller, and converted it to work with XInput instead.
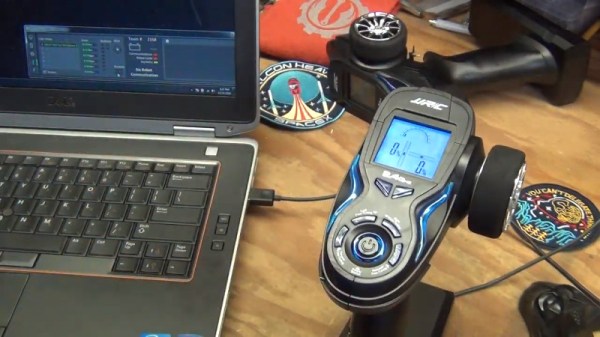
The controller in question is the JJRC Q35-01, a trigger-type RC controller available for under $20. The conversion is executed neatly, with the original STM microcontroller being removed from the board, and the PCB traces instead being connected to a Teensy 3.5 which takes over running the show.
The conversion is remarkably complete, with the team not stopping at just reading the buttons and steering potentiometer. A USB logic analyzer was used to figure out how to control the LCD, and a calibration mode implemented just in case.
[James] has shared the work on Github so it’s reproducible for the average maker. We’ve seen plenty of builds in this space, like this tilt controller from [Electronoobs]. Video after the break.