An animated GIF of Engineer Bo's Precision Bluetooth Scroll Wheel wirelessly, and effortlessly scrolling down the Hack A Day blog with a single finger

Doomscroll Precisely, And Wirelessly

Around here, we love it when someone identifies a need and creates their own solution. In this case, [Engineer Bo] was tired of endless and imprecise scrolling with a mouse wheel. No off-the-shelf solutions were found, and other DIY projects either just used hacked mice scroll wheels, customer electronics with low-res hardware encoders, or featured high-res encoders that were down-sampled to low-resolution. A custom build was clearly required.
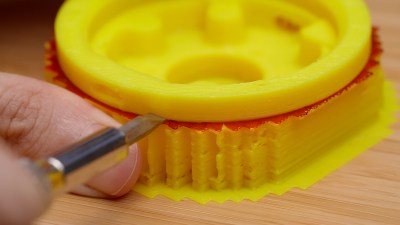
A photo of a 3D printed yellow plastic form with red marker drawn on the top of the support material and used in Engineer Bo's Precision Bluetooth Scroll Wheel

We loved seeing hacks along the whole process by [Engineer Bo], working with components on hand, pairing sensors to microcontrollers to HID settings, 3D printing forms to test ergonomics, and finishing the prototype device. When 3D printing, [Engineer Bo] inserted a pause after support material to allow drawing a layer of permanent marker ink that acts as a release agent that can later be cleaned with rubbing alcohol. 

We also liked the detail of a single hole inside used to install each of the three screws that secure the knob to the base. While a chisel and UV-curing resin cleaned up some larger issues with the print, more finishing was required. For a project within a project, [Engineer Bo] then threw together a mini lathe with 3D printed and RC parts to make sanding easy.
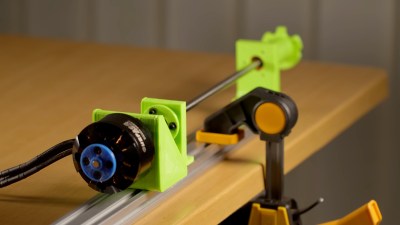
Scroll down with your clunky device to see the video that illustrates the precision with a graphic of a 0.09° rotation and is filled with hacky nuggets. See how the electronics were selected and the circuit designed and programmed, the use of PCBWay’s CNC machining in addition to board assembly services, and how to deal with bearings that spin too freely. [Engineer Bo] teases that a future version might use a larger bearing for less wobble and an anti-slip coating on the base. Will the board files and 3D models be released, too? Will these be sold as finished products or kits? Will those unused LED drivers be utilized in an upcoming version? We can’t wait to see what’s next for this project.

Continue reading “Doomscroll Precisely, And Wirelessly”

VR Headset With Custom Face Fitting Gets Even More Custom

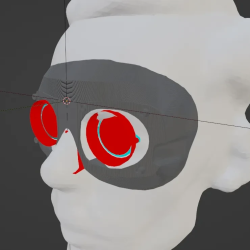
The Bigscreen Beyond is a small and lightweight VR headset that in part achieves its small size and weight by requiring custom fitting based on a facial scan. [Val’s Virtuals] managed to improve fitment even more by redesigning a facial interface and using a 3D scan of one’s own head to fine-tune the result even further. The new designs distribute weight more evenly while also providing an optional flip-up connection.

It may be true that only a minority of people own a Bigscreen Beyond headset, and even fewer of them are willing to DIY their own custom facial interface. But [Val]’s workflow and directions for using Blender to combine a 3D scan of one’s face with his redesigned parts to create a custom-fitted, foam-lined facial interface is good reading, and worth keeping in mind for anyone who designs wearables that could benefit from custom fitting. It’s all spelled out in the project’s documentation — look for the .txt file among the 3D models.

We’ve seen a variety of DIY approaches to VR hardware, from nearly scratch-built headsets to lens experiments, and one thing that’s clear is that better comfort is always an improvement. With newer iPhones able to do 3D scanning and 1:1 scale scanning in general becoming more accessible, we have a feeling we’re going to see more of this DIY approach to ultra-customization.

Tiny Trackpad Fits On Ergonomic Keyboard

Cats are notorious for interrupting workflow. Whether it’s in the kitchen, the garden, or the computer, any feline companion around has a way of getting into mischief in an oftentimes disruptive way. [Robin] has two cats, and while they like to sit on his desk, they have a tendency to interrupt his mouse movements while he’s using his Apple trackpad. Rather than solve the impossible problem of preventing cats from accessing areas they shouldn’t, he set about building a customized tiny trackpad that integrates with his keyboard and minimizes the chance of cat interaction.

The keyboard [Robin] uses is a split ergonomic keyboard. While some keyboards like this might use a standard USB connection to join the two halves, the ZSA Voyager uses I2C instead and even breaks the I2C bus out with a pogo pin-compatible connector. [Robin] originally designed a 3D-printed integrated prototype based on a Cirque trackpad that would clip onto the right side of the keyboard and connect at this point using pogo pins, but after realizing that the pogo pin design would be too difficult for other DIYers to recreate eventually settled on tapping into the I2C bus on the keyboard’s connecting cable. This particular keyboard uses a TRRS connector to join the two halves, so getting access to I2C at this point was as simple as adding a splitter and plugging in the trackpad.

With this prototype finished, [Robin] has a small trackpad that seamlessly attaches to his ergonomic keyboard, communicates over a standard protocol, and avoids any unwanted cat-mouse action. There’s also a build guide if you have the same keyboard and want to try out this build. He does note that using a trackpad this small involves a bit of a learning curve and a larger-than-average amount of configuration, but after he got over those two speed bumps he hasn’t had any problems. If trackpads aren’t your style, though, with some effort you can put a TrackPoint style mouse in your custom mechanical keyboard instead.

Osprey Keyboard Lets The NRF52840 Spread Its Wings

While most people don’t care whether they use one finger or ten, some people want to better themselves by learning how to touch-type. And honestly, there’s no easier way to do that than by getting into the ergo keyboard game. Even if you consider yourself a touch-typist already, an ortholinear or column-staggered keyboard may teach you otherwise, as you find yourself trying to type ‘c’ with your index finger (for example) and failing miserably.

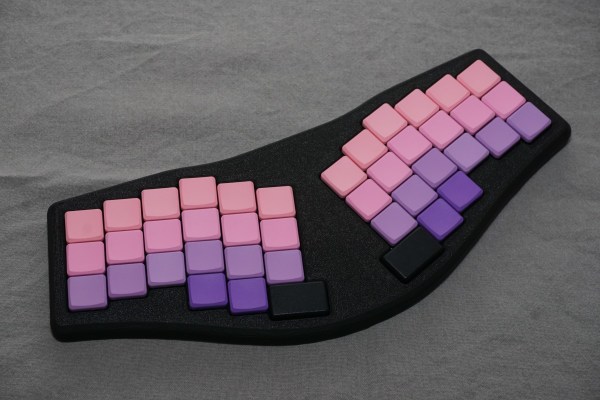
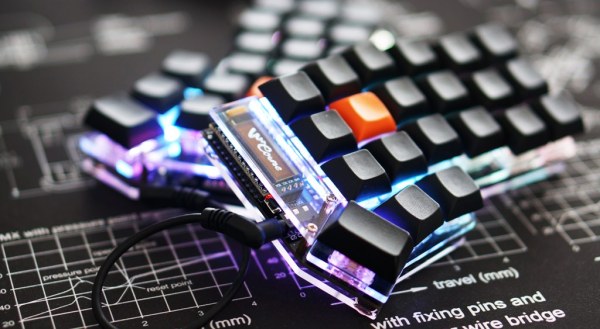
[ebastler] chose the best of all routes and decided to build his own perfect keyboard, called the Osprey. It’s a wireless, column-staggered 40% that runs on ZMK firmware, which of course is open-source, as is the PCB itself and the thick and travel-ready printed enclosure. Although [ebastler] has yet to implement either one of these additional inputs, the Osprey also supports a thumbstick and a track pad.

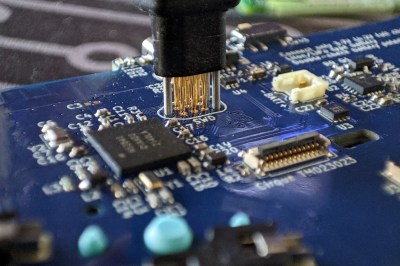
Brain-wise, it’s a bare nRF52840 chip along with a TI BQ24075 for battery charging. The interesting thing about this implementation is that [ebastler] used and abused Nordic sample schematic #4, which utilizes both DC-DC converter stages of the chip. We can’t wait to see what this trailblazing build will mean for the community!

TypeMatrix EZ-Reach 2030 Is Better Than Your Laptop Keyboard

Maybe you’re not ready to take the leap into a full-on ergonomic split keyboard. That’s okay, that’s cool, that’s understandable. They’re weird! Especially ones like my Kinesis Advantage with the key bowls and such. But maybe your poor pinkies are starting to get tired and you’re ready to start using your thumbs for more than just the space bar. Or you want to be able to type ‘c’ properly, with your middle finger.

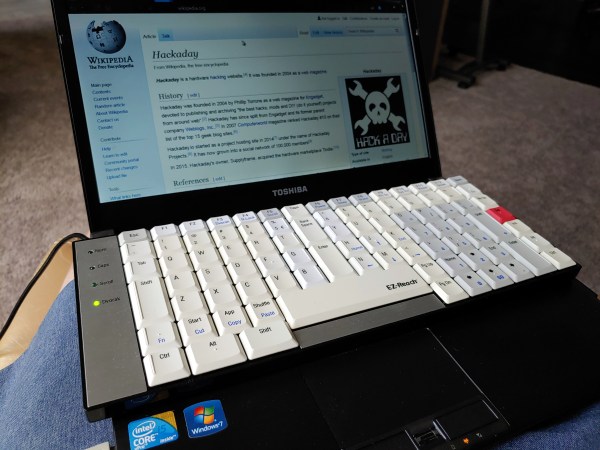
In that case, the TypeMatrix could be the keyboard for you. Or maybe for travel you, because it’s designed as a quasi-ergonomic, orthonormal layout travel keyboard to pair with your laptop, and as such it sits directly over a laptop keyboard without blocking the track pad. (How do people use those things, anyway?)

Of course, you could use this as a desktop keyboard as well, although it’s unfortunate that Control and Shift are stuck on the pinkies. More about that later.

First Impressions

When I saw this keyboard on eBay, I was attracted by two things: the layout, and the dedicated Dvorak light. (And, let’s be honest — the price was right.) I’ve always found myself generally turned off by chocolate bar-style ortholinear keebs because they’re so incredibly cramped, but this one seemed a more acceptable because of the slight split.

The first thing I noticed was the fantastic number pad integration. The different colored keycaps are a nice touch, because the gray makes the number pad stand out, and the red Delete is easy to find since Num Lock is squatting in the upper right corner. Why does Delete always feel like an afterthought on compact keebs? I also like the location of the arrows, and it makes me think of the AlphaSmart NEO layout. Unfortunately, it comes at the cost of burying the right hand Enter down in no-man’s land where you can’t exactly hit it blindly with great accuracy right away. If only you could swap Shift and Enter without messing up the number pad!

Continue reading “TypeMatrix EZ-Reach 2030 Is Better Than Your Laptop Keyboard”

DIY Ergonomic Game Pad Lends A Hand

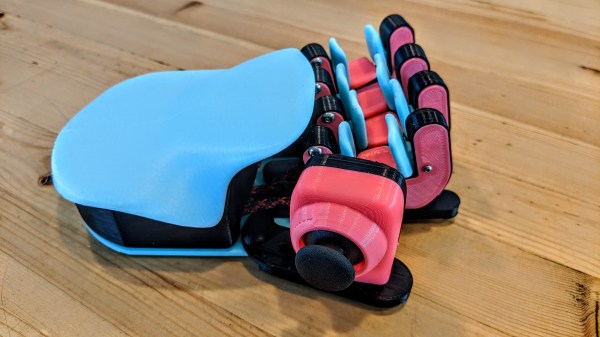
Does it seem like everyone you game against can do everything faster than you? Chances are good that they have some kind of dedicated game pad or macro pad with a bunch of custom shortcuts. If you can’t beat ’em, join ’em, but why buy one when you can build your own? [lordofthedum] did the smart thing when they built their own version of the Azeron game pad, which is an outrageously expensive but ergonomic and cool-looking macro pad that reminds us of the DataHand ergonomic keyboard.

Each finger hovers over a C-shaped group of three switches — one actuates by moving the finger forward, another by moving backward, and the third by pushing down like a regular button. The thumb gets a 4-way joystick. All of these inputs are wired up to an Arduino Pro Micro, which has sort of become the standard for DIY macro pads and keyboards. We think this looks fantastic, and really raises the bar for DIY macro pads.

Need a few more keys, but still want a thumb joystick? Check out the smooth and sweet Sherbet game pad.

Split Keyboard Finder Stacks Them Up For Your Approval

Tired of a boring, single piece keyboard? Thinking about a change but don’t know what all your options are? Well prospective-keyboard-shopper, today is your lucky day. We at the Hackaday are here to facilitate the habit with two excellent resources for the eager keyboard shopper; [pvinis]’s awesome-split-keyboards and [jhelvy]’s splitkbcompare.

As indicated by its title, awesome-split-keyboards is an awesome list of split keyboards 50 examples strong. Every split we’ve come across seems to be represented here, many with at least an image or two along with links to more information about how to build or buy the model in question. If that’s not enough, the bottom of the page has a wealth of background information about building or buying your own.

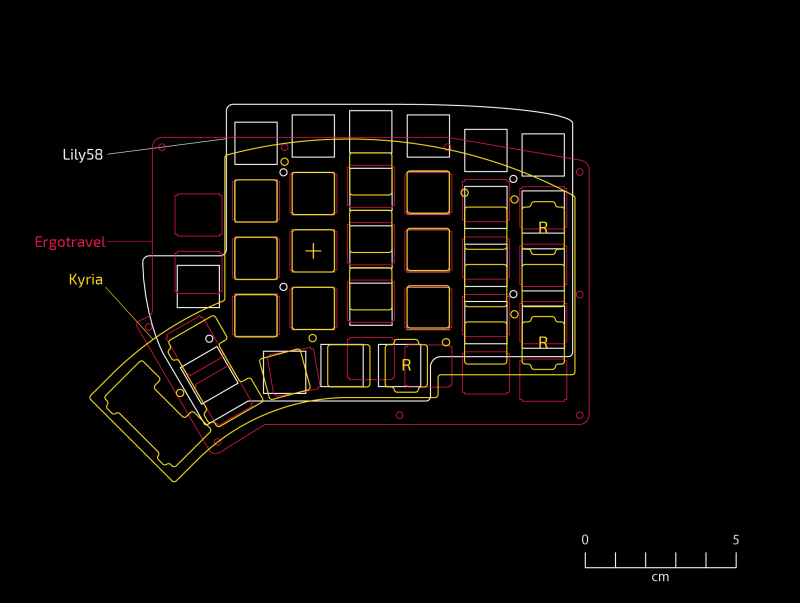
But before making such an important decision it’s important to make sure the keyboard in question will be a good fit in the hands. This is where splitkbcompare comes in, providing a visualization of many popular split layouts. If we hadn’t just found awesome-split-keyboards this filterable list and wide selection would have been the highlight here. But what does stand out is the ability to generate 1:1 scale printouts of the layouts in question, even stacking them for comparison, allowing a prospective buyer get a hands on feel for what they’re considering.

Not enough clackin’ action? Recently we’ve been producing a fierce amount of keyboard related content, of particular highlight is [Kristina Panos’]’ series called Inputs of Interest. Earlier in the summer she even built her own Ergodox split keeb.

[Main image source: HeliDox by diimdeep]