3D Printering: Printing Sticks For A PLA Hot Glue Gun

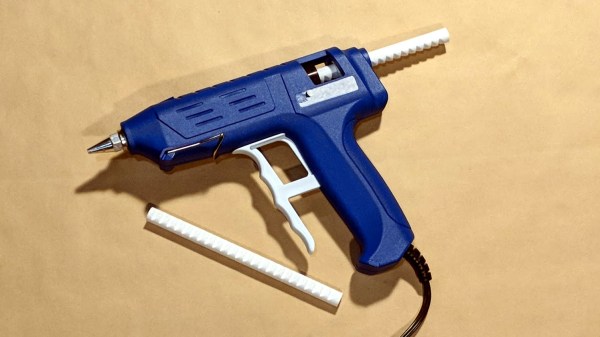
When is a hot glue stick not a hot glue stick? When it’s PLA, of course! A glue gun that dispenses molten PLA instead of hot glue turned out to be a handy tool for joining 3D-printed objects together, once I had figured out how to print my own “glue” sticks out of PLA. The result is a bit like a plus-sized 3D-printing pen, but much simpler and capable of much heavier extrusion. But it wasn’t quite as simple as shoving scrap PLA into a hot glue gun and mashing the trigger; a few glitches needed to be ironed out.

Why Use a Glue Gun for PLA?
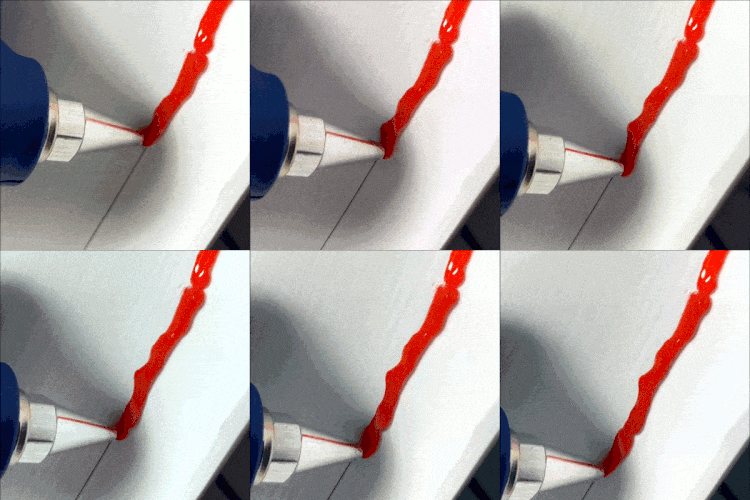
Some solutions come from no more than looking at two dissimilar things while in the right mindset, and realizing they can be mashed together. In this case I had recently segmented a large, hollow, 3D model into smaller 3D-printer-sized pieces and printed them all out, but found myself with a problem. I now had a large number of curved, thin-walled pieces that needed to be connected flush with one another. These were essentially butt joints on all sides — the weakest kind of joint — offering very little surface for gluing. On top of it all, the curved surfaces meant clamping was impractical, and any movement of the pieces while gluing would result in other pieces not lining up.

An advantage was that only the outside of my hollow model was a presentation surface; the inside could be ugly. A hot glue gun is worth considering for a job like this. The idea would be to hold two pieces with the presentation sides lined up properly with each other, then anchor the seams together by applying melted glue on the inside (non-presentation) side of the joint. Let the hot glue cool and harden, and repeat. It’s a workable process, but I felt that hot glue just wasn’t the right thing to use in this case. Hot glue can be slow to cool completely, and will always have a bit of flexibility to it. I wanted to work fast, and I wanted the joints to be hard and stiff. What I really wanted was melted PLA instead of glue, but I had no way to do it. Friction welding the 3D-printed pieces was a possibility but I doubted how maneuverable my rotary tool would be in awkward orientations. I was considering ordering a 3D-printing pen to use as a small PLA spot welder when I laid eyes on my cheap desktop glue gun.

Continue reading “3D Printering: Printing Sticks For A PLA Hot Glue Gun”

The Engineering Analysis Of Plastic-Dissolving Lubricant

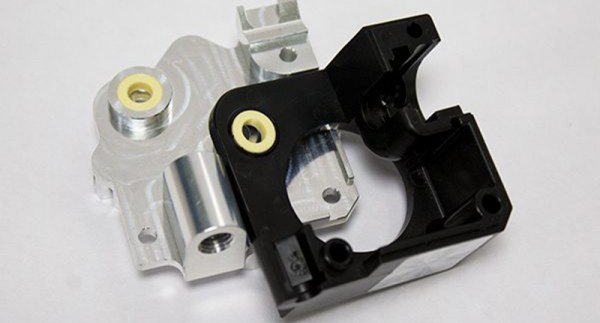
Over the years, E3D has made a name for themselves as a manufacturer of very high-quality hotends for 3D printers and other printer ephemera. One of their more successful products is the Titan Extruder, a compact extruder for 3D printers that is mostly injection-molded plastic. The front piece of the Titan is a block of molded polycarbonate, a plastic that simply shouldn’t fail in its normal application of holding a few gears and bearings together. However, a few months back, reports of cracked polycarbonate started streaming in. This shouldn’t have happened, and necessitated a deep dive into the failure analysis of these extruders. Lucky for us, E3D is very good at doing engineering teardowns. The results of the BearingGate investigation are out, and it’s a lesson we can all learn from.

The first evidence of a problem with the Titan extruders came from users who reported cracking in the polycarbonate case where the bearing sits. The first suspect was incorrectly manufactured polycarbonate, perhaps an extruder that wasn’t purged, or an incorrect resin formulation during manufacturing. A few whacks with a hammer of each production run ruled out that possibility, so suspicion turned to the bearing itself.

After a few tests with various bearings, the culprit was found: in some of the bearings, the lubricant mixed with the polycarbonate to create a plastic-degrading toxic mixture. These results were verified by simply putting a piece of polycarbonate and the lubricant in a plastic bag. This test resulted in some seriously messed up plastic. Only some of the bearings E3D used caused this problem, a lesson for everyone to keep track of your supply chain and keep records of what parts went into products when.

The short-term fix for this problem is to replace the bearing in the Titan with IGUS solid polymer bushings. These bushings don’t need lubricant, and therefore are incapable of killing the polycarbonate shell. There are downsides to this solution, namely that the bushings need to be manufactured, and cause a slight increase in friction reducing the capability of the ‘pancake’ steppers E3D is using with this extruder.

The long-term solution for this problem is to move back to proper bearings, but changing the formulation of the polycarbonate part to something more chemical resistant. E3D settled on a polymer called Tritan from Eastman, a plastic with similar mechanical properties, but one that is much more chemically resistant. This does require a bit more up-front work than machining out a few bearings, but once E3D gets their Tritan parts in production, they will be able to move back to proper bearings with the right lubrication.

While this isn’t a story of exploding smartphones or other disastrous engineering failures, it is a great example of how your entire supply chain goes into making a product, and how one small change can ruin an entire product. This is real engineering right here, and we’re glad E3D finally figured out what was going on with those broken Titan extruders.

MIT Is Building A Better 3D Printer

Traditional desktop 3D printing technology has effectively hit a wall. The line between a $200 and a $1000 printer is blurrier now than ever before, and there’s a fairly prevalent argument in the community that you’d be better off upgrading two cheap printers and pocketing the change than buying a single high-end printer if the final results are going to be so similar.

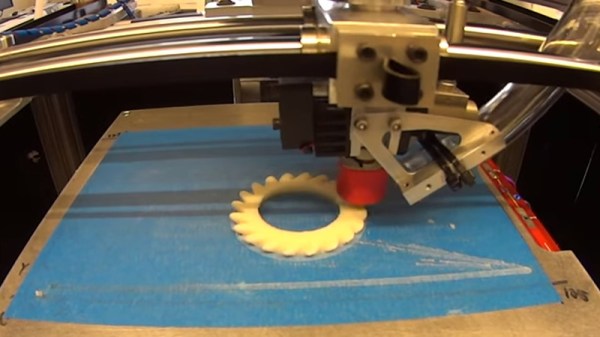
The reason for this is simple: physics. Current printers have essentially hit the limits of how fast the gantry can move, how fast plastic filament can pushed through the extruder, and how fast that plastic can be melted. To move forward, we’re going to need to come up with something altogether different. Recently a team from MIT has taken the first steps down that path by unveiling a fundamental rethinking of 3D printing that specifically addresses the issues currently holding all our machines back, with a claimed 10-fold increase in performance over traditional printing methods.

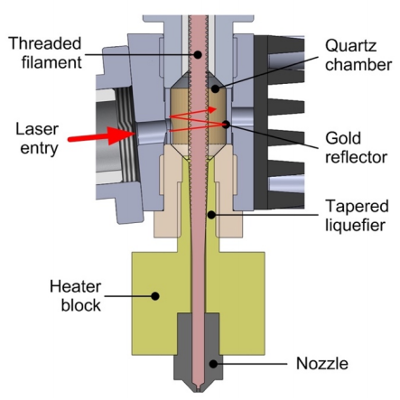
MIT’s revolutionary laser-assisted hot end.

As anyone who’s pushed their 3D printer a bit too hard can tell you, the first thing that usually happens is the extruder begins to slip and grind the filament down. As the filament is ground down it starts depositing plastic on the hobbed gear, further reducing grip in the extruder and ultimately leading to under-extrusion or a complete print failure. To address this issue, MIT’s printer completely does away with the “pinch wheel” extruder design and replaces it with a screw mechanism that pulls special threaded filament down into the hot end. The vastly increased surface area between the filament and the extruder allows for much higher extrusion pressure.

An improved extruder doesn’t do any good if you can’t melt the incoming plastic fast enough to keep up with it, and to that end MIT has pulled out the really big guns. Between the extruder and traditional heater block, the filament passes through a gold-lined optical cavity where it is blasted with a pulse modulated 50 W laser. By closely matching the laser wavelength to the optical properties of the plastic, the beam is able to penetrate the filament and evenly bring it up to nearly the melting point. All without physically touching the filament and incurring frictional losses.

There are still technical challenges to face, but this research may well represent the shape of things to come for high-end printers. In other words, don’t expect a drop-in laser hot end replacement for your $200 printer anytime soon; the line is about to get blurry again.

Speeding up 3D printing is a popular topic lately, and for good reason. While 3D printing is still a long way off from challenging traditional manufacturing in most cases, it’s an outstanding tool for use during development and prototyping. The faster you can print, the faster you can iterate your design.

Thanks to [Maave] for the tip.

Continue reading “MIT Is Building A Better 3D Printer”

Automate Wire Prep With A Robot Wire Cutter

When you move from one-off builds to production scale, perhaps to meet that Kickstarter commitment or to keep your Tindie store stocked, you’re going to need to tool up. Jobs like building wiring harnesses can be tedious and time-consuming, so outsourcing them to this robot wire cutter might be a good idea.

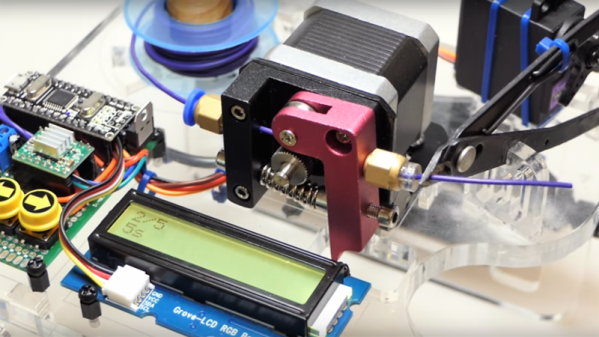
The video below tells the whole tale of this build, which despite the fact that [Maclsk] seems to have put it together quickly from scrap bin parts still looks pretty professional. The business end of the machine is a 3D printer extruder, minus the hot end, of course. A Nano controls the extruder’s stepper to shoot out the right length of wire, as well as the servo that squeezes the snippers. An LCD display and some pushbuttons provide the UI that rounds out the build. Tell it how long and how many, and you’ll be ready to build. We can see how this might be upgraded to strip the wires as well, although getting both ends stripped might be tricky.

Might this component tape-cutting robot from a few weeks back have inspired [Maclsk]’s build? Perhaps, but in any case, both are fun to watch.

Continue reading “Automate Wire Prep With A Robot Wire Cutter”

MakerBot Really Wants You To Like Them Again

For the last couple years, a MakerBot press release has generally signaled that more pink slips were going to be heading out to the already shell-shocked employees at their NYC factory. But just last week something that could almost pass as good news came out of the once mighty 3D printer manufacturer, the unveiling of “MakerBot Labs”. A number of mainstream tech sites heralded this as MakerBot’s first steps back into the open source community that launched it nearly a decade ago; signs of a newer and more thoughtful MakerBot.

Reading the announcement for “MakerBot Labs”, you can almost believe it. All the buzz words are there, at least. In fact, if this announcement came from anyone else, in any other field, I’d probably be on board. Sharing knowledge and listening to the community is essential if you want to connect with hackers and makers. But this is MakerBot, and they’ve dug themselves into a very deep hole over the years.

The spectacular fall from grace that MakerBot has experienced, from industry leader to afterthought, makes this hat-in-hand peace offering hard to take seriously. It reads like a company making a last ditch effort to win back the users they were so sure they didn’t need just a few years ago. There is now a whole new generation of 3D printer owners who likely have never even seen a MakerBot printer, and it’s hard to imagine there’s still enough innovation and life in the company to turn that around before they completely fade into obscurity.

Continue reading “MakerBot Really Wants You To Like Them Again”

3D Printer Tool Changer Gives You Access To Lots Of Extruders

The benefits of having a 3D printer with multiple extruders are numerous: you can print soluble support material for easy removal, print a combination of flexible and rigid filament, or simply print in different colors. Unfortunately, traditional multi-extruder setups have some serious drawbacks, even aside from the cost.

Usually, the extruders are all mounted next to each other on a single carriage. This increases the mass, which can cause print quality issues like shadowing. It also reduces the printable area, as each extruder needs to be able to reach the entire area. All of this means that the design becomes more and more impractical with each extruder you add, and that’s why it’s uncommon to see more than two extruders on a printer.

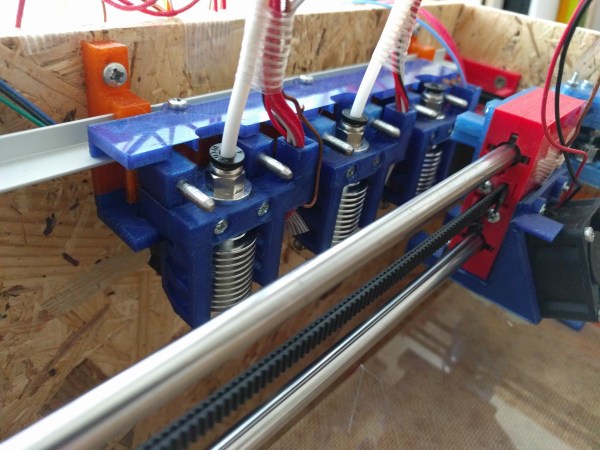
Over on Hackaday.io, [rolmie] has come up with a very practical (and affordable) solution to this problem. He has designed a tool changer that gives the printer the ability to switch out hot ends on the fly. The system is very similar to the tool changers we see on CNC machining centers: tools (the hotends) are stored on a rack, and a tool change in the G-code sends the carriage over to the rack to drop off the old hotend and pick up a new one.

The benefit of the design is that both the mass and volume of the carriage are kept to a minimum, while allowing you to use many different hot ends. Each hotend’s settings can be configured individually, and you can even use different models of hotend altogether (maybe one model works better for PLA, while another is better for ABS). The design is still in the prototyping stage and needs some refinement, but it’s a very promising proof of concept that seems like it could be implemented fairly easily into most 3D printer models.

Continue reading “3D Printer Tool Changer Gives You Access To Lots Of Extruders”

Additive + Subtractive = One Powerful Machine

It says it right on the title of the video below: it was bound to happen eventually. It’s only natural that somebody would stick a 3D printer extruder on the business end of a CNC machine. The long-awaited convergence of additive and subtractive manufacturing is here.

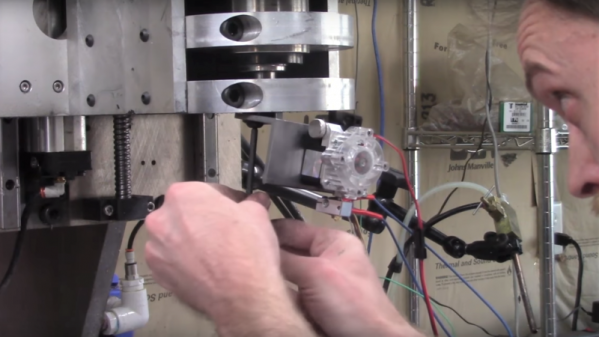
OK, that may be overstating things a bit, but we think [Chris DePrisco] is on to something here. Given the considerable investment he’s made in his DIY CNC machine, an enormous vertical machining center that looks a little like a homebrew Bridgeport, it was a no-brainer to take advantage of the huge XYZ stage. Mounting the Titan Aero extruder to the quill required some custom parts; fair warning that the video below is heavy on machining, but it’s not the seven hours of video he streamed when he milled the heated aluminum bed. Skip ahead to about the six-minute mark if you want to see the first prints and how he optimized the setup.

As we watched [Chris]’ video, we were struck by the potential for adding 3D printing to CNC milling machines. What we’d like to see is a setup where the spindle and the extruder work together to build more complex parts. Or maybe a tool-changing CNC that can pick up a spindle, an extruder, and maybe even a laser or plasma cutter head. Now that would be a powerful machine!

Continue reading “Additive + Subtractive = One Powerful Machine”