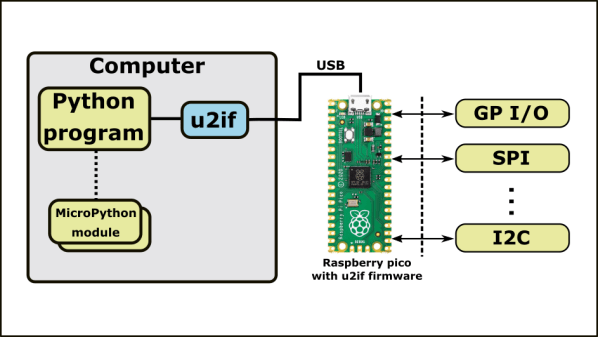
Although protocols like I2C and SPI are great for communicating between embedded devices and their peripherals, it can be a pain to interface these low-level digital interfaces to a PC. [Alexandre] typically used an Arduino to bridge between the PC and embedded worlds, but he got tired of defining a custom serial protocol for each project. Inspired by MicroPython’s machine module, [Alexandre] has developed u2if—an implementation of some of MicroPython’s machine module for PC—using a USB-connected Raspberry Pi Pico to bridge between a PC and low-level digital interfaces.
u2if consists of two parts: the PC portion is a Python implementation of a portion of the MicroPython machine module, and the Raspberry Pi Pico receives some custom C++ firmware. Thus far, [Alexandre] has implemented functionality for the onboard ADCs, I2C, SPI, UART, and GPIO lines as well as additional support for I2S sound and the WS2812B addressable LED.
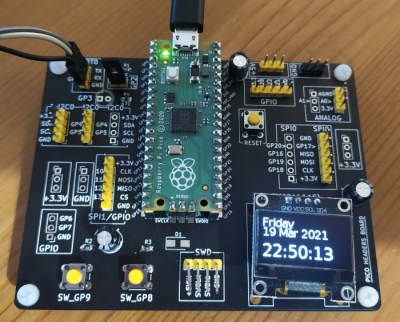
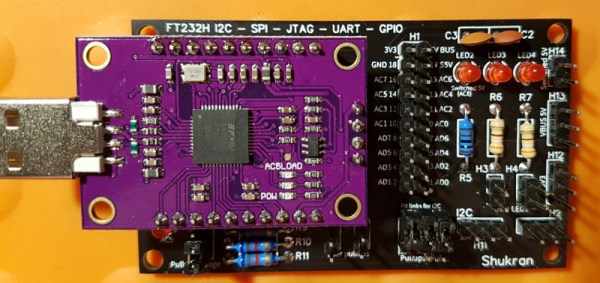
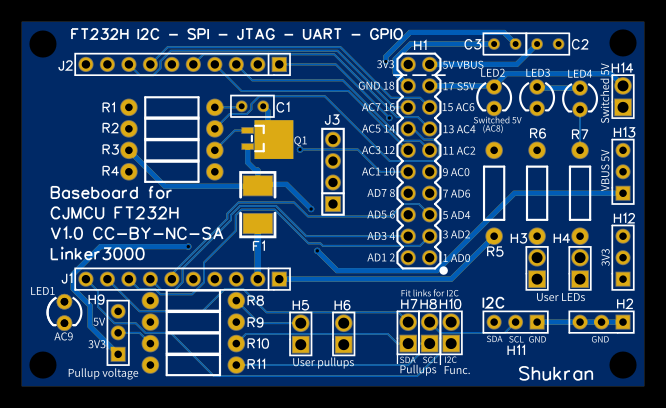
In addition to the u2if package, [Alexandre] has designed a PCB to break out all of the Raspberry Pi Pico’s interfaces in a handy 3×3.9″ board. We especially like that multiple headers are supplied for I2C, including one with enough space to mount an SSD1306 OLED display.
We think this could be an incredibly useful tool, and what makes it even more impressive is that it uses a board many of us already have laying around. If you want a dedicated device for interfacing with low-level digital buses, you may want to check out the GreatFET.
 The
The