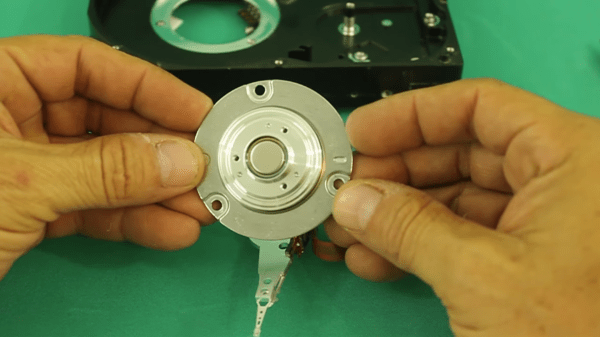
Spinners built into games of chance like roulette or tabletop board games stop on a random number after being given a good spin. There is no trick, but they eventually rest because of friction, no matter how hard your siblings wind up for a game-winning turn. What if the spinning continued forever and there was no programming because there was no controller? [Ludic Science] shows us his method of making a perpetual spinner with nothing fancier than a scrapped hard disk drive motor and a transformer. His video can also be seen below the break.
Fair warning: this involves mains power. The brushless motor inside a hard disk drive relies on three-phase current of varying frequencies, but the power coming off a single transformer is going to be single-phase AC at fifty or sixty Hz. This simplifies things considerably, but we lose the self-starting ability of the motor and direction control, but we call those features in our perpetual spinner. With two missing phases, our brushless motor limps along in whatever direction we initiate, but the circuit couldn’t be much more straightforward.
There’s something to be said for the feel of controls. Whether it’s the satisfying snap of a high-quality switch or the buttery touch of the pots on an expensive amplifier, the tactile experience of the controls you interact with says a lot about a device.
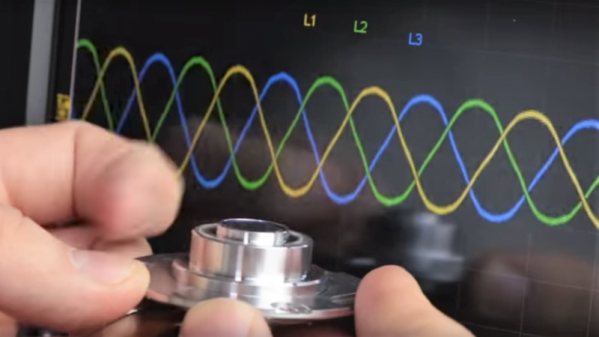
[GreatScott!] knows this, and rather than put up with the bump and grind of a cheap rotary encoder, he decided to find an alternative. He ended up exploring hard drive motors as encoders, and while the results aren’t exactly high resolution, he may be onto something. Starting with a teardown of some old HDDs — save those magnets! — [Scott!] found that the motors fell into either the four-lead or three-lead categories. Knowing that HDD motors are brushless DC motors, he reasoned that the four-lead motors had their three windings in Wye configuration with the neutral point brought out to an external connection. A little oscilloscope work showed the expected three-phase output when the motor hub was turned, with the leading and lagging phases changing as the direction of rotation was switched. Hooked to an Arduino, the motor made a workable encoder, later improved by sending each phase through a comparator and using digital inputs rather than using the Nano’s ADCs.
It looks like [GreatScott!]’s current setup only responds to a full rotation of the makeshift encoder, but we’d bet resolution could be improved. Perhaps this previous post on turning BLDC motors into encoders will help.
We’re used to attaching peripherals to our computers, when we have a need for them to interact with the world around them. An Arduino Uno needs a shield to turn on the lights, for example. Just sometimes though there is the potential for unintended interaction between a computer and the real physical world which surrounds it, and it’s one of those moments that [Alfredo Ortega] has uncovered in his talk at the EKO Party conference in Buenos Aires. He demonstrates how a traditional spinning-rust computer hard disk interacts with vibration in its surroundings, and can either become a rudimentary microphone, or be compromised by sound at its resonant frequency (PDF).
It seems that you can measure the response time of the hard drive head during a read operation without requiring any privilege escalation. This timing varies with vibration, so can be used to reconstruct the sound that the drive is facing. Thus it becomes a microphone, albeit not a very good one with a profoundly bass-heavy response. He goes on to investigate the effect of sound on the drive, discovering that it has a resonant frequency at which the vibration causes it to be unreadable.
Sadly the talk itself appears not yet to be online, but given that previous years’ EKO talks are on YouTube it is likely that when the dust has settled you will be able to see it in full. Meanwhile he’s posted a video demonstration which we’ve posted below the break.
You’ll all remember my grand adventure in acquiring a photocopier. Well, it’s been a rollercoaster, I tell ya. While I still haven’t found a modification worthy enough to attempt, I have become increasingly frustrated. From time to time, I like to invite my friends and family over for dinner, and conversation naturally turns to things like the art on the walls, the fish in the aquarium, or perhaps the photocopier in the living room. Now, I dearly love to share my passions with others, so it’s pretty darned disappointing when I go to fire off a few copies only to have the machine fail to boot! It was time to tackle this problem once and for all.
When powered up, the photocopier would sit at a “Please Wait…” screen for a very long time, before eventually coughing up an error code — SC990 — and an instruction to call for service. A bunch of other messages would flash up as well; Address Book Data Error, Hard Drive Data Error, and so on. In the end I realized they all centered around data storage.
Now, I’d already tried diving into the service menu once before, and selected the option to format the hard drive. That had led to the problem disappearing for a short period, but now it was back. No amount of mashing away at the keypad would work this time. The format commands simply returned “Failed” every time. What to do next? You guessed it, it was time for a teardown!
Thankfully, photocopiers are designed for easy servicing — someone’s paying for all those service calls. A few screws and large panels were simply popping off with ease; completely the opposite of working on cars. Spotting the hard drive was easy, it looked like some sort of laptop IDE unit. With only SATA laptops around the house to salvage parts from, I wasn’t able to come up with something to swap in.
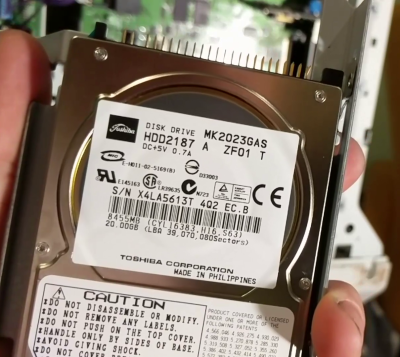
A bit of research (and reading the label) taught me that the drive was a Toshiba MK2023GAS/HDD2187. Replacements were available on eBay, but if I waited two weeks I’d probably be wrist deep in some other abandoned equipment. It had to be sorted on the night. In the words of [AvE], if you can’t fix it… well, you know how it goes. I yanked the drive and, lo and behold – the copier booted straight up! Just to be sure I wasn’t hallucinating, I churned out a few copies, and other than the continued jamming on all-black pages, everything was fine. Literally all it took to get the copier to boot was to remove the ailing drive. Suffice to say, I was kind of dumbfounded.
I’m happy to chalk up the win, but I have to draw issue with Ricoh’s design here. The copier is clearly capable of operating perfectly well without a hard drive. It will give up its document server and address book abilities, but it will still make copies and print without a problem.
Yet, when the copier’s drive fails, the unit fails completely and refuses to work. This necessitates a service call for the average user to get anything at all happening again — causing much lost work and productivity. A better design in my eyes would have the copier notify users of the lost functionality due to the failed drive and the need to call service, but let them copy! Any IT administrator will know the value of a bodged work around that keeps the company limping along for the day versus having a room of forty agitated workers with nothing to do. It’s a shame Ricoh chose to have the photocopier shut down completely rather than valiantly fight on.
Feel free to chime in with your own stories of minor failures that caused total shutdowns in the comments. Video below the break.
Hard drives work by spinning platters full of magnetized data while a read/write head very quickly harvests or changes bits as needed. Older (or perhaps cheaper) drives spin at 5400 RPM, better drives spin at 7200 RPM, and elite drives (that mortals like you never shell out for) spin in the 10k-15k RPM range. This spinning is thanks to a sweet combination of a bearing and a brushless DC motor.
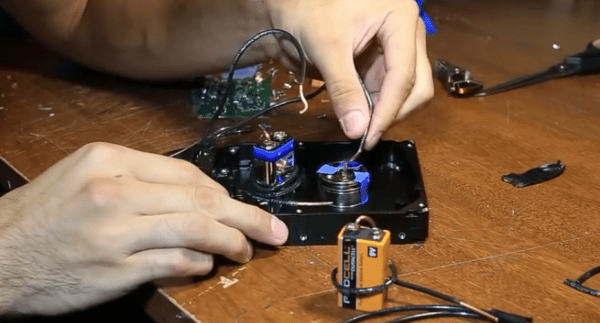
Unfortunately you can’t drive a brushless motor without a brushless motor driver. Well, of course that’s not absolutely true — and [Tommy Callaway] has certainly hacked together a crude exception to the rule. He’s using a 9-volt battery and some blue painters tape to drive a brushless motor.
Brushless motors do their thing by placing permanent magnets on the rotor (the part that spins) and placing multiple stationary coils of wire around it. Brushless motor drivers then energize these coils in a vary carefully timed pattern to continuously push the rotor magnets in the same direction.
[Tommy] wired up his 9V to one of these coils and observed that it holds the rotor in position. He then began playing around with different ways automatically break the circuit to de-energize the coil at just the right time. This means using the spinning center of the hard drive as part of the circuit, with blue painter’s tape in alternating patterns to create the timing. Is this a brushless motor driver, or has he just re-invented the brushed motor?
If this workbench trick leaves you wanting for some hardcore BLCD action, you can’t go wrong with this $20 offering to push motors at very high speeds.
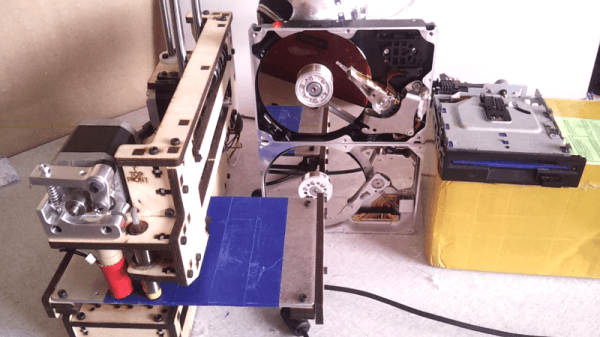
Like many of us, [Laurens] likes video game music and bending hardware to his will. Armed with a Printrbot, a couple of floppy drives, and some old HDDs, he built the Unconventional Instrument Orchestra. This 2015 Hackaday Prize contender takes any MIDI file and plays it on stepper and solenoid-based hardware through a Java program.
A while back, [Laurens] won a Fubarino in our contest by using a MIDI keyboard and an Arduino to control the Minecraft environment with Legend of Zelda: Ocarina of Time songs. The Unconventional Instrument Orchestra uses that Fubarino of victory to control the steppers of two floppy drives. He only needed three pins to control the drives—one to enable, one to set the head’s direction, and one to make it step once per pulse.
If ever you’ve been around a 3D printer, you know they make music as a natural side effect. The problem is getting the printer to obey the rests in a piece of music. In order to do this, [Laurens] used his software to control the printer, essentially withholding the next command until the appropriate time in the song.
The percussive elements of this orchestra are provided by a hard drive beating its head against the wall. Since it’s basically impossible to get an HDD to do this as designed (thankfully), [Laurens] replaced the control board with a single transistor to drive the coil that moves the head.
[Laurens] has made several videos of the orchestra in concert, which are a joy all their own. Most of the visual real estate of each video is taken up with a real-time visualization of the music produced by the software. There’s still plenty of room to show the orchestra itself, song-specific gameplay, and a textual commentary crawl in 16-segment displays. Check out the playlist we’ve embedded after the break.
A while ago [Frank Zhao] built a computer in an aquarium. It’s exactly what you would expect – a bunch of parts stuffed into a container filled with mineral oil. Yes, there’s an i7 and a GTX970 in there, but there’s also a bunch of neopixels and a neat little bubbling treasure chest. That wasn’t enough for [Frank], and he wanted to add a HDD activity monitor. What’s the most absurd activity monitor for an SSD? An old platter-based drive, of course.
The build is relatively simple and something [Frank] put together from spare parts in a day. After cracking open an old PATA hard drive, the voice coil for the hard drive arm was connected to the motherboard’s HDD activity signal through a few MOSFETs. The platter motor is controlled by an MTD6501 motor driver, set to spin up when the circuit is on.
It’s a kludge as far as controlling the components of a hard drive go, but that’s not really the point. It’s just a neat project to show when the SSD in the aquarium computer is being accessed. That said, the activity monitor is currently disconnected because the old HDD is so freakin’ loud. It looks really cool, though.