Today we’re used to handheld game consoles like the Nintendo Switch, that let you roam around in 3D worlds which include not only 3D players but more terrain than many people walk around in real life in a week. But back in the early 1980s Nintendo’s handheld offering was the Game & Watch, which used a segmented LCD display. An entire segment could be used to represent the player, with player segments spread throughout the display. To move the player, the previous player segment would be turned off while another adjacent one would be on. That also meant that a console could play only one game. Despite these limitations they were very popular for their time.
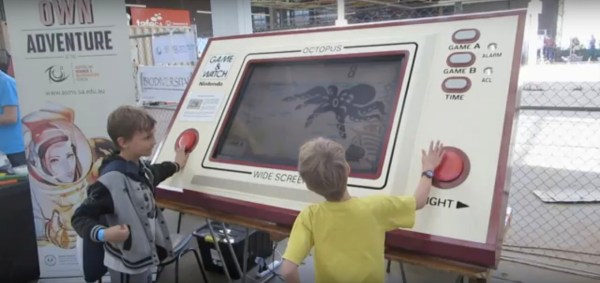
[Thomas Tilley] decided to improve on the old Game & Watch in a different way, by making it bigger, much bigger. So big in fact that even many teenage players can’t reach both the button to move left and the button to move right in time, turning it into a highly co-operative two-player game. Judging by the video below, that made playing it double the fun. The game he chose to tackle is the Game & Watch Octopus, or Mysteries of the Sea and Mysteries of the Deep in the UK.