With Grinning Keyboard And Sleek Design, This Synth Shows It All

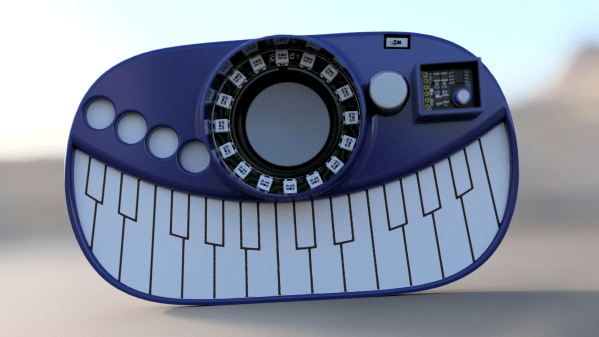
Stylish! is a wearable music synthesizer that combines slick design with stylus based operation to yield a giant trucker-style belt buckle that can pump out electronic tunes. With a PCB keyboard and LED-surrounded inset speaker that resembles an eyeball over a wide grin, Stylish! certainly has a unique look to it. Other synthesizer designs may have more functions, but certainly not more style.

The unit’s stylus and PCB key interface resemble a Stylophone, but [Tim Trzepacz] has added many sound synthesis features as well as a smooth design and LED feedback, all tied together with battery power and integrated speaker and headphone outputs. It may have been originally conceived as a belt buckle, but Stylish! certainly could give conference badge designs a run for their money.

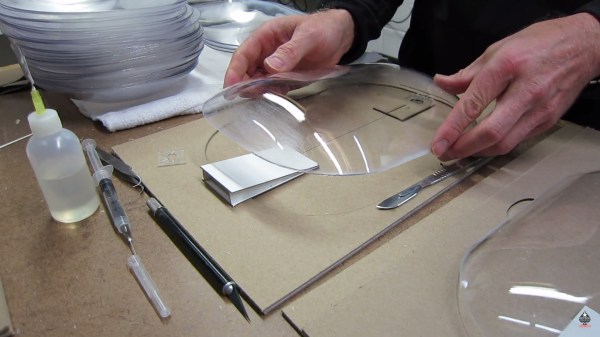
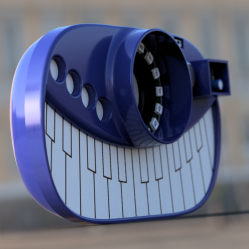
The photo shown is a render, but a prototype is underway using a milled PCB and 3D printed case. [Tim]’s Google photo gallery has some good in-progress pictures showing the prototyping process along with some testing, and his GitHub repository holds all the design files, should anyone want a closer look under the hood. Stylish! was one of the twenty finalists selected for the Musical Instrument Challenge portion of the 2018 Hackaday Prize and is therefore one of the many projects in the running for the grand prize!

These Capacitors Are A Cheap Gimmick

If you search through an electrical engineering textbook, you probably aren’t going to find the phrase “gimmick capacitor” but every old ham radio operator knows about them. They come in handy when you need a very small capacitor of unknown value. For example, if you are trying to balance the stray capacitance in a circuit, you might not know exactly what value you need, but you know it won’t be very much. That’s when you want a gimmick capacitor.

A gimmick capacitor is made by taking two strands of insulated wire and twisting them together; the length and the tightness of the twist determine the capacitance. Tightening or loosening the twist, or trimming some of the wire off, makes it tunable.

These are most commonly found in RF equipment or high-speed logic because of the small capacitance involved — usually about 1 to 2 pF per inch of twist or so. The thicker the insulation, the less capacitance you’ll get, so it is common to use magnet wire or something else with a thin insulating layer. You can take this one step further and decrease the spacing by stripping down one wire as long as it isn’t going to touch anything else.

Obviously, the insulation needs to be good enough for the voltage on them, an important consideration in tube circuits, for instance. But other than that, a gimmick capacitor is a straightforward tool to have in your box of design tricks. Can we take this further? Continue reading “These Capacitors Are A Cheap Gimmick”

XLIDAR Is A Merry-Go-Round Of Time-Of-Flight Sensors

[JRodrigo]’s xLIDAR project is one of those ideas that seemed so attractively workable that it went directly to a PCB prototype without doing much stopping along the way. The concept was to mount a trio of outward-facing VL53L0X distance sensors to a small PCB disk, and then turn that disk with a motor and belt while taking readings. As the sensors turn, their distance readings can be used to paint a picture of the immediate surroundings (at least within about 1 meter, which is the maximum range of the VL53L0X.)

The hardware is made to be accessible and has a strong element of “what you see is what you get.” The distance sensors are on small breakout boards, and the board turns the sensor disk via a DC motor and 3D printed belt drive. Even the method of encoding the disk’s movement and zero position has the same WYSIWYG straightforwardness: a spring contact and an interrupted bare copper trace on the bottom of the sensor disk acts as a physical switch. In fact, exposed copper traces in concentric circular patterns and spring pins taken from an SD card socket are what provide power and communications as the disk turns.

The prototype looks good and sounds like it should work, but how well does it hold up? We’ll find out once [JRodrigo] does some testing. Until then, the board designs are available on the project’s GitHub repository if anyone wants to take a shot at their own approach without starting from scratch.

How To Put The ‘Pro’ In Prototype

It’s easy to get professional-quality finishes on your prints and prototypes if you take the right steps. In the final installment of his series about building with Bondo, product designer [Eric Strebel] shows us how it’s done no matter what the substrate.

How does he get such a smooth surface? A few key steps make all the difference. First, he always uses a sanding block of some kind, even if he’s just wrapping sandpaper around a tongue depressor. For instance, his phone holder has a round indent on each side. We love that [Eric] made a custom sanding block by making a negative of the indent with—you guessed it—more Bondo and a piece of PVC. The other key is spraying light coats of both primer and paint in focused, sweeping motions to allow the layers to build up.

If you need to get the kind of surface that rivals a baby’s behind, don’t expect to prime once, paint once, and be done with it. You must seek and destroy all imperfections. [Eric] likes to smooth them over with spot putty and then wet sand the piece back to smooth before applying more primer. Then it’s just rinse and repeat with higher grits until satisfied.

There’s more than one way to smooth a print, of course. Just a few weeks ago, our own [Donald Papp] went in-depth on the use of UV resin.

Continue reading “How To Put The ‘Pro’ In Prototype”

Taking A Guitar Pedal From Concept Into Production

Starting a new project is fun, and often involves great times spent playing with breadboards and protoboards, and doing whatever it takes to get things working. It can often seem like a huge time investment just getting a project to that functional point. But what if you want to take it to the next level, and take your project from a prototype to a production-ready form? This is the story of how I achieved just that with the Grav-A distortion pedal.

Why build a pedal, anyway?

The author, shown here with bandmates.

A long time ago, I found myself faced with a choice. With graduation looming on the horizon, I needed to decide what I was going to do with my life once my engineering degree was squared away. At the time, the idea of walking straight into a 9-5 wasn’t particularly attractive, and I felt like getting back into a band and playing shows again. However, I worried about the impact an extended break would have on my potential career. It was then that I came up with a solution. I would start my own electronics company, making products for musicians. Continue reading “Taking A Guitar Pedal From Concept Into Production”

Less Than Production, More Than One-Offs

We build things we think are cool. Sometimes, other people agree with us and they want a copy of what we’ve built. If you’re lucky enough to have an enviable product but you’re not ready for full-scale manufacturing, you may be looking at a low-volume production run. [Eric Strebel] walks us through one such instance where he makes some custom color swatches for a show. Video after the break.

[Eric Strebel] is an industrial designer so he plays to his strengths by designing the swatch shape, jig, tool, and hangers. He hires out the painting, laser cutting, and CNC machining. This may seem like a simple statement but some of us have a hard time paying other people for things we’re capable of learning. In some cases, we just have to pay the professionals to do it correctly and keep our focus.

The mentality of small runs in this video is perfect for people who sell on Tindie or want to make more than a handful of consistently nice parts. Our own [Lewin Day] recently talked about his experience with a run of 200 mixers called gMix.

Continue reading “Less Than Production, More Than One-Offs”

Smart Eyeglasses That Auto Focus Where You Look

A University of Utah team have a working prototype of a new twist on fluid-filled lenses for correction of vision problems: automatic adjustment and refocus depending on what you’re looking at. Technically, the glasses have a distance sensor embedded into the front of the frame and continually adjust the focus of the lenses. An 8 gram, 110 mAh battery powers the prototype for roughly 6 hours.

Eyeglasses that can adapt on the fly to different focal needs is important because many people with degraded vision suffer from more than one condition at the same time, which makes addressing their vision problems more complex than a single corrective lens. For example, many people who are nearsighted or farsighted (where near objects and far objects far objects and near objects are seen out of focus, respectively) also suffer from a general loss of the eye’s ability to change focus, a condition that is age-related. As a result, people require multiple sets of eyeglasses for different conditions. Bifocal or trifocal or progressive lenses are really just multiple sets of lenses squashed into a smaller form factor, and greatly reduce the wearer’s field of view which is itself a significant vision impairment. A full field of view could be restored if eyeglass lenses were able to adapt to different needs based on object distance, and that is what this project achieves.

Continue reading “Smart Eyeglasses That Auto Focus Where You Look”