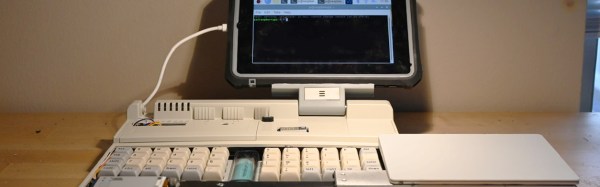
[Alta’s Projects] built a two-in-one cyberdeck that not only contains the requisite Raspberry Pi (a zero in this case) but also eschews a dumb LCD and uses an iPad mini 5 for a display.
We need to address the donor case right away. Some likely see this as heresy, and while we love to see vintage equipment lovingly restored, upcycling warms our hearts and keeps mass-produced plastic out of landfills too. The 1991 AST 386SX/20 notebook in question went for $45 on an online auction and likely was never destined for a computer museum.
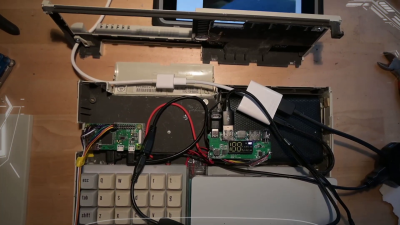
Why is Cupertino’s iOS anywhere near a cyberdeck? If a touch screen is better than an LCD panel, a tablet with a full OS behind it must be even better. You might even see this as the natural outgrowth of tablet cases first gaining keyboards and then trackpads. We weren’t aware that either was possible without jailbreaking, but [Alta’s Projects] simply used a lighting-to-USB dongle and a mini USB hub to connect the custom split keyboard to the iPad and splurged on an Apple Magic Trackpad for seamless and wireless multi-touch input.
The video build (after the break) is light on details, but a quick fun watch with a parts list in the description. It has a charming casual feel that mirrors the refreshingly improvisational approach that [Altair’s Projects] takes to the build. We appreciate the nod to this cyberdeck from [Tinfoil_Haberdashery] who’s split keyboard and offset display immediately sprang to mind for us too. The references to an imagined “dystopian future” excuse the rough finish of some of the Dremel cuts and epoxy assembly. That said, apocalypse or not, the magnets mounted at both ends of the linear slide certainly are a nice touch.
Continue reading “Cyberdeck Running On Apple Silicon, Though An A12 Not An M1”