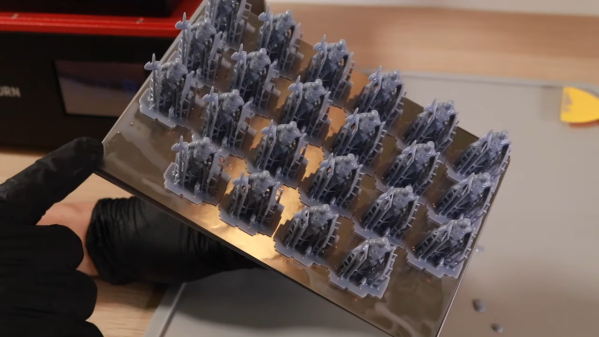
Lots of parts printed at once with a resin printer

Making The Most Of Your Resin Printer Investment

To the extent that we think of 3D printers as production machines, we tend to imagine huge banks of FDM machines slowly but surely cranking out parts. These printer farms are a sensible way to turn a slow process into a high-volume operation, but it turns out there’s a way to do the same thing with only one printer — as long as you think small.

This one comes to us by way of [Andrew Sink], who recently showed us a neat trick for adding a dash of color to resin printed parts. As with that tip, this one centers around his Elegoo resin printer, which is capable of intricately detailed prints but like any additive process, takes quite a bit of time to finish a print. Luckily, though, the printer uses the MSLA, or masked stereolithography, process, which exposes the entire resin tank to ultraviolet light in one exposure. That means that, unlike FDM printers, it takes no more time to print a dozen models than it does to print one. The upshot of this is that however many models can fit on the MSLA print platform can be printed in the same amount of time it takes to print the part with the most layers. In [Andrew]’s case, 22 identical figurine models were printed in the same three hours it took to print just one copy.

It seems obvious, but sometimes the simplest tips are the best. And the next step is obvious, especially as MSLA printer prices fall: a resin printer farm, with each printer working on dozens of small parts at a time. Such a setup might rival injection molding in terms of throughput, and would likely be far cheaper as far as tooling goes. Continue reading “Making The Most Of Your Resin Printer Investment”
Modular Box Design Eases Silicone Mold-Making

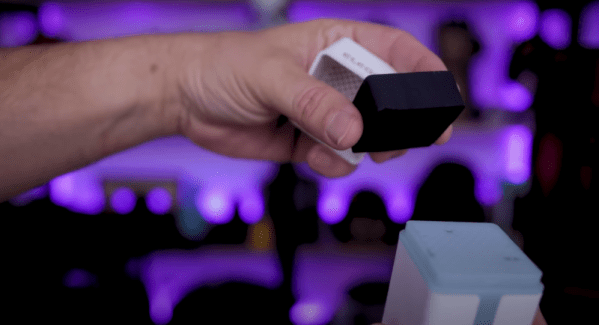
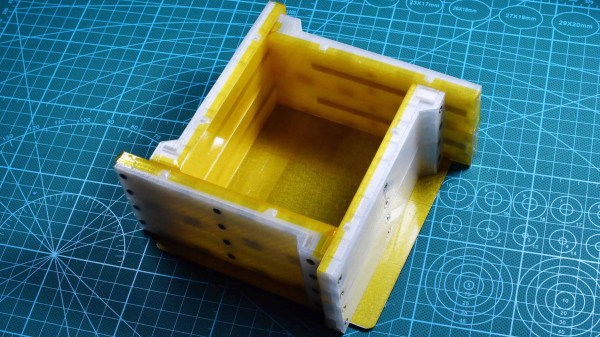
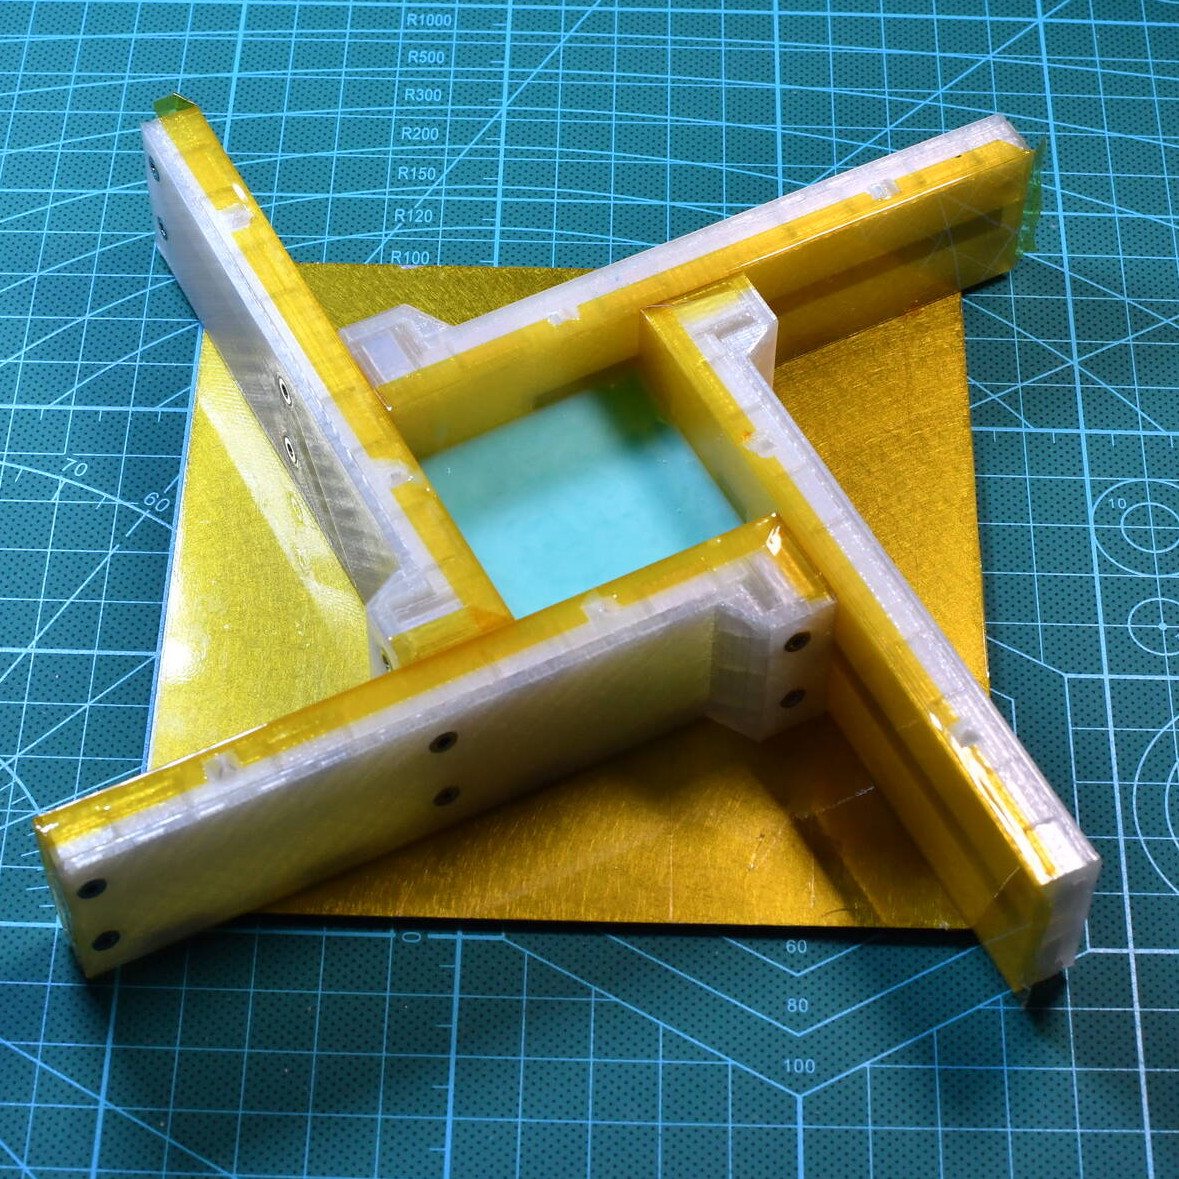
Resin casting is a fantastic way to produce highly detailed parts in a wide variety of colors and properties, and while the process isn’t complicated, it does require a certain amount of care and setup. Most molds are made by putting a part into a custom-made disposable box and pouring silicone over it, but [Foaly] was finding the process of making and re-making those boxes a bit less optimized than it could be. That led to this design for a re-usable, modular, adjustable mold box that makes the workflow for small parts considerably more efficient.

The walls of the adjustable box are four identical 3D-printed parts with captive magnets, and the base of the box is a piece of laser-cut steel sheet upon which the magnetic walls attach. The positioning and polarity of the magnets are such that the box can be assembled in a variety of sizes, and multiple walls can be stacked to make a taller mold. To aid cleanup and help prevent contamination that might interfere with curing, the inner surfaces of each piece are coated in Kapton tape.

The result is a modular box that can be used and re-used, and doesn’t slow down the process of creating and iterating on mold designs. The system as designed is intended for small parts, but [Foaly] feels there is (probably) no reason it can’t be scaled up to some degree. Interested? The design files are available from the project’s GitHub repository, and if you need to brush up a bit on how resin casting works, you can read all about it here.

Less Stinky Resin Two Ways

After watching [Uncle Jessy’s] video about soy-based 3D printing resin from Elegoo and their miniature air purifiers, we couldn’t decide if the resin doesn’t smell as bad as some other resins or if the air purifier works wonders. Maybe it is a bit of both.

We’ve used Eryone super low odor resin and it has less smell than, say, paint. It sounds like the Elegoo is similar. However, we are always suspicious of claims that any resin is really made with natural ingredients. As [Brent], who apparently has a PhD in chemistry, pointed out, AnyCubic Eco resin makes similar claims but is likely only partially made from soy. Sure, a little less than half is soy-based, but then there’s the other half. Still, we suppose it is better than nothing. That video (also below) is worth watching if you ever wondered why resin solidifies under UV light or what a monomer is.

Continue reading “Less Stinky Resin Two Ways”

Faux Stained Glass Effect, With 3D Printing And Epoxy

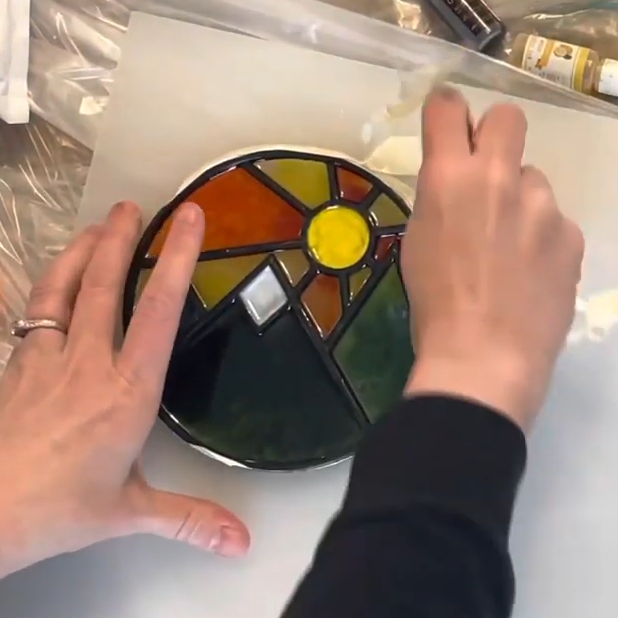
Like the looks of stained glass, but not the amount of work, skill, and materials involved? Well, [Northern Geometry] shows how to sidestep all that nonsense and use a 3D printed frame, epoxy, and some alcohol-based inks to create a pretty good fake stained-glass effect piece of art.

A smooth polypropylene board is the key to a glassy smooth back.

[Northern Geometry] has played with this idea before, but shares some refinements and tips on getting the best results. One suggestion is to begin by securely taping the 3D printed frame to a smooth polypropylene board as a backer. Giving the cured resin a smooth surface is important to get the right look, and since resin will not bond to the polypropylene, it can be used as a backer to get that done.

Once the frame is mounted, pour a small amount of epoxy into each cavity and ensure it gets into every corner, then let it cure. The thin bottom layer of resin will seal things as well as create a glassy-smooth backing that is the perfect foundation for finishing the piece with colored resin as needed.

Once that is done, and everything has had plenty of time to cure fully, just pop the piece off the board. Check it out in the video embedded below, where [Northern Geometry] shows the process from start to finish.

Continue reading “Faux Stained Glass Effect, With 3D Printing And Epoxy”

3D-Printed Press-Forming Tools Dos And Don’ts

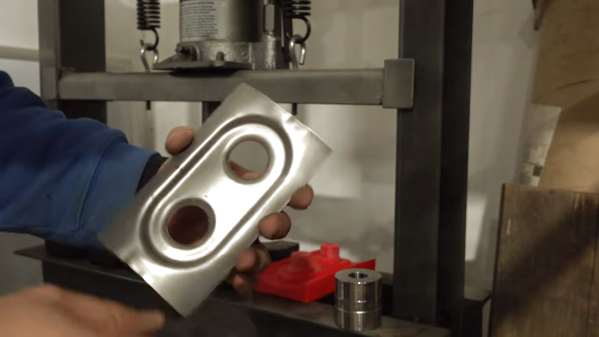
Press-forming is a versatile metal forming technique that can quickly and easily turn sheet metal into finished parts. But there’s a lot of time and money tied up in the tooling needed, which can make it hard for the home-gamer to get into. Unless you 3D-print your press-form tooling, of course.

Observant readers will no doubt recall our previous coverage of press-forming attempts with plastic tooling, which were met with varying degrees of success. But [Dave]’s effort stands apart for a number of reasons, not least of which is his relative newbishness when it comes to hot-squirt manufacturing. Even so, he still came up with an interesting gradient infill technique that put most of the plastic at the working face of the dies. That kept print times in the reasonable range, at least compared to the days of printing that would have been needed for 100% infill through the whole tool profile.

The other innovation that we liked was the idea to use epoxy resin to reinforce the tools. Filling the infill spaces on the tools’ undersides with resin resulted in a solid, strong block that was better able to withstand pressing forces. [Dave] didn’t fully account for the exothermic natures of the polymerization reaction, though, and slightly warped the tools. But as the video below shows, even suboptimal tools can perform, bending everything he threw at them, including the hydraulic press to some extent.

It sure seems like this is one technique to keep in mind for a rainy day. And hats off to [Dave] for sharing what didn’t work, since it points the way to improvements.

Continue reading “3D-Printed Press-Forming Tools Dos And Don’ts”

Electroplating 3D Printed Parts For Great Strength

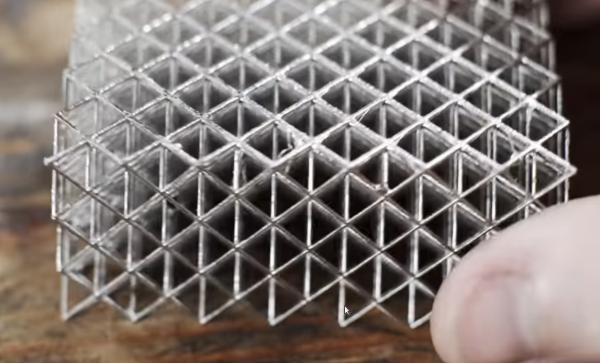
Resin 3D printers have a significant advantage over filament printers in that they are able to print smaller parts with more fine detail. The main downside is that the resin parts aren’t typically as strong or durable as their filament counterparts. For this reason they’re often used more for small models than for working parts, but [Breaking Taps] wanted to try and improve on the strength of these builds buy adding metal to them through electroplating.

Both copper and nickel coatings are used for these test setups, each with different effects to the resin prints. The nickel adds a dramatic amount of stiffness and the copper seems to increase the amount of strain that the resin part can tolerate — although [Breaking Taps] discusses some issues with this result.

While the results of electroplating resin are encouraging, he notes that it is a cumbersome process. It’s a multi-step ordeal to paint the resin with a special paint which helps the metal to adhere, and then electroplate it. It’s also difficult to ensure an even coating of metal on more complex prints than on the simpler samples he uses in this video.

After everything is said and done, however, if a working part needs to be smaller than a filament printer can produce or needs finer detail, this is a pretty handy way of adding more strength or stiffness to these parts. There’s still some investigating to be done, though, as electroplated filament prints are difficult to test with his setup, but it does show promise. Perhaps one day we’ll be able to print with this amount of precision using metal directly rather than coating plastic with it.

Thanks to [smellsofbikes] for the tip!

Continue reading “Electroplating 3D Printed Parts For Great Strength”

More LEDs Means Faster Print Times For 3D Printer, But There’s A Catch

[Jan Mrázek] is no stranger at all to home-grown improvements with his Elegoo Mars SLA 3D printer, and there is a lot going on in his experimental multi-LED upgrade which even involved casting his own lens array. In the end it did speed up his prints by a factor of three to four, though he cooked an LCD to failure in the process. Still, it was a fun project done during a COVID-19 lockdown; as usual there is a lot to learn from [Jan]’s experiences but the mod is not something he necessarily recommends people do for themselves.

[Jan] started by wondering whether better print quality and performance could be obtained by improving the printer’s UV light source. The stock printer uses a single large UV LED nestled into a reflector, but [Jan] decided to try making a more precise source of UV, aiming to make the UV rays as parallel as possible.

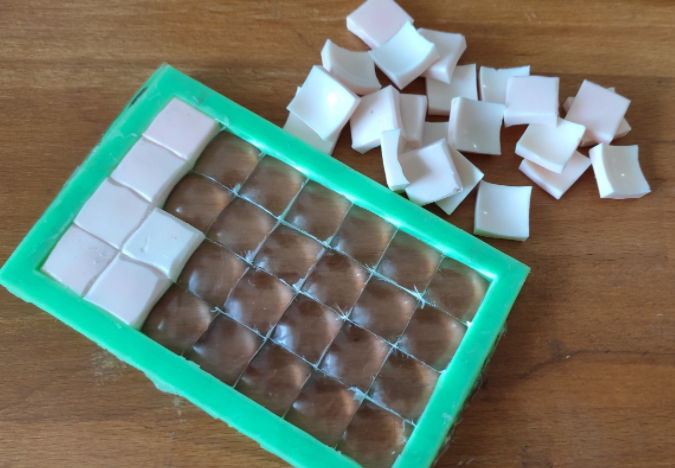
Custom LED array molded in clear epoxy.

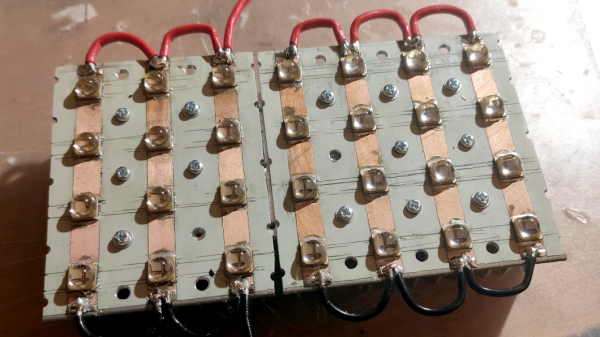
To do this, he took a two-pronged approach. One was to replace the single large UV LED with a 4×7 array of emitters plus heat sink and fans. The other was to make a matching array of custom lenses to get the UV rays as parallel as possible.

Casting one’s own lens array out of clear epoxy was a lot of work and had mixed results, but again, it was a lockdown project and the usual “is-this-really-worth-it” rules were relaxed. In short, casting a single custom lens out of clear epoxy worked shockingly well, but when [Jan] scaled it up to casting a whole 4×7 array of them, results were mixed. Mold deformation and artifacts caused by the areas between individual lenses robbed the end result of much of its promise.

More success was had with the array of UV emitters, which enabled faster curing thanks to higher power, but the heat needs to be managed. The stock emitter of the printer is about 30 W, and [Jan] was running his new array at 240 W. This meant a blazing fast one second exposure time per layer, but the heat generated by the new lighting was higher than anticipated. After only ten hours the LCD failed, probably at least in part due to the heat. [Jan] halved the power of the array down to 120 W and added an extra fan, which appears to have done the trick. Exposure time is two to three seconds per layer, and it’s up to 150 hours of printing without problems.

Again, it’s not a process [Jan] necessarily recommends to others (and he definitely recommends buying lenses if at all possible instead of casting them) but as usual there is a lot to learn from his frank sharing of results, both good and bad. We’ve seen 3D-printed lenses as well as adding WiFi connectivity to one of these hobbyist printers, and it’s great to see the spirit of hacking alive and well when it comes to these devices.