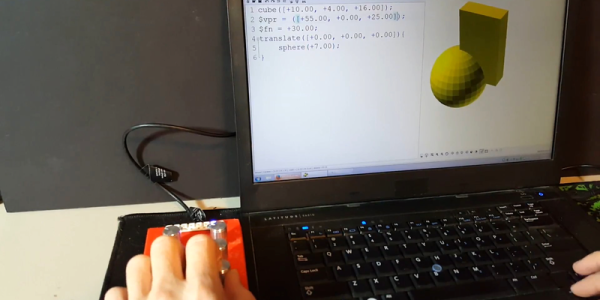
This one is clearly from the “it’s all fun and games until someone loses an eye” file, and it’s a bit of a departure from [Make It Extreme]’s usual focus on building tools for the shop. But what’s the point of having a well-equipped shop if you don’t build cool things, like this unique homebrew electric gun?
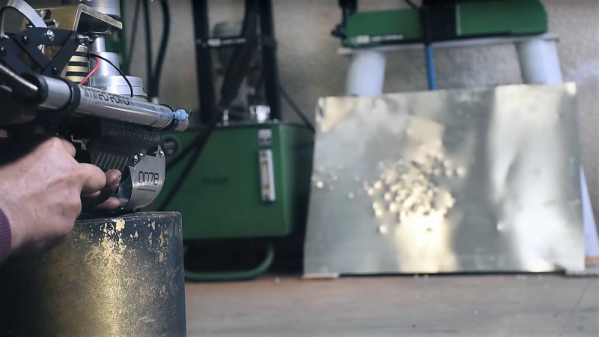
When we hear “electric gun” around here, we naturally think of the rail guns and coil guns we feature on a regular basis, which use stored electric charge to accelerate a projectile using electromagnetic forces. This gun is much simpler than that, using purely mechanical means to accelerate the projectiles. The heart of the unit is a machined aluminum spiral from an old scroll compressor, which uses interleaved orbiting spirals to compress gasses. This scroll was cut down to reduce its mass and fixed to a complex shaft assembly allowing it to spin up to tremendous speed with a powerful electric motor. A hopper feeds the marble-sized ammo into the eye of the scroll, which spits it out at high speed. Lacking a barrel, the gun can only spew rounds in the general direction of the target, but it makes up for inaccuracy with an impressive rate of fire — 100 rounds downrange in two seconds. It’s pretty powerful, too, judging by the divots in the sheet steel target in the video below.
Like all of [Make It Extreme]’s build, a lot of effort went into this, and it shows. Their other fun builds of dubious safety include these electromagnetic wall climbers and these “Go Go Gadget” legs.
Continue reading “Rotary Electric Gun Might Not Put Your Eye Out, Kid”

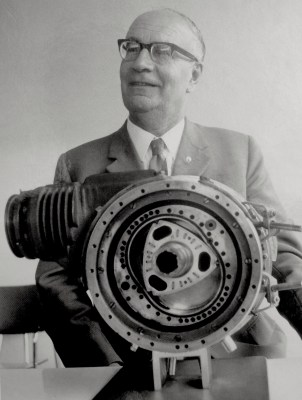 Felix Wankel’s engine was conceived during a dream. In it, 17-year-old Felix was driving his car to a concert. When he arrived, he bragged to his friends that his car used a new type of engine – half turbine, half reciprocating. “It is my invention!” he told his friends. Upon waking up, Wankel became dedicated to building his engine. Though he never received a formal degree (or a driver’s license), Wankel was a gifted engineer.