Probe The Galaxy On A Shoestring With This DIY Hydrogen-Line Telescope

Foil-lined foam insulation board, scraps of lumber, and a paint-thinner can hardly sound like the tools of a radio astronomer. But when coupled with an SDR, a couple of amplifiers, and a fair amount of trial-and-error tweaking, it’s possible to build your own hydrogen-line radio telescope and use it to image the galaxy.

As the wonderfully named [ArtichokeHeartAttack] explains in the remarkably thorough project documentation, the characteristic 1420.4-MHz signal emitted when the spins of a hydrogen atom’s proton and electron flip relative to each other is a vital tool for exploring the universe. It lets you see not only where the hydrogen is, but which way it’s moving if you analyze the Doppler shift of the signal.

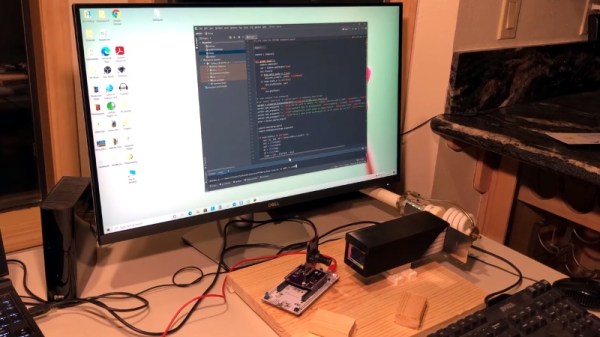
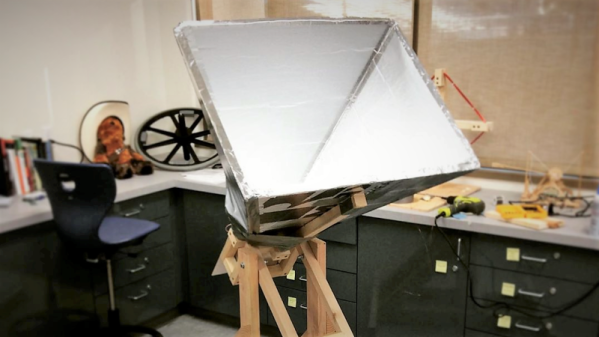
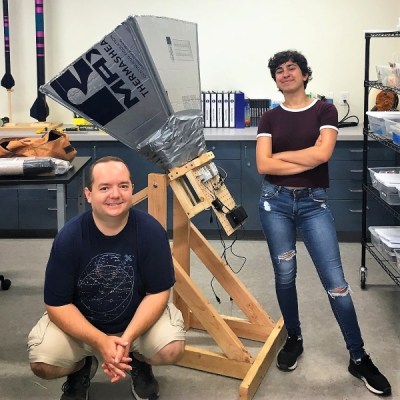
But to do any of this, you need a receiver, and that starts with a horn antenna to collect the weak signal. In collaboration with a former student, high school teacher [ArtichokeHeartAttack] built a pyramidal horn antenna of insulation board and foil tape. This collects RF signals and directs them to the waveguide, built from a rectangular paint thinner can with a quarter-wavelength stub antenna protruding into it. The signal from the antenna is then piped into an inexpensive low-noise amplifier (LNA) specifically designed for the hydrogen line, some preamps, a bandpass filter, and finally into an AirSpy SDR. GNURadio was used to build the spectrometer needed to determine the galactic rotation curve, or the speed of rotation of the Milky Way galaxy relative to distance from its center.
We’ve seen other budget H-line SDR receiver builds before, but this one sets itself apart by the quality of the documentation alone, not to mention the infectious spirit that it captures. Here’s hoping that it finds its way into a STEM lesson plan and shows some students what’s possible on a limited budget.

Spectrometer Is Inexpensive And Capable

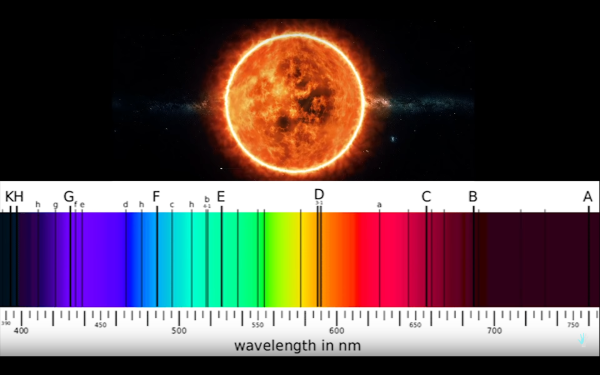
We know the effect of passing white light through a prism and seeing the color spectrum that comes out of the other side. It will not be noticeable to the naked eye, but that rainbow does not fully span the range of [Roy G. Biv]. There are narrowly absent colors which blur together, and those missing portions are a fingerprint of the matter the white light is passing through or bouncing off. Those with a keen eye will recognize that we are talking about spectrophotometry which is identifying those fingerprints and determining what is being observed and how much is under observation. The device which does this is called a spectrometer and [Justin Atkin] invites us along for his build. Video can also be seen below.

Along with the build, we learn how spectrophotometry works, starting with how photons are generated and why gaps appear in the color spectrum. It is all about electrons, which some of our seasoned spectrometer users already know. The build uses a wooden NanoDrop style case cut on a laser engraver. It needs some improvements which are mentioned and shown in the video so you will want to have some aluminum tape on hand. The rest of the bill of materials is covered including “Black 2.0” which claims to be the “mattest, flattest, black acrylic paint.” Maybe that will come in handy for other optical projects. It might be wise to buy first surface mirrors cut to size, but you can always make bespoke mirrors with carefully chosen tools.

Continue reading “Spectrometer Is Inexpensive And Capable”

Vintage Plotter Turned Fruit Spectrometer

Fruit can be a tricky thing: if you buy it ripe you’ll be racing against time to eat the pieces before they turn into a mushy mess, but if you buy the ones which are a bit before their prime it’s not always easy to tell when they’re ready to eat. Do you smell it? Squeeze it? Toss it on the counter to see if it bounces? In the end you forget about them and they go bad anyway. That’s why here at Hackaday we sustain ourselves with only collected rainwater and thermo-stabilized military rations.

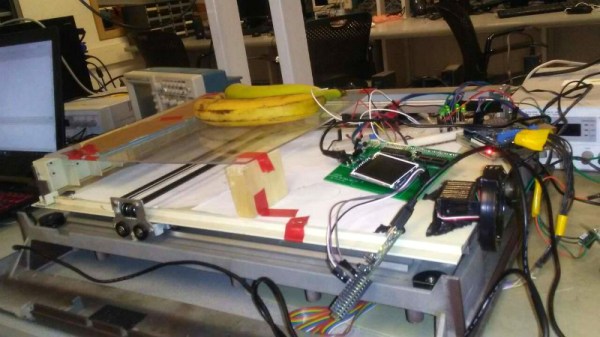
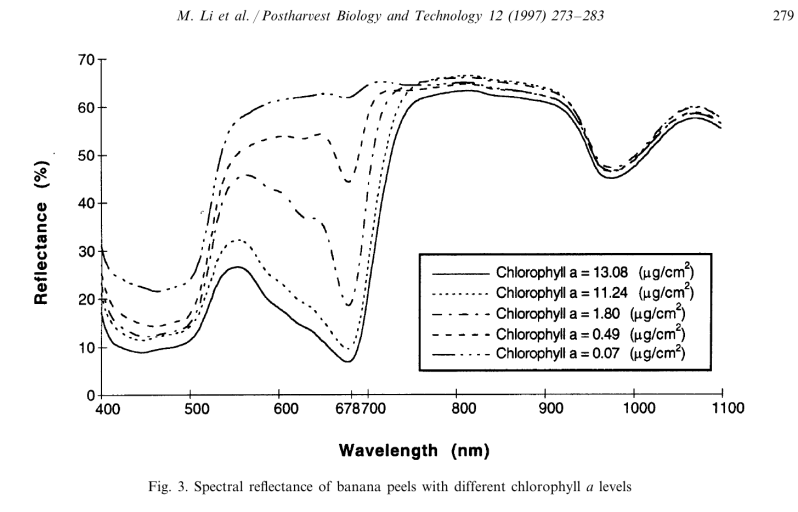
But thankfully Cornell students [Christina Chang], [Michelle Feng], and [Russell Silva] have come up with a delightfully high-tech solution to this decidedly low-tech problem. Rather than rely on human senses to determine when a counter full of fruit has ripened, they propose an automated system which uses a motorized spectrometer to scan an arrangement of fruit. The device measures the fruit’s reflectance at 678 nm, which can be used to determine the surface concentration of chlorophyll-a; a prime indicator of ripeness.

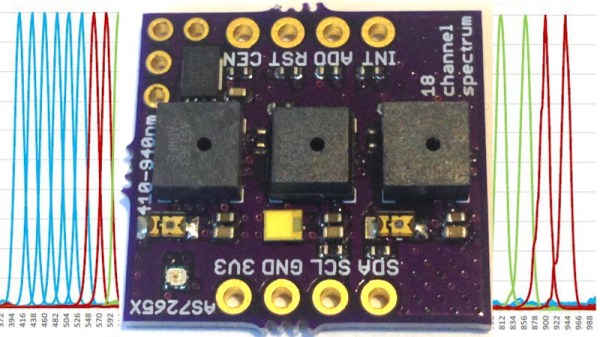
If that sounds a bit above your pay grade, don’t worry. The students were able to build a functional prototype using a 1980’s era plotter, a Raspberry Pi, and a low-cost AS7263 NIR spectral sensor from SparkFun which just so happens to have a peak responsivity of 680 nm. The scanning is performed by a PIC32MX250F128B development board with an attached TFT LCD display so the results can be easily viewed. The Raspberry Pi is used in conjunction with a Adafruit PCA9685 I2C PWM driver to control the plotter’s stepper motors. The scanning and motor control could be done with the PIC32 alone, but to save time the students decided to use the Raspberry Pi to command the PCA9685 as that was what the documentation and software was readily available for.

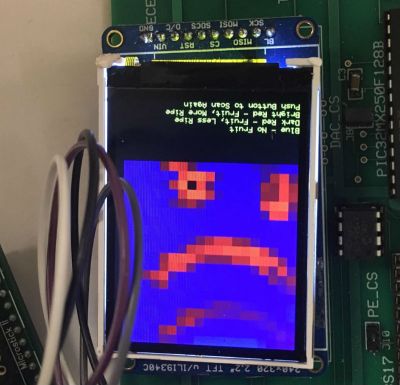
To perform a scan, the stepper motors home the AS7263 sensor module, and then passes it under the fruit which is laying on a clear acrylic sheet. Moving the length of the acrylic sheet, the sensor is able to scan not only multiple pieces of fruit but the entirety of each piece; allowing it to determine for example if a section of a banana has already turned. The relative ripeness of the fruit is displayed to the user on the LCD display as a heatmap: the brighter the color the more ripe it is.

At the end of their paper, [Christina], [Michelle], and [Russell] note that while the scanner worked well there’s still room for improvement. A more scientific approach to calculating how ripe each fruit is would make the device more accurate and take out the guess work on the part of the end user, and issues with darker colored fruit could potentially be resolved with additional calibration.

While a spectrometer might sound like the kind of equipment that only exists in multi-million dollar research laboratories, we occasionally see projects like this which make the technology much more accessible. This year we saw a compact spectrometer in the Hackaday Prize, and going a bit farther back in time we even featured a roundup of some of the most impressive spectrometer builds on Hackaday.io.

Continue reading “Vintage Plotter Turned Fruit Spectrometer”

Putting More Tech Into More Hands: The Robin Hoods Of Hackaday Prize

Many different projects started with the same thought: “That’s really expensive… I wonder if I could build my own for less.” Success is rewarded with satisfaction on top of the money saved, but true hacker heroes share their work so that others can build their own as well. We are happy to recognize such generosity with the Hackaday Prize [Robinhood] achievement.

Achievements are a new addition to our Hackaday Prize, running in parallel with our existing judging and rewards process. Achievements are a way for us to shower recognition and fame upon creators who demonstrate what we appreciate from our community.

Fortunately there is no requirement to steal from the rich to unlock our [Robinhood] achievement, it’s enough to give away fruits of price-reduction labor. And unlocking an achievement does not affect a project’s standings in the challenges, so some of these creators will still collect coveted awards. The list of projects that have unlocked the [Robinhood] achievement will continue to grow as the Hackaday Prize progresses, check back regularly to see the latest additions!

In the meantime, let’s look at a few notable examples that have already made the list:

Continue reading “Putting More Tech Into More Hands: The Robin Hoods Of Hackaday Prize”

Tiny $25 Spectrometer Aims To Identify Materials With Ease

Reflectance spectrometers work on a simple principle: different things reflect different wavelengths in different amounts, and because similar materials do this similarly, the measurements can be used as a kind of fingerprint or signature. By measuring how much of which wavelengths get absorbed or reflected by a thing and comparing to other signatures, it’s possible to identify what that thing is made of. This process depends heavily on how accurately measurements can be made, so the sensors are an important part.

[Kris Winer] aims to make this happen with the Compact, $25 Spectrometer entry for The 2018 Hackaday Prize. The project takes advantage of smaller and smarter spectral sensors to fit the essential bits onto a PCB that’s less than an inch square. If the sensors do the job as expected then that’s a big part of the functionality of a reflectance spectrometer contained in a PCB less than an inch square and under $25; definitely a feat we’re happy to see.

SCiO “Pocket Molecular Scanner” Teardown

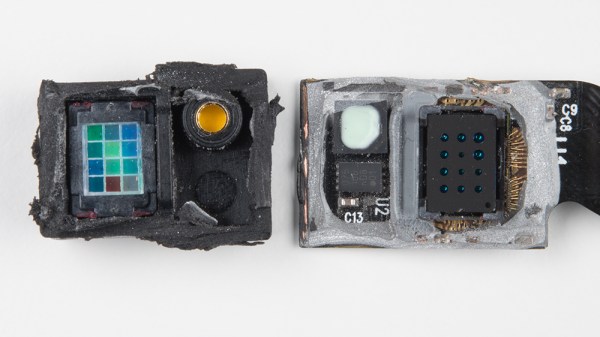
Some of you may remember the SCiO, originally a Kickstarter darling back in 2014 that promised people a pocket-sized micro spectrometer. It was claimed to be able to scan and determine the composition of everything from fruits and produce to your own body. The road from successful crowdsourcing to production was uncertain and never free from skepticism regarding the promised capabilities, but the folks at [Sparkfun] obtained a unit and promptly decided to tear it down to see what was inside, and share what they found.

The main feature inside the SCiO is the optical sensor, which consists of a custom-made NIR spectrometer. By analyzing the different wavelengths that reflect off an object, the unit can make judgments about what the object is made of. The SCiO was clearly never built to be disassembled, but [Sparkfun] pulls everything apart and provides some interesting photos of a custom-made optical unit with an array of different sensors, various filters, apertures, and a microlens array.

It’s pretty interesting to see inside the SCiO’s hardware, which unfortunately required destructive disassembly of the unit in question. The basic concept of portable spectroscopy is solid, as shown by projects such as the Farmcorder which is intended to measure plant health, and the DIY USB spectrometer which uses a webcam as the sensor.

Bring Doping, Microfluidics, Photovoltaics, And More Into The Home

Can you make a spectrometer for your home lab all from materials you have sitting around? We might not believe it from a less credible source, but this MIT course does indeed build a spectrometer from foam board using two razor blades as the silt cover and a writable CD as the diffraction grating. The coolest part is removing the metal backing of the CD.

mit_experiments_thumbHackaday reader [gratian] tipped us off about the course available from MIT courseware called Nanomaker. It boils down some fairly complicated experiments to the kind one can do in the home lab without involving thousands of dollars of lab equipment. The whole point is to demystify what we think of as complicated devices and topics surrounding photovoltaics, organic photovoltaics, piezoelectricity and thermoelectricity.


Spectrometers are used to analyze the wavelengths of a light source. Now that you have a measurement tool in hand it’s time to build and experiment with some light sources of your own. Here you can see an LED that is the topic of one of the course labs.

If you have a bit of background in chemistry this is a good step-by-step guide for getting into these types of experiments at home. It reminds us of some of the really cool stuff [Jeri Ellsworth] was doing in her garage lab, like making her own EL panels.

Continue reading “Bring Doping, Microfluidics, Photovoltaics, And More Into The Home”