DIY Switches For People Who Can’t Push Switches

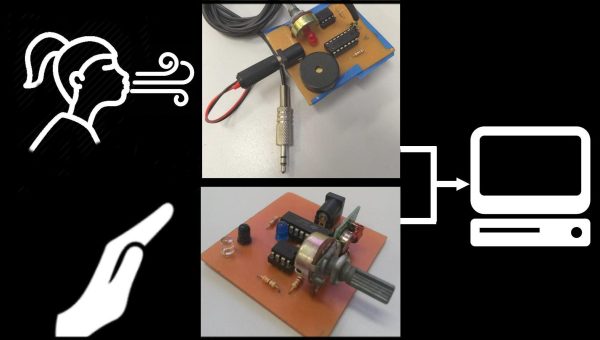
An outstanding number of things most people take for granted present enormous hurdles for people with physical disabilities, including interaction with computers and other digital resources. Assistive technologies such as adaptive switches allow users who cannot use conventional buttons or other input devices to interact with digital devices, and while there are commercial offerings there is still plenty of room for projects like [Cassio Batista]’s DIY Low-cost Assistive Technology Switches.

[Cassio]’s project focuses on non-contact switches, such as proximity and puff-based activations. These are economical, DIY options aimed at improving accessibility for people who are unable to physically push even specialized switches. There are existing products in this space, but cost can be a barrier and DIY options that use familiar interfaces greatly improves accessibility.

Assistive technologies that give people the tools they need to have more control over their own lives in a positive, healthy way is one of the more vibrant and positive areas of open hardware development, and it’s not always clear where the challenges lie when creating solutions. An example of this is the winner of the 2015 Hackaday Prize, the Eyedrivomatic, which allows one to interface the steering of an electric wheelchair to a gaze tracking system while permanently altering neither device; a necessity because users often do not own their hardware.

Save Fingers, Save Lives With A No-Voltage Release For The Shop

Imagine the scenario: you’re spending some quality time in the shop with your daughter, teaching her the basics while trying to get some actual work done. You’re ripping some stock on your cheap table saw when your padiwan accidentally hooks the power cord with her foot and pulls out the plug. You have a brief chat about shop safety and ask her to plug it back in. She stoops to pick up the cord and plugs it back in while her hand is on the table! Before you can stop the unfolding tragedy, the saw roars to life, scaring the hell out of everyone but thankfully doing no damage.

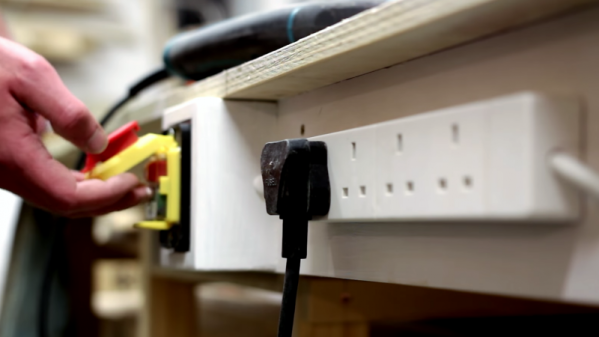
If that seems strangely specific it’s because it really happened, and my daughter was scared out of the shop for months by it. I’ll leave it to your imagination what was scared out of me by the event. Had I only known about no-voltage release switches, or NVRs, I might have been able to avoid that near-tragedy. [Gosforth Handyman] has a video explaining NVRs that’s worth watching by anyone who plugs in anything that can spin, cut, slice, dice, and potentially mutilate. NVRs, sometimes also called magnetic contactors, do exactly what the name implies: they switch a supply current on and off, but automatically switch to an open condition if the supply voltage fails.

Big power tools like table saws and mills should have them built in to prevent a dangerous restart condition if the supply drops, but little tools like routers and drills can still do a lot of damage if they power back up while switched on. [Gosforth] built a fail-safe power strip for his shop from a commercial NVR, and I’d say it’s a great idea that’s worth considering. Amazon has a variety of NVRs that don’t cost much, at least compared to the cost of losing a hand.

True, an NVR power strip wouldn’t have helped me with that cheap table saw of yore, but it’s still a good idea to put some NVR circuits in your shop. Trust me, it only takes a second’s inattention to turn a fun day in the shop into a well-deserved dressing down by an angry mother. Or worse.

Continue reading “Save Fingers, Save Lives With A No-Voltage Release For The Shop”

Get Nostalgic With These GameCube Themed Joy-Cons

There are a lot of good reasons to think fondly of the Nintendo GameCube. Metroid Prime and Rogue Leader knocked it out of the park. The Game Boy Player was cool. There’s even something to be said for having a convenient carrying handle on a system designed for couch multiplayer. But if you ask anyone who played Nintendo’s sixth generation console what part they missed the least, it would probably be the controller. With all the visual flair of a Little Tikes playset and ergonomics designed for an octopus, it’s a controller that works well for first-party Nintendo titles and little else.

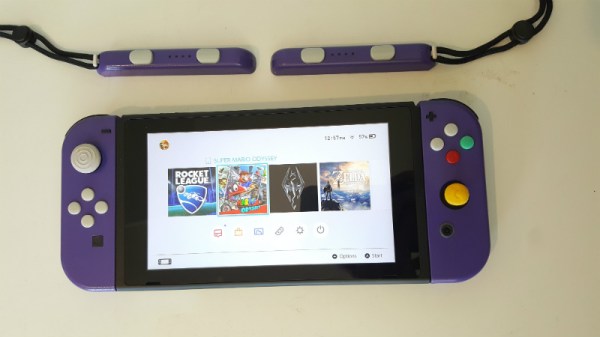
So it’s probably for the best that these Switch Joy-Cons created by [Madmorda] focus on recreating the aesthetics of the GameCube controller for Nintendo’s latest money-printing machine rather than its feel. With a surprising amount of work required to create them, these definitely count as a labor of love by someone who yearns for the days when gaming was more…cubic.

To start with, nobody makes Joy-Con cases in that signature GameCube purple so [Madmorda] had to paint them herself. The longevity of a painted controller is somewhat debatable, but the finish certainly looks fantastic right now.

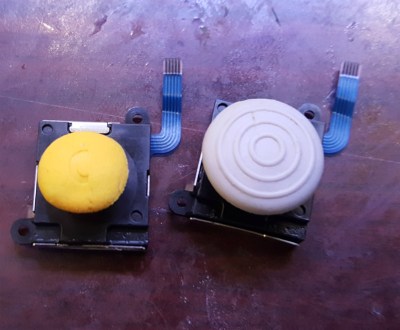
For the left analog stick [Madmorda] was able to use the cap from a real GameCube controller, which fit perfectly. Apparently, Nintendo has been pretty happy with their analog stick sizing decisions for the last two decades or so. The right analog stick was another story, however, and she had to cut the shaft down to size with a Dremel to get the cap to fit.

Finally, molds were made of the original face buttons, which were then used to cast new buttons with colored resin to match the GameCube color scheme. Since the original Switch buttons don’t have indented lettering to get picked up by the mold, she had to laser etch them. This little detail goes a long way to selling the overall look.

The final result looks great, and compared to previous attempts we’ve seen to bring some of that early 2000’s Nintendo style to the Switch, this one is certainly less destructive. Check them out in action after the break!

Continue reading “Get Nostalgic With These GameCube Themed Joy-Cons”

A Dramatic Demo Of AC Versus DC Switching

Switches seem to be the simplest of electrical components – just two pieces of metal that can be positioned to either touch each other or not. As such it would seem that it shouldn’t matter whether a switch is used for AC or DC. While that’s an easy and understandable assumption, it can also be a dangerous one, as this demo of AC and DC switching dramatically reveals.

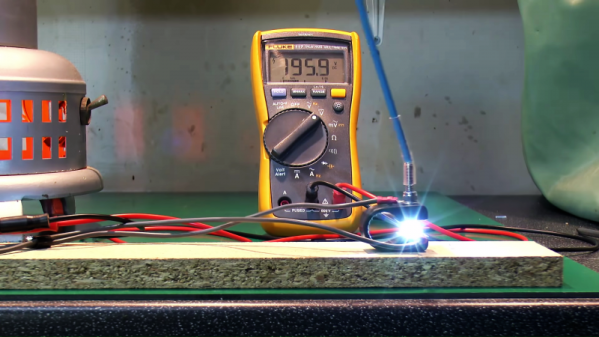
Using a very simple test setup, consisting of an electric heater for a load, a variac to control the voltage, and a homemade switch, [John Ward] walks us through the details of what happens when those contacts get together. With low-voltage AC, the switch contacts exhibit very little arcing, and even with the voltage cranked up all the way, little more than a brief spark can be seen on either make or break. Then [John] built a simple DC supply with a big rectifier and a couple of capacitors to smooth things out and went through the same tests. Even at a low DC voltage, the arc across the switch contacts was dramatic, particularly upon break. With the voltage cranked up to the full 240-volts of the UK mains, [John]’s switch was essentially a miniature arc welder, with predictable results as the plastic holding the contacts melted. Don your welding helmet and check out the video below.

As dramatic as the demo is, it doesn’t mean we won’t ever be seeing DC in the home. It just means that a little extra engineering is needed to make sure that all the components are up to snuff.

Continue reading “A Dramatic Demo Of AC Versus DC Switching”

Thinking Inside The (Cardboard) Box With Nintendo Labo Hacks

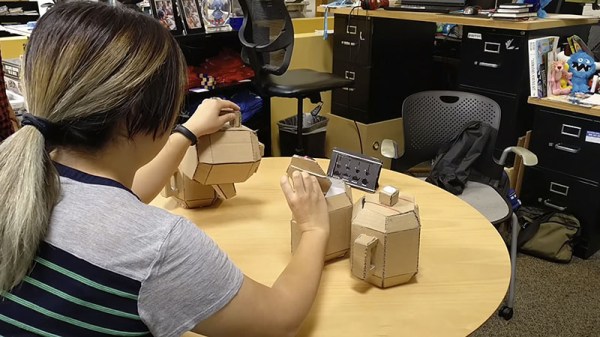
Cardboard is one of the easiest ways to build something physical, far easier than the 3D printing and laser cutting we usually write about here. So when Nintendo released their Labo line of cardboard accessories, it doesn’t take a genius to predict the official product would be followed by a ton of user creations. Nintendo were smart enough to provide not only an internet forum for this creativity to gather, they also hold contests to highlight some of the best works.

The most impressive projects in the winner’s circle combined the one-of-a-kind cardboard creations with custom software written using Toy-Con Garage, the visual software development environment built into the Nintendo Switch console. Access to the garage is granted after a user runs through Nintendo Labo’s “Discover” activities, which walk the user behind the scenes of how their purchased Labo accessories work. This learning and discovery process thus also serves as an introductory programming tutorial, teaching its user how to create software to light up their custom cardboard creations.

It’s pretty cool that Nintendo opened up a bit of the mechanism behind Labo activities for users to create their own, but this is only a tiny subset of Nintendo Switch functionality. We have different hacks for different folks. Some of us enjoy reverse engineering details of how those little Joy-Cons work. Others hack up something to avoid a game puzzle that’s more frustrating than fun. And then there are those who are not satisfied until they have broken completely outside the sandbox.

[via Engadget]

Continue reading “Thinking Inside The (Cardboard) Box With Nintendo Labo Hacks”

Blinging Buttons For Pick And Place

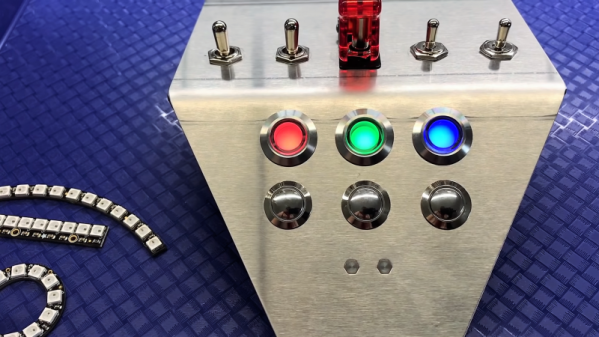
With 3D-printing, cheap CNC machines, and the huge variety of hardware available these days, really slick-looking control panels are getting to be commonplace. We’re especially fond of those nice indicators with the chrome bezels, and the matching pushbuttons with LED backlighting; those can really make a statement on a panel.

Sadly for [Proto G], though, the LEDs in his indicator of choice were just boring old one-color units, so he swapped them out and made these addressable RGB indicators. The stock lamps are not cheap units, but they do have a certain look, and they’re big enough to allow room for a little modification. The original guts were removed with a Dremel to make way for a Neopixel board. [Proto G] wanted to bring the board’s pads out to screw terminals, so he had to adapt the 3.0-mm pitch blocks he had on hand to the 2.54-mm pitch on Neopixel board, but that actually came out neater than you’d think. With a little hot glue to stick it all back together, he now has fully-addressable indicators that can be daisy-chained together and only take up a single GPIO pin.

These indicators and the nice looking panel they’re on is part of a delta pick-and-place robot build [Proto G] has been working for a while. He’s had some interesting side projects too, like the clickiest digital clock in the world and easing ESP32 setup for end-users. While we like all his stuff, we can’t wait to write up the finished delta.

Continue reading “Blinging Buttons For Pick And Place”

Give The Clapper A Hand

While “The Clapper” probably first conjures images of low-budget commercials, it was still a useful way to remotely switch lights and other things around the house. But if the lights you want to switch weren’t plugged into the wall, like a ceiling fan, for example, The Clapper was not going to help you. To add some functionality to this infamous device, [Robin] built one from scratch that has all the extra features built in that you could ever want.

First, the new Clapper attaches to the light switch directly, favoring mechanical action of the switch itself rather than an electromechanical relay which requires wiring. With this setup, it would be easy to install even if you rent an apartment and can’t do things like rewire outlets and it has the advantage of being able to switch any device, even if it doesn’t plug into the wall. There’s also a built-in microphone to listen for claps, but since it’s open-source you could program it to actuate the switch when it hears any sound. It also includes the ability to be wired in to a home automation system as well.

If the reason you’ve stayed out of the home automation game is that you live in a rental and can’t make the necessary modifications to your home, [Robin]’s Clapper might be just the thing you need to finally automate your living space. All the files are available on the project site, including the 3D printing plans and the project code. Once you get started in home automation, though, there’s a lot more you can do with it.

Continue reading “Give The Clapper A Hand”