For those of us with science and engineering backgrounds, opening the character map or memorizing the Unicode shortcuts for various symbols is a tedious but familiar part of writing reports or presentations. [Magne Lauritzen] thought there had to be a better way and developed the Mathboard.
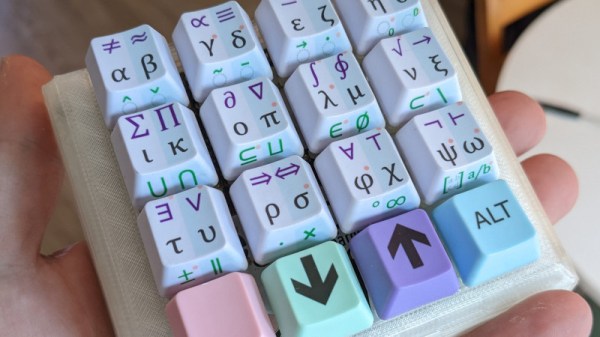
With more than 80 “of the most commonly used mathematical operators” and the entire Greek alphabet, the Mathboard could prove very useful to a wide number of disciplines. Hardware-wise, the Mathboard is a 4×4 macro pad, but the special sauce is in the key set implementation firmware. While the most straightforward approach would be to pick 16 or 32 symbols for the board, [Magne] felt that didn’t do the wide range of Unicode symbols justice. By implementing a system of columns and layers, he was able to get 6+ symbols per key, giving a much greater breadth of symbols than just 16 keys and a shift layer. The symbols with a dot next to them unlock variants of that symbol by double or triple-tapping the key. For instance, a lower or capital case of a Greek letter.
The Mathboard currently works in Microsoft Office’s equation editor and as a plain-text Unicode board. [Magne] is currently working on LaTeX support and hopes to add Open Office support in the future. This device was an honorable mention in our Odd Inputs and Peculiar Peripherals Contest. If you’d like to see another interesting math-themed board, check out the one on the MCM/70 from 1974.