Like other owners of the high-end Yamaha MODX, [sn00zerman] wasn’t happy with the synthesizer’s integrated touch screen. It’s a bit small, and not at a very good angle for viewing. So he made it his mission to find some way of adding a larger external touch screen without making any permanent modifications to the expensive instrument.
This might seem like a tall order, but he wasn’t starting from zero. It was already known that you could plug an external display into it if you used a USB to DVI/HDMI adapter; but without the touch overlay it wasn’t a particularly useful trick. He pondered adding an external connector for the device’s built-in touch screen overlay, but that broke his no modifications rule. Considering how much one of these things cost, we can’t blame him for not wanting to put a hole in the side.
So he started to look for a software solution to get him the rest of the way. Luckily the MODX runs Linux, and Yamaha has made good on their GPL responsibilities and released the source code for anyone who’s interested. While poking around, he figured out that the device uses tslib to talk to the touch screen, which [sn00zerman] had worked with on previous projects. He realized that the solution might be as simple as finding a USB touch screen controller that’s compatible with the version of tslib running on the MODX.
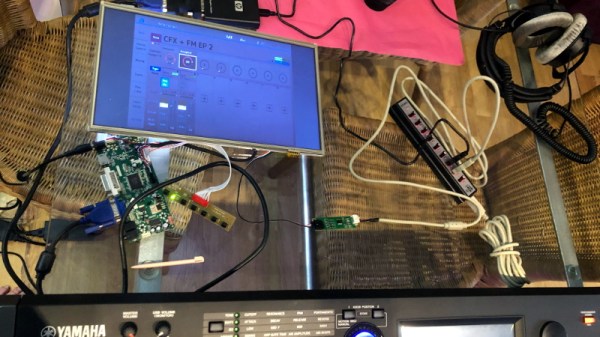
In the end, a trip through his parts bin uncovered a stand-alone touch screen controller that he knew from experience would work with the library. Sure enough, when plugged into the MODX, the OS accepted it as an input device. With the addition of a USB hub, he was able to combine this with an existing display and finally have a more comfortable user-interface for his synthesizer.
Now all he’s got to do is plug in a USB floppy drive, and he’ll have the ultimate Yamaha Beat Laboratory.
Continue reading “Synthesizer Gets An External Touch Screen”