Electric vehicles are everywhere now. Even though battery technology hasn’t had the breakthrough that we need to get everyone out driving an electric car, the price for batteries has dropped enough that almost anything else is possible. The hoverboard was proof of this: an inexpensive electric vehicle of sorts that anyone who was anyone in 2015 had. Taking his cue from there, [Harris] used off-the-shelf parts normally used for hoverboards to build his own battery-powered trike.
The trike is homemade from the ground up, too. The H-frame was bolted together using steel and lots and lots of bolts. Propulsion comes from a set of hub motors that are integrated into the wheels like a hoverboard or electric bicycle would have. Commonly available plug-and-play lithium batteries make up the power unit and are notably small. In fact, the entire build looks like little more than a frame and a seat, thanks to the inconspicuous batteries and hub motors.
Sure we can have our kids back up against a wall, force them to stand up straight, and use a ruler on their head to mark their height on the wall, but what kind of hacker would we be? There isn’t a single microcontroller or any electronic component involved! The DIY-family that calls themselves [HomeMadeGarbage] stood tall and came up with a high-tech tool to measure their kid’s height.
In place of the ruler they got a small wooden box to place on the head. Under the box, at the rear end facing down, they mounted a VL53L0X laser ranging sensor. With a range of 2 meters it’s sure to work with any child. But the box has to be sat level on the child’s head, otherwise the laser will be pointing down at an angle. To handle that they put an MPU6050 6-axis motion sensor in the box along with an Arduino Nano to tie it all together. A LCD display, measurement push-button and LED are mounted outside the box on the rear facing side.
To use it, a parent sits the box on the child’s head, making sure the laser sensor isn’t blocked and can see the floor. The LCD shows the height, along with the acceleration in the x and y directions. The LED is red if the box isn’t level and green if it is. Holding the measurement button pressed puts the tool in measurement mode and when it’s level, the LED turns blue and the LCD display freezes so you can make a note of the height. You’re good for a while, depending on your child’s age. See it being used to measure a child after the break as well as an additional clip showing what the output looks like when waving a hand up and down below it.
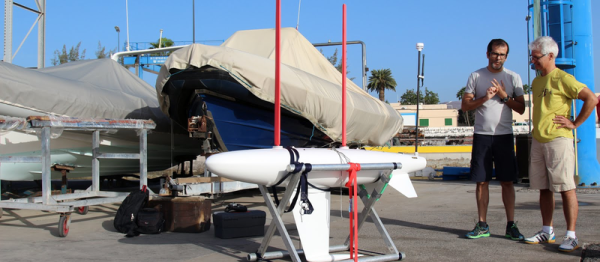
If you’re like us, you had no idea that there even was a World Robotic Sailing Championship. But we’re glad that we do now! And congratulations to the team of A-Tirma G2, the winning boat. (Link in Spanish, difficult to translate — if you can figure out how, post in the comments?)
The Championship has apparently been going on for nine years now, and moves to a different location around the world each year. The contests for 2016 (PDF) are by no means trivial. Besides a simple there-and-back regatta, the robot boats have to hold position, scan a prescribed area, and avoid a big obstacle and return quickly back to their lane. All of this with wind power, of course.
The winning boat used solid sails, which act essentially as vertical wings, and was designed for rough weather. This paid off in the area-scanning test; the winds were so strong that the organizers considered calling it off, but team A-Tirma’s boat navigated flawlessly, giving them enough points to win the event even though camera malfunction kept them from completing the obstacle avoidance.
Unless you’ve sailed, it’s hard to appreciate the difficulty of these challenges to an autonomous vehicle. It’s incredibly hard to plan far ahead because the boat’s motive power source, the wind, isn’t constant. But the boat has, relatively speaking, a lot of inertia and no brakes, so the robot has to plan fairly far in advance. That any of the 2-4 meter long boats could stay inside a circle of 20 meters is impressive. Oh, and did we mention that A-Tirma did all of this calculating and reacting on solar power?
Because the wind is so fickle, drone sailboats are much less popular than drone motorboats — at least using the Hackaday Blogpost Metric ™. The hackerboat project is trying out sails, but they’re still mostly working on powered propulsion. We do have an entry in the 2016 Hackaday Prize, but it’s looking like the development process is in the doldrums. Still, sailing is the best way to go in the end, because windpower is essentially free on the open ocean, which means less work for the solar panels.
As far as role-models go, you’ve basically got the entrants in the World Robotic Sailing Championships. So kudos to the A-Tirma team, and thanks [Nikito] for the tip!
For the first in a series of posts describing how to make a PCB, we’re going with Eagle. Eagle CAD has been around since the days of DOS, and has received numerous updates over the years. Until KiCad started getting good a few years ago, Eagle CAD was the de facto standard PCB design software for hobbyist projects. Sparkfun uses it, Adafruit uses it, and Dangerous Prototypes uses it. The reason for Eagle’s dominance in a market where people don’t want to pay for software is the free, non-commercial and educational licenses. These free licenses give you the ability to build a board big enough and complex enough for 90% of hobbyist projects.
Of course, it should be mentioned that Eagle was recently acquired by Autodesk. The free licenses will remain, and right now, it seems obvious Eagle will become Autodesk’s pro-level circuit and board design software.
Personally, I learned PCB design on Eagle. After a few years, I quickly learned how limited even the professional version of Eagle was. At that point, the only option was to learn KiCad. Now that Eagle is in the hands of Autodesk, and I am very confident Eagle is about to get really, really good, I no longer have the desire to learn KiCad.
With the introduction out of the way, let’s get down to making a PCB in Eagle.
We’re in the last few weeks for entries in the 2016 Hackaday Prize — specifically the challenge is to show off your take on assisstive technology. This is a hugely broad category and I’ve been thinking about it for a while. I’m sure there’s a ton of low-hanging fruit that’s not obvious to everyone. This would be a great time to hit up the comments below and leave your “hey, I always thought someone should make…” ideas. I’m looking forward to reading them and it might just inspire someone to spend the next couple weeks hammering out a prototype to enter.
For me, it’s medication. I knew this can be a challenging problem having gone through a few cycles of prescription medicines in my life. But recently I helped out a family member who was suddenly on many medications taken on eight different times a day — including once, twice, three, and six times per day. This was further compounded by sleep deprivation (having to set alarms at night to take the medicine) and drowsy/woozy effects from the medicine. I can tell you first hand that this is really tough for anyone to deal with and it’s incredibly easy to make a mistake or not be able to remember if you took a dose.
Pill Organizers Do No More or Less
We’ve seen a number of pill organizers before and that’s what I reached for in this case. However, that organizer only had four slots for each day. I didn’t hack it (other than writing on the doors with a Sharpie for when to take each) but even if there were added buttons or LEDs I’m not convinced this would be a marked improvement.
What you see above is my proposal for the medicine problem. Smartphones have become ubiquitous and the processing power and cameras of even budget phones are mind blowing. I think it is entirely possible to write an app that uses computer vision to recognize pills and sync them with the schedule. This may mean whipping the phone out of your pocket, or designing a pill box that has a phone stand next to it (saying that makes me think of using RPi and a Pi camera). Grab your pills and validate them under the camera.
Useful Augmented Reality
The screen of the phone would use augmented reality to overlay information about the pills it sees — you know, like Pokemon Go but in a way that enriches your life. ‘pills, catch ’em all!’ — new pills can be learned of the fly, delivering the user to a screen to identify the pill and the dosing schedule. Taking the validation picture will record when the medicine was taken, and the natural extension of this systems is a pharmacy’s ability to push your dose schedule to your account when you pick up the prescription. A stretch goal would be keeping an eye out for interactions.
This is all very much like how hospitals do it — they’re scanning bar codes on the packaging and the patient bracelet and recording it. This would be an easier user experience and quite frankly I think companies already in this space (like Snapchat and Niantic) could whip this up in a single-day hackathon no problem.
Is it the perfect system? Maybe not. But there is no perfect system or we’d be using it by now. We need you, the world’s talent pool, to step up and make life a little better. Do it in prototype form by October 3rd and you’ll be eligible for one of twenty $1000 cash prizes and a chance at winning the Hackaday Prize. But even if you don’t build a single thing, one idea could be the spark that lets others change the world for the better. So let’s hear it!
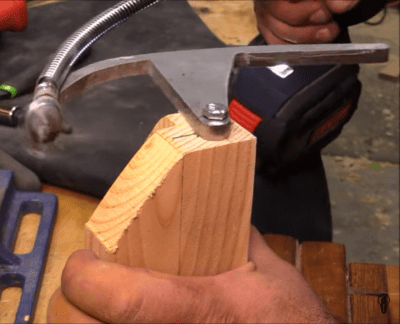
Next time you’re renovating and need to run some cables around corners in you walls, save yourself some frustration by building [izzy swan]’s corner drilling rig. It’s something akin to a custom tunnel boring machine but on a small scale.
Starting with a piece of steel, [izzy] traced and cut out a 90 degree curve with an attached arm that will allow it to rotate from a central block. He then grabs a random drill bit and attaches it to a flex shaft which is secured to the leading point of the steel curve. To complete the handy setup the entire rig is bolted to a block that will clamp over the corner stock.
As it stands, it takes some elbow grease to get the drill through, but it’s not a purpose built setup. On a second demonstration, the flex shaft breaks, but the idea is there. Now, [izzy] advises that this is most easily accomplished when re-framing walls with no drywall obstructing your drill, but the concept for this rig could nonetheless prove handy for welding, grinding, and so forth along any angled curve.
If instead you want to push your carpentry skills to their limits, build a wooden Vespa.
I think the restaurant is really close now… CC: E. Broeks
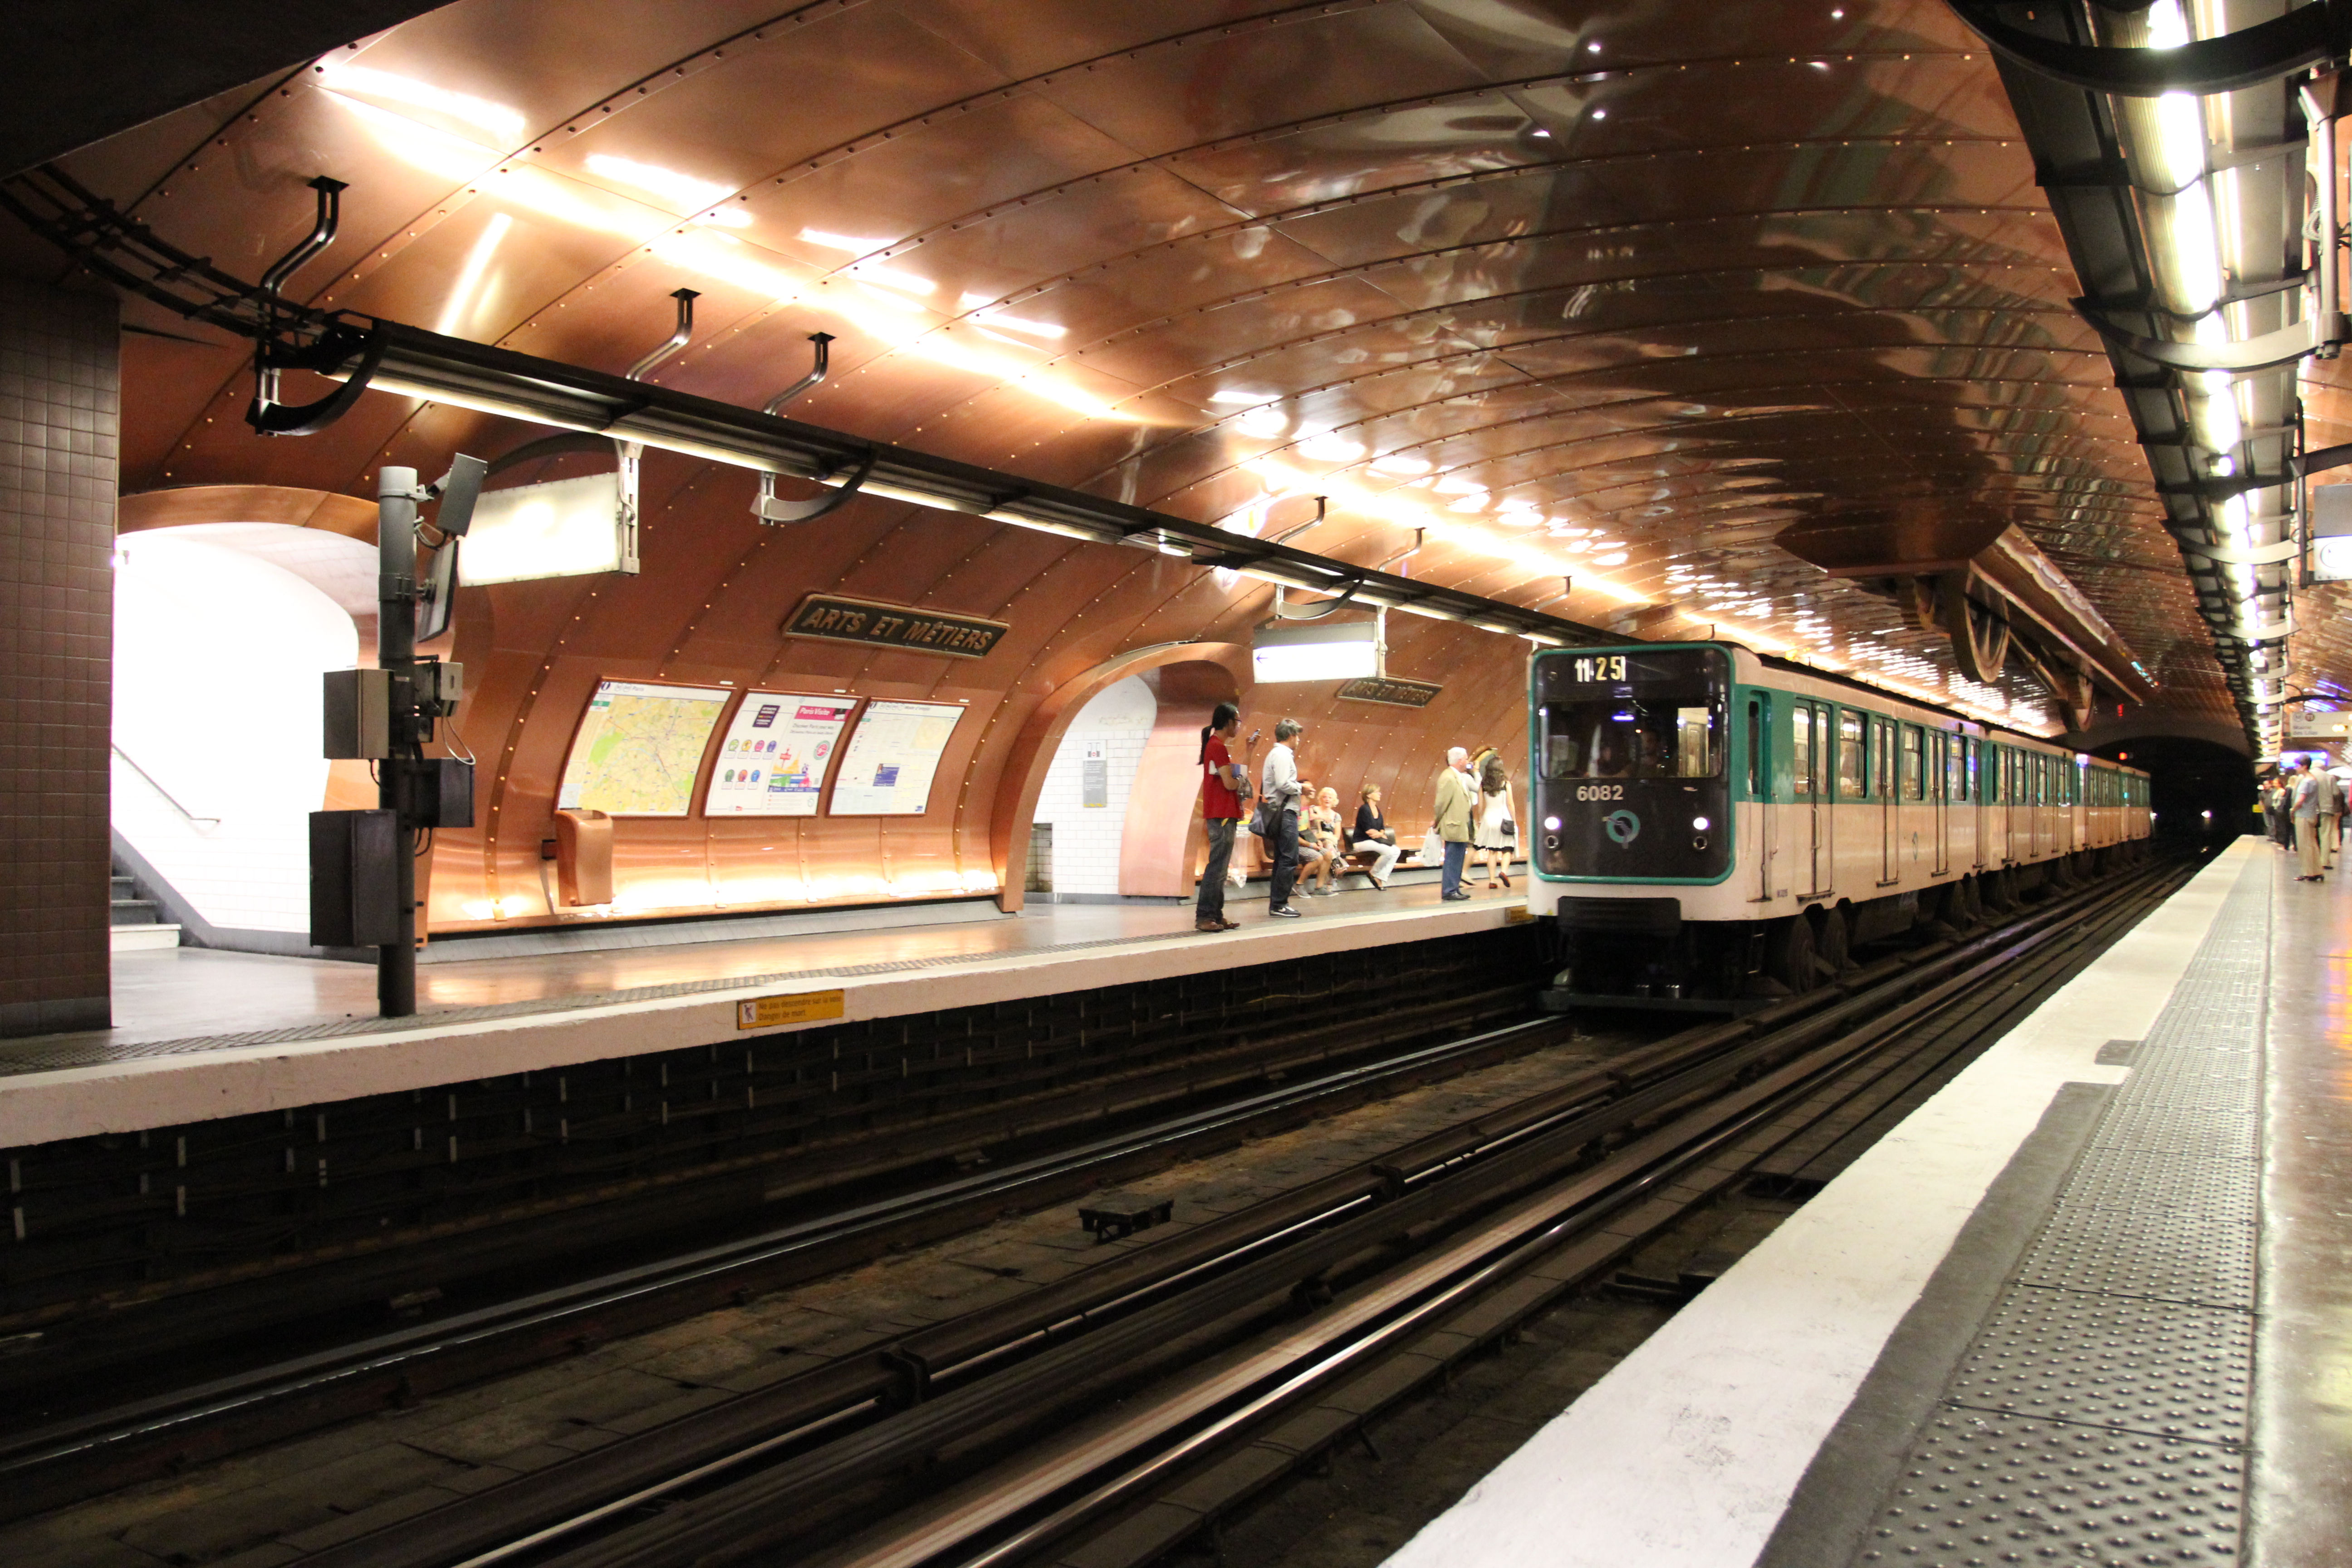
The best way to pull off this deception: tell your significant other that you’d want nothing more than a romantic week in Paris. Arrive in Paris, stash your bags, and then take either the number three or eleven Metro. When you get to the station that looks like the inside of a giant steam engine, Arts et Métiers, get out. You’re now ten Euros away from one of the coolest museums a hacker could visit.
A significant portion of modern science’s beginnings is sitting in the Musée, polished and beautiful. Most of them are housed in cabinets so old they’re part of the exhibit. Now, the Henry Ford museum in Detroit Michigan is a monument to industrialization, and cool in its own right, but it leaves some questions unanswered. We’re all spoiled by desktop CNCs, precision measurement tools for pennies, and more. How did we get here? How did they measure a shaft or turn a screw before precision digital micrometers? What did early automation look like? Early construction?
Also did I mention it has Foucault’s Pendulum? You know, the one that finally convinced everyone that the Earth rotated around an axis? No big deal.
The museum has a few permanent exhibits: instruments scientifique, matériaux, construction, communication, énergie, mécanique et transports.
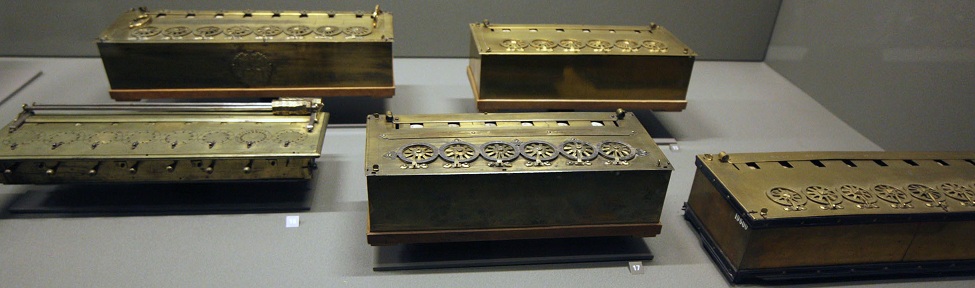
What kind of basic museum would have just one example of Pascal’s work? CC: Anton Lefterov
Instruments Scientifiques was one of my favorites. Not only did it include old scientific instruments, it had sections containing some of the original experiments in optics, computation, and more. For example you can see not just one but a few original examples of Pascal’s Pascaline, arguably the first mechanical calculators in the modern era to be used by the layman for every day calculation, signed by Pascal. It’s also worth noting just how incredible the workmanship of these tools are. They’re beautiful.
Matériaux was initially a disappointment as I entered it from the wrong end. For me it started of with a tragically boring and simplistic display on recycling materials designed primarily to torture children on field trips. Luckily it quickly ramped into a fascinating display on materials manufacturing technology. How did we go from hand looms to fully automated Jacquard looms (of which you can see some of the first examples) to our modern day robotic looms? How did ceramic evolve? What was early steelmaking like? It’s very cool and models are all in beautiful condition.
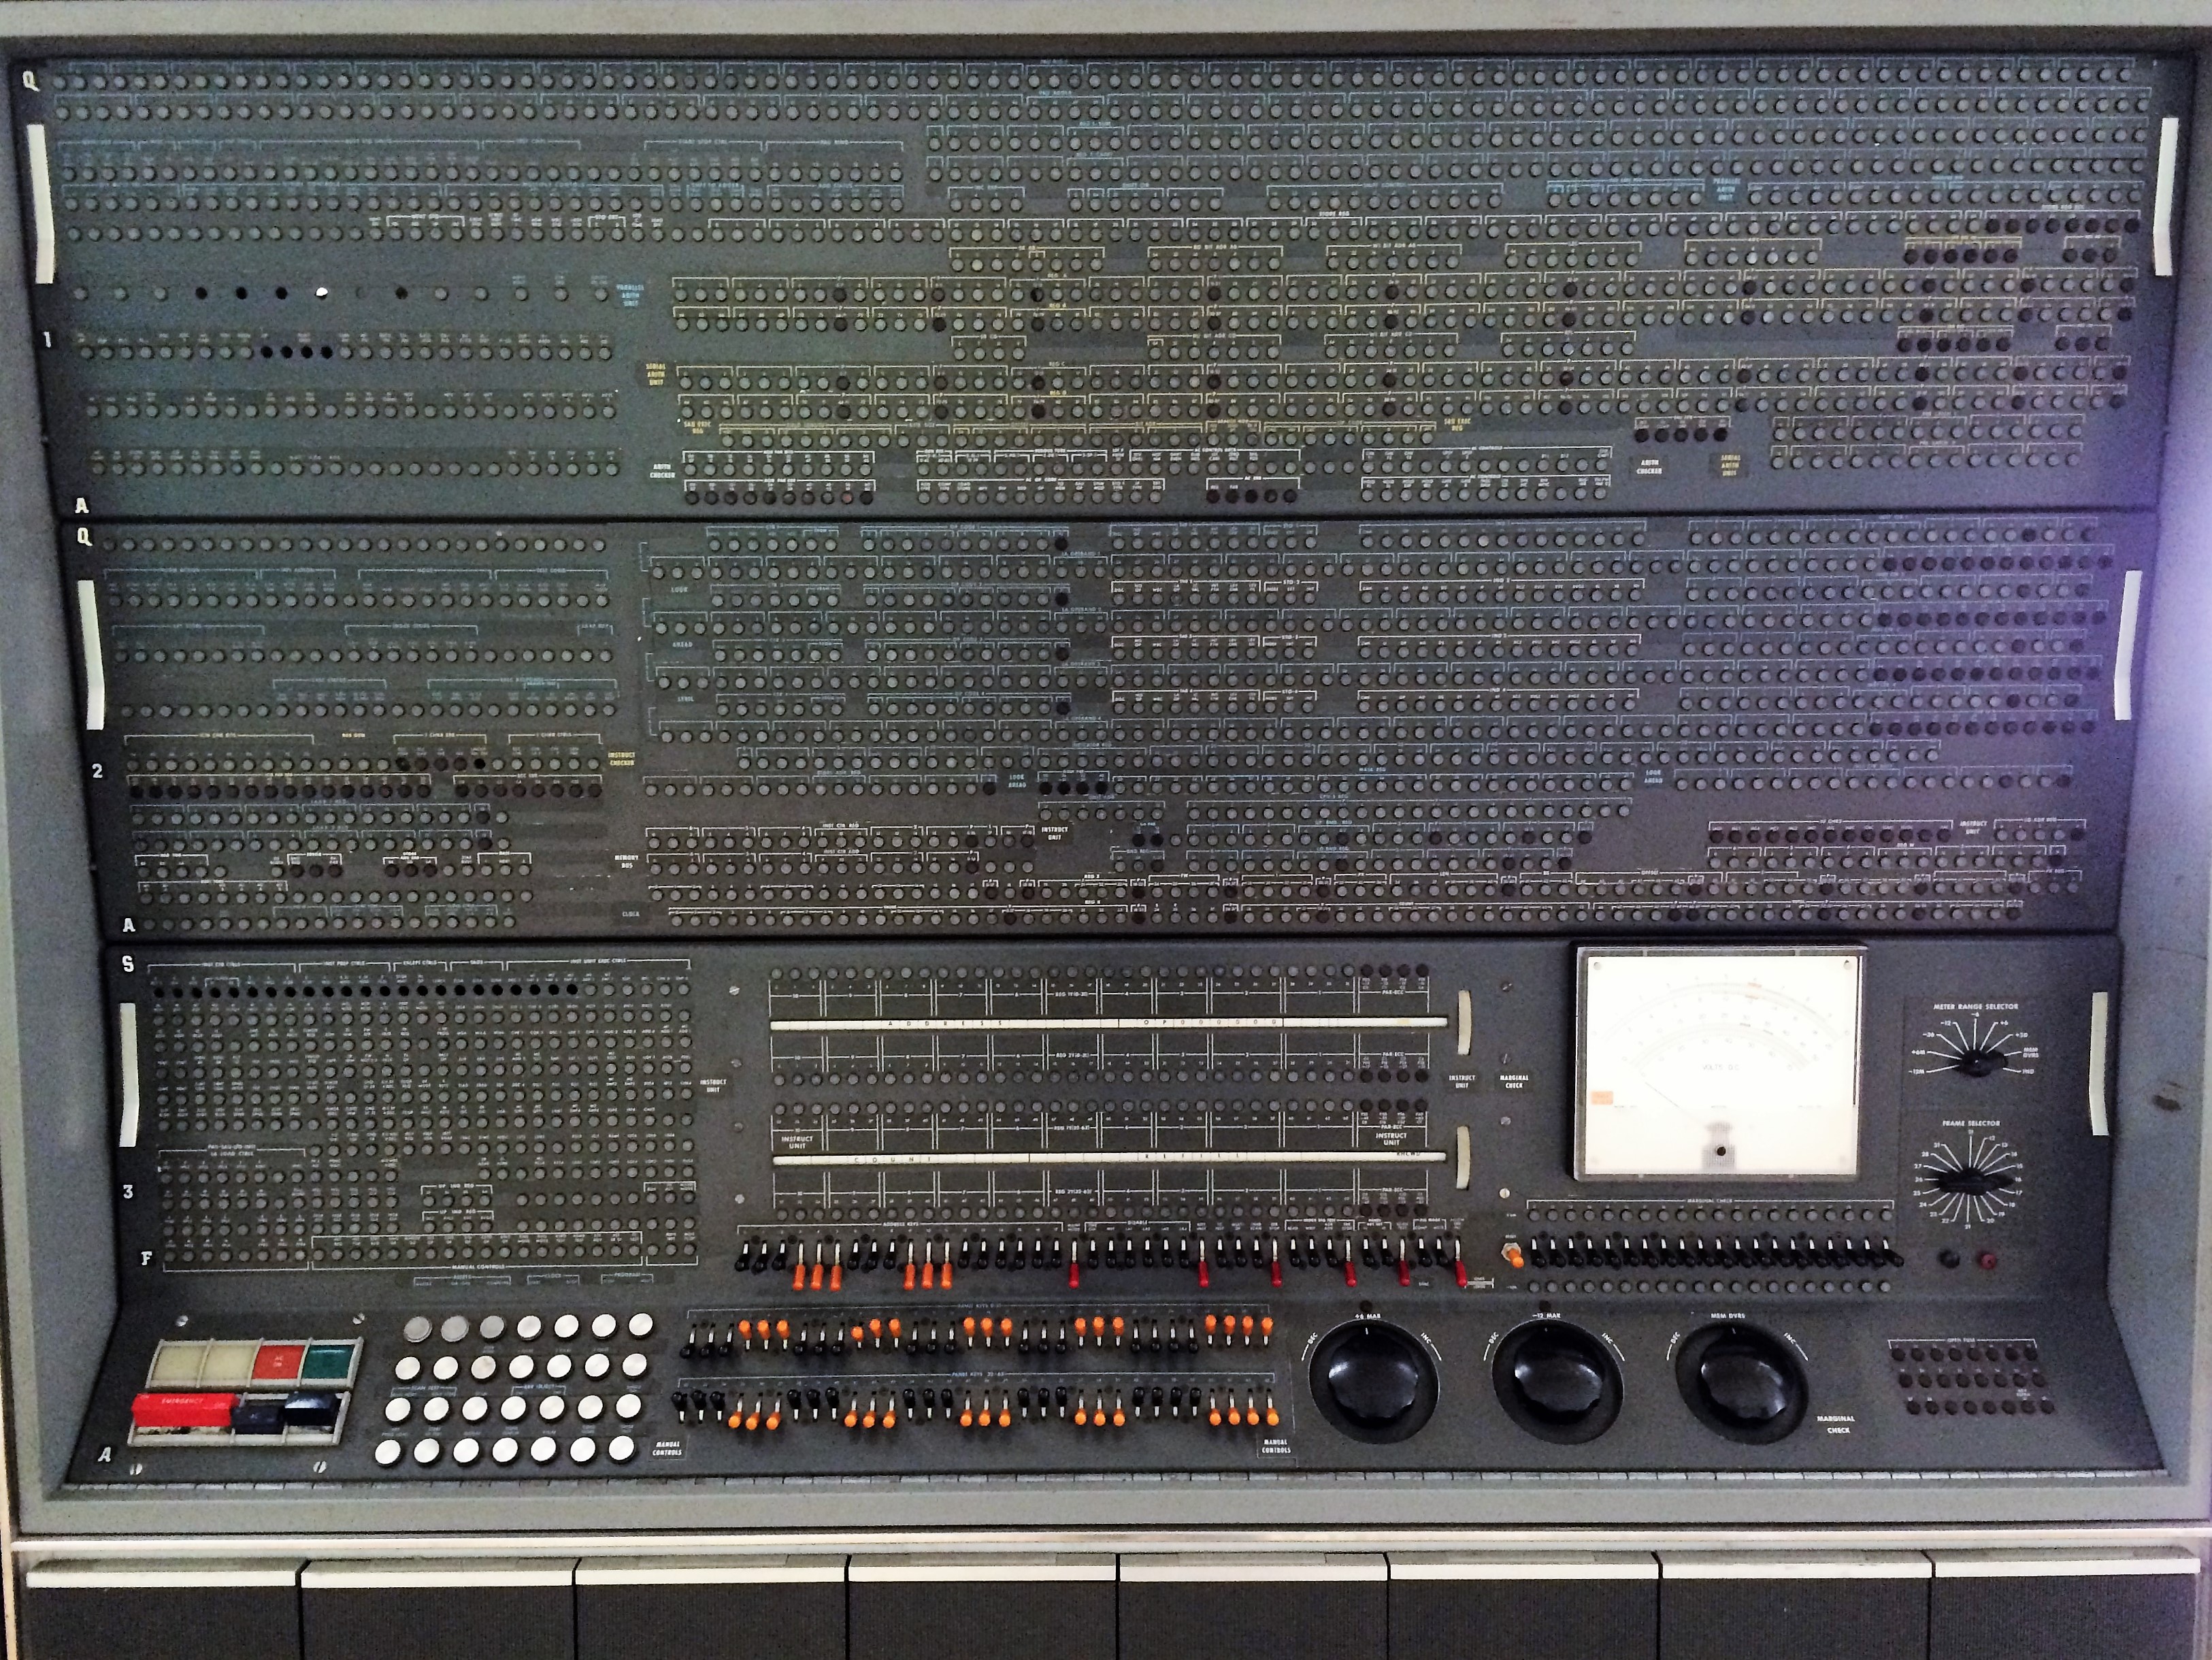
It reeked of copper, machine oil, and phenolics. They just don’t make computers like they used to.
By the time I got to Communication I was reaching the limit of my endurance and also what you can fit into a single day of the museum. It’s a large building. It was packed through many of the early examples of computing, television, and space. There was quite a display of early camera equipment. You could get close enough to some truly massive old computers to smell the still off-gassing phenolics.
Construction held my interest for a long time. It’s not my usual interest, but after living in Paris for a month or so I was absolutely burning with curiosity. How did anyone without a single powered crane or vehicle build so many buildings out of stone? It’s packed for four rooms and two stores from floor to ceiling of beautiful little wood models explaining exactly how.
Énergie was quite cool. It followed the development of steam power for the most part. It started with primitive waterwheels. Moved on to turbines. Then showed the gradual increase in complexity until the the modern day. It had some internal combustion too, but much of that was reserved for the transports section of the museum. It also had some interactive displays to entertain children and Hackaday writers. However they were in desperate need of an oiling and this is by far the most ear-piercingly squeaky exhibit in the whole building.
Mécanique is competing with instruments scientifique as my favorite exhibit. Have you ever wanted to see hundreds of examples of screw machines, old lathes, and the evolution of the milling machine? What about models of the factories that built steam engines or massive wagon wheels. They even had a lathe that belonged to a French king. Apparently he thought metalworking was the way to get in touch with the common people.
Transports was a nice exhibit, but it fell a little short for me since I’d been to the aforementioned Henry Ford museum. However, it covered the history of some of the European automobile manufacturers pretty well. Had a nice section on trains and subways. And even had some models of the ships used in the European Space Agency.
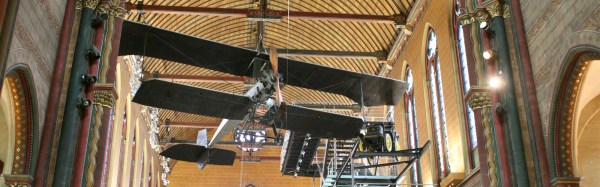
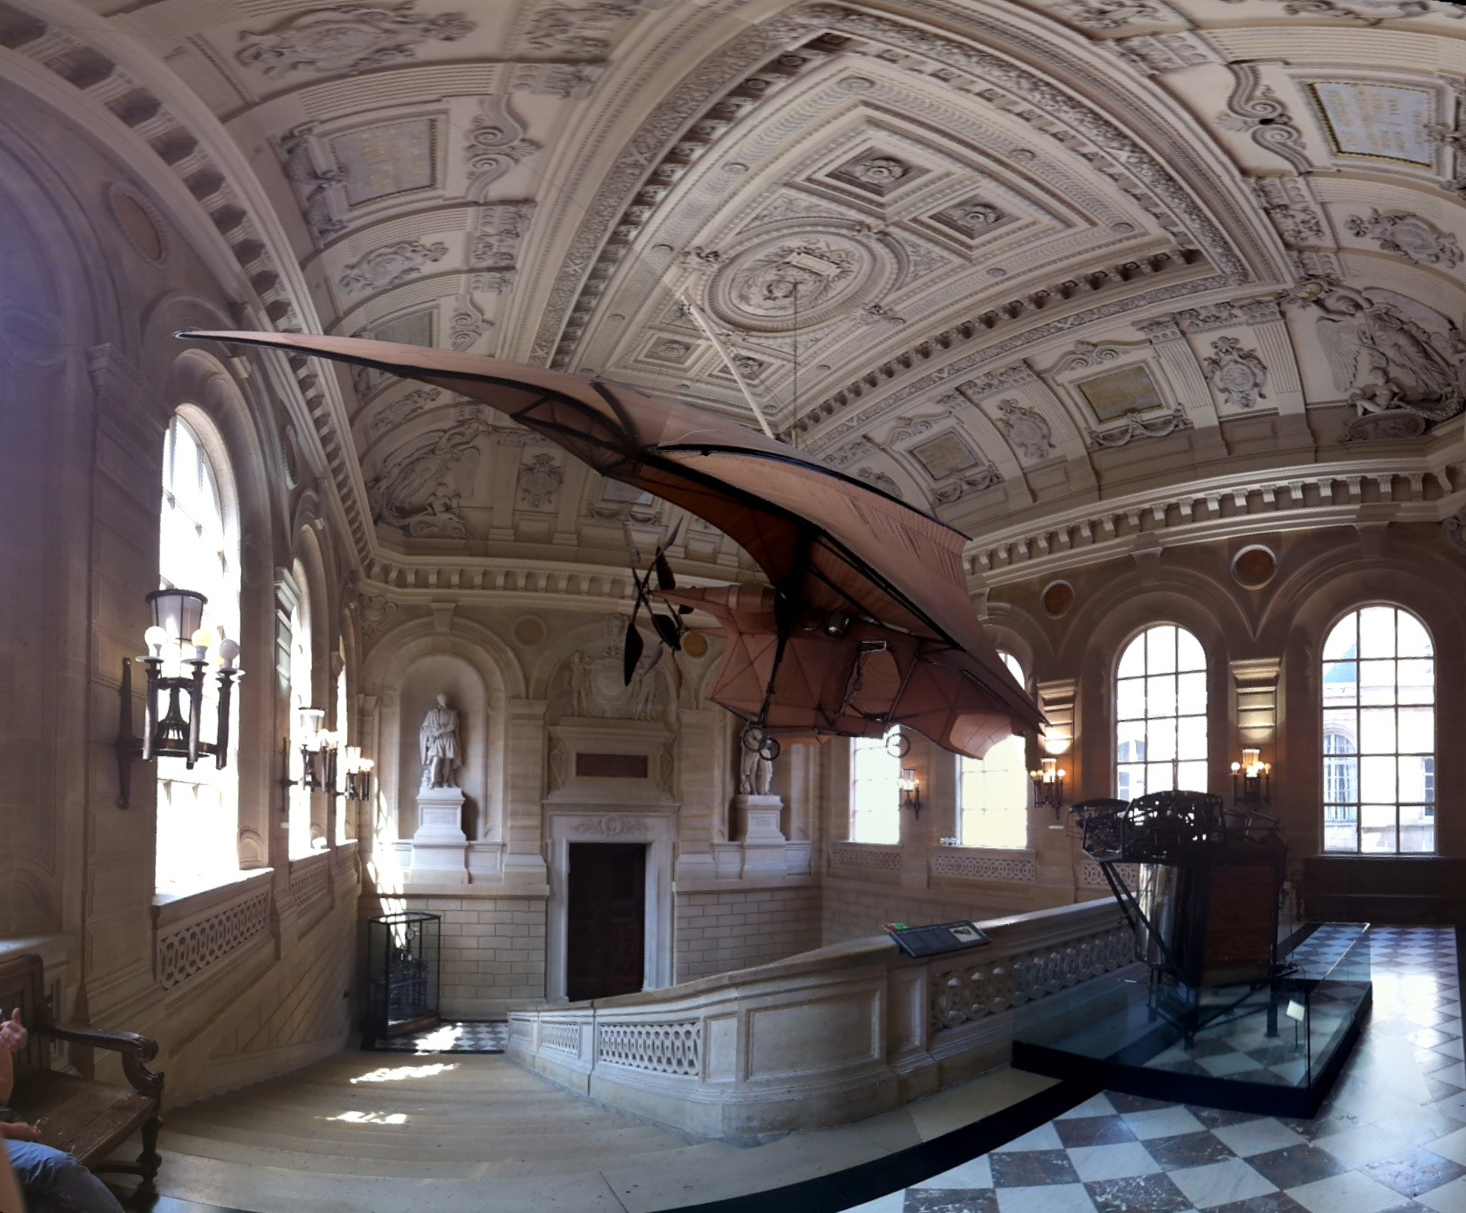
The entrance of the school. Has some original, “flying,” machines. CC: King Boshi
The last exhibit is the museum itself. It’s an historic building. It was originally built as a school for training engineers in 1794 but as the school grew out of it, it slowly transformed into the museum it is today. The architecture is beautiful. It’s adorned in stone and statue like all the French museums. It also has sections cut out in some of the higher storeys of the building so you can see how it was constructed.
Part of its beauty is also related to the school swallowing up the Priory of Saint Martin des Champs (Google translate does a great job if you don’t read French). The Priory is a beautiful old church, founded in 1079. It was home to the last trial by combat the country would see. You can piece together the story between the two pages dedicated to the combatants Jean de Carrouges and Jacques Le Gris.
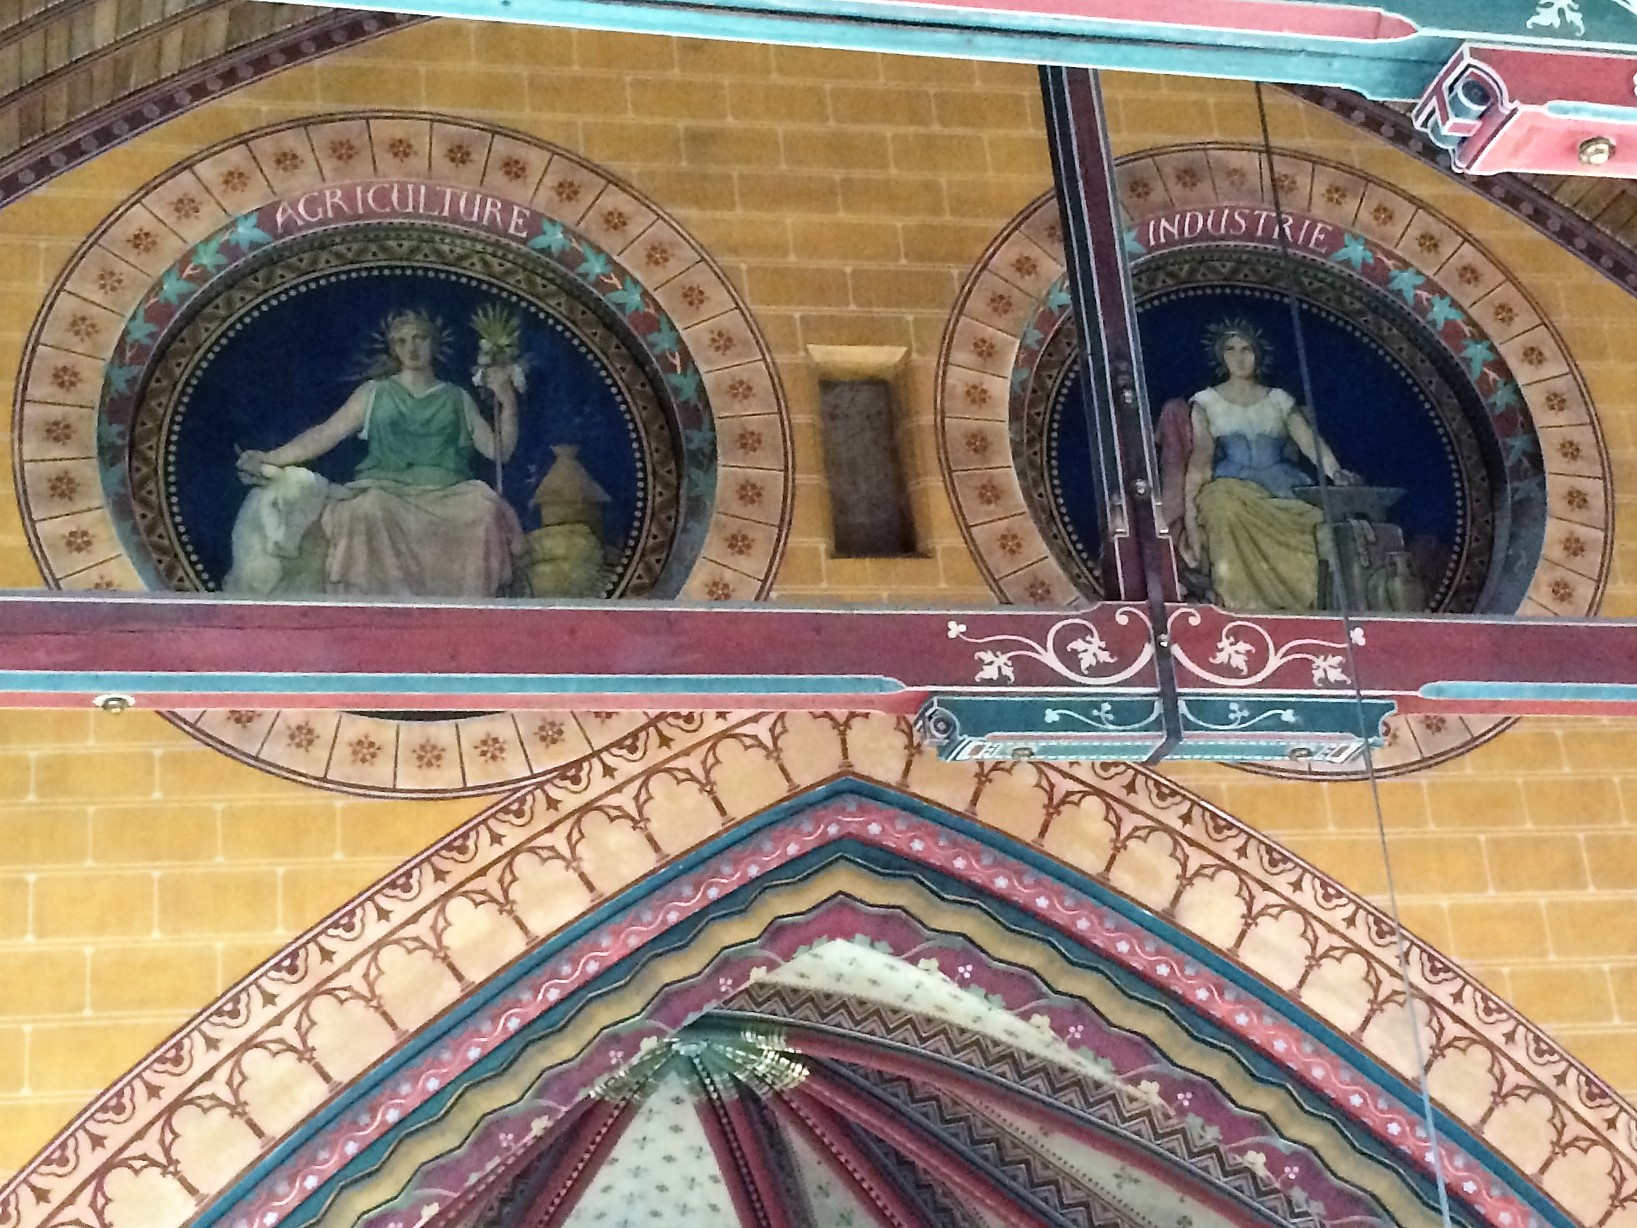
The muses of agriculture and industry now look over the sanctuary.
The final display in the museum is in the church. It holds Foucault’s pendulum, dangling from the center of the sanctuary. If you get there early enough in the day you may get to watch it knock over a peg or two and prove the rotation for yourself.
Rather than the statues of the saints there are statues of the muses of Industrie and Agriculture. The hall is filled with more exhibits. There are cutaway original automobiles. A model of the Statue of Liberty. A catwalk lets you take a high view of the surroundings. It is also beautiful in and of itself. The church is well maintained and painted in the style original to them.
If you find yourself in Paris with a few hours (or days) to spare I highly recommend this museum. Any technical person would be hard pressed to leave uninspired and unawed by the display. It’s good to get a perspective on the past.


 Starting with a piece of steel, [izzy] traced and cut out a 90 degree curve with an attached arm that will allow it to rotate from a central block. He then grabs a random drill bit and attaches it to a flex shaft which is secured to the leading point of the steel curve. To complete the handy setup the entire rig is bolted to a block that will clamp over the corner stock.