Auto-Tracking Sentry Gun Gives Deer A Super Soaking

Things rarely go well when humans mix with wildlife. The problems are exacerbated in the suburbs, where bears dine on bird feeders and garbage cans, raccoons take up residence in attics, and coyotes make off with the family cat. And in the suburbs, nuisance wildlife can be an intractable problem because the options for dealing with it are so limited.

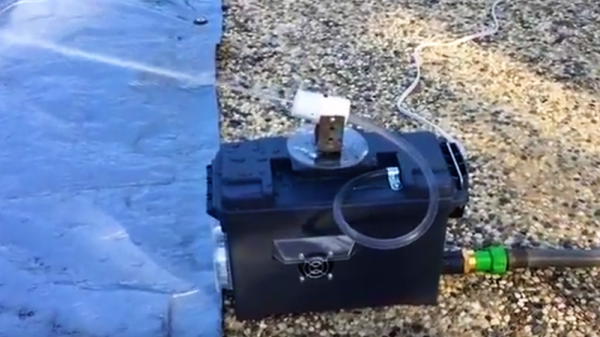
Not to be dissuaded in the battle to protect his roses, [dlf.myyta] built this motion-activated sentry gun to apply some watery aversion therapy to marauding deer. Shown in action below against a bipedal co-conspirator, the sentry gun has pretty much what you’d expect under the hood — Raspberry Pi, NoIR camera, a servo for aiming and a solenoid valve to control the water. OpenCV takes care of locating the intruders and swiveling the nozzle to center mass; since the deer are somewhat constrained by a fence, there’s no need to control the nozzle’s elevation. Everything is housed nicely in a plastic ammo can for portability and waterproofing. Any target that stands still for more than three seconds gets a hosing; we assume this is effective, but alas, no snuff films were provided.

We’re not sure if [dlf.myyta]’s code can discern friend from foe, and in this litigious world, hosing the neighbor’s kid could be a catastrophe. Perhaps version 2.0 can include image recognition for target verification.

Continue reading “Auto-Tracking Sentry Gun Gives Deer A Super Soaking”

A New Life For A Dead VIC-20

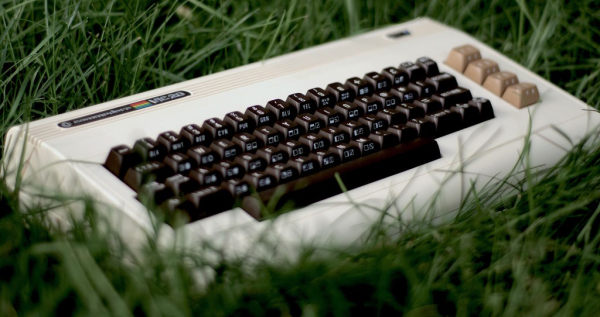
What was the first computer you bent to your programmatic will? If you’re old enough, it was probably a Commodore. For [Jagged-path], it was a VIC-20. After finding a broken one on Kijiji, he recaptured that 80s feeling with VicPi, a revitalization project that marries modern computing power with vintage form factor.

The VicPi can be used as a standalone computer or a USB keyboard for an external computer. As you’ve probably guessed, there’s a Raspberry Pi involved. There is also a Keyrah board, which is arguably the easiest way to convert Commodore (and Amiga) keystrokes to USB without breaking a sweat.

There are a lot of nice touches that really make this project. A toggle switch on the back selects between VicPi mode and keyboard mode, and the distinction is made with a two-color LED in place of the VIC-20’s power LED. [Jagged-path] used panel mount cables to extend the HDMI, 3.5mm, and USB ports and ran them out to a custom metal panel that’s treated with rubberized black paint. Another nice touch: the dedicated keyboard port is USB-B, so it’s easy to differentiate from the Pi inputs.

If you have a working VIC-20 but not the rare Votrax Type ‘n Talk synthesizer peripheral, you can use an old Android phone to hear those Voodoo Castle responses.

Cramming A Pi Zero Into A Cheap Handheld Game

At this point, we’ve seen the Raspberry Pi jammed into what amounts to every retro game system, handheld or otherwise, that was ever released. While they’re always fun builds, invariably somebody will come along who is upset that the original hardware had to be gutted to create it. It seems as if with each post, a classic gaming aficionado out there has his or her heart broken just a bit more. Will no one put an end to the senseless slaughter of Game Boys?

As it so happens, not all hardware modders are such unconscionable brutes. [Starfire] recently sent his latest creation into the tip line, and it’s designed specifically to address the classic gaming massacre in which Hackaday has so shamefully been a collaborator.  His build sacrifices a portable Genesis built by AtGames, and turns it into a Raspberry Pi Zero portable running RetroPie.

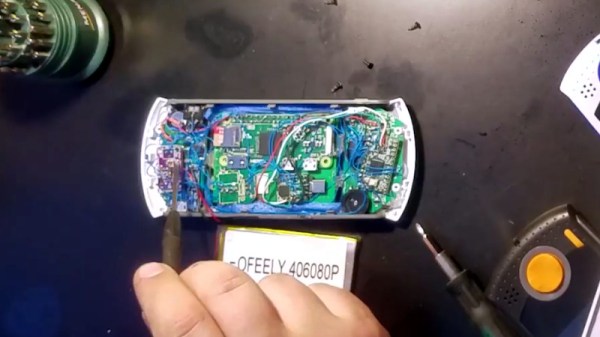
Opening up the back panel of his portable Pi shows an incredible amount of hardware smashed into the tiny package. Beyond the obvious Pi Zero, there’s a iUniker 2.8-inch LCD, a 2,200 mAh battery, a two-port USB hub, a Teensy microcontroller, a USB sound card, an audio amplifier, a LiPo charging module, and a boost converter. [Starfire] measured peak power consumption to be 500 mA, which should give about a 3.5 hour run time on the 2,200 mAh battery.

This is all the more impressive when you realize the original AtGames PCB is still in the system, albeit with the center cut out for the Pi’s LCD to fit in. Rather than having to figure out a new way to handle input, [Starfire] simply connected the existing inputs to the digital pins on the Teensy and used some code to convert that into USB HID for the Pi. A few case modifications were necessary, namely the removal of the battery compartment from the back panel and covering up the original SD card slot and ports; but otherwise the finished product looks completely stock.

If you don’t mind tearing into a real Game Boy to make your portable Pi, you can check out a few of the stand out examples which we’ve covered here in the past.

Continue reading “Cramming A Pi Zero Into A Cheap Handheld Game”

Search For Military Satellite Finds One NASA Lost Instead

[Scott Tilley] was searching for radio signals from the Air Force’s top-secret ZUMA satellite. He found something that is — we think — much more interesting. He found NASA’s lost satellite called IMAGE. You are probably wondering why it is interesting that someone listening for one satellite found another one. You see, NASA declared IMAGE dead in 2005. It went silent unexpectedly and did not complete its mission to image the magnetosphere.

NASA did a failure review and concluded that in all likelihood a single event upset caused a power controller to trip. A single event upset, or SEU, is a radiation event and should have been automatically recovered. However, there was a design flaw that failed to report certain types of power controller failures, including this one.

The report mentioned that it might be possible to reset the controller at a specific time in 2007, but given that NASA thought the satellite was out of commission that either never occurred or didn’t work. However, something apparently woke the satellite up from its sleep.

[Scott] did a lot of number crunching to determine that the satellite’s spin rate had only decreased a little from its operational value and that the doppler data matched what he expected. [Scott] can’t read or command the telemetry, so he doesn’t know how healthy the satellite is, but it is at least operational to some degree. It’s really neat to see members of the team that worked on IMAGE leaving comments congratulating [Scott] on the find. They are working to get him data formatting information to see if more sense can be made of the incoming transmissions.

Who knew listening to satellites could be so exciting? If you want to build your own ground station, you might be interested in this antenna mount. If you need to know what’s overhead, this can help.

Three Ways To Etch Snazzy Brass Nameplates

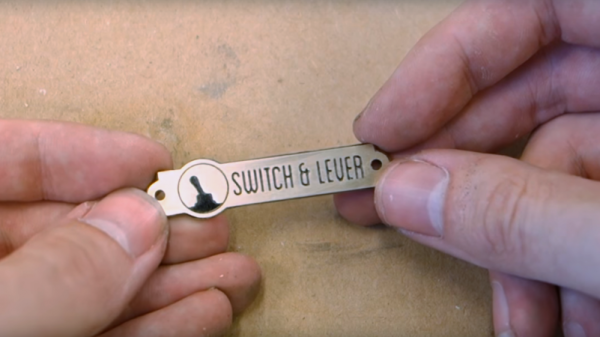
It’s the little touches that make a project, and a nice nameplate can really tie a retro build together. Such badges are easy enough to make with a CNC machine, but if you don’t have access to machine tools you can put chemistry to work for you with these acid-etched brass nameplates.

The etching method that [Switch and Lever] uses to get down to brass plaques will be intimately familiar to anyone who has etched a PCB before. Ferric chloride works as well on brass as it does on copper, and [Switch and Lever] does a good job explaining the chemistry of the etching process and offers some tips on making up etching solution from powdered ferric chloride. But the meat of the video below is the head-to-head test of three different masking methods.

The first method uses a laser printer and glossy paper ripped from a magazine to create a mask. The toner is transferred to the brass using an office laminator, and the paper removed with gentle rubbing before etching. For the other two candidates he uses a laser engraver to remove a mask of plain black spray paint in one case, or to convert special laser marking paint to a mask in the other.

We won’t spoil the surprise as to which gave the best results, but we think you’ll be pleased with how easy making classy nameplates can be. You can also use electrolytic methods for a deeper etch, but we think acid etching is a little more approachable for occasional use.

Continue reading “Three Ways To Etch Snazzy Brass Nameplates”

Using Lasagna To Make Cost-Saving Molds

Building a one-off prototype is usually pretty straightforward. Find some perfboard and start soldering, weld up some scrap metal, or break out the 3D printer. But if you’re going to do a production run of a product then things need to have a little more polish. In [Eric Strebel]’s case this means saving on weight and material by converting a solid molded part into something that is hollow, with the help of some lasagna.

What [Eric] walks us through in this video is how to build a weep mold. First, the solid part is cast in silicone. Using the cast, some “sheet clay” is applied to the inside which will eventually form the void for the new part’s walls. The clay needs to be flush with the top of the mold, though, and a trick to accomplish this task is to freeze the mold (next to the lasagna) which allows the clay to be scraped without deforming.

From there, the second half of the mold is poured in, using special channels that allow the resin to “weep” out of the mold (hence the name). This two-part process creates a much more efficient part with thin walls, rather than the expensive solid prototype part.

[Eric] is no stranger around these parts, either. He’s an industrial designer with many tips and tricks of the profession, including a method for building a machining tool out of a drill press and a vise as well as some tips for how to get the most out of a low-volume production run of a product you might be producing.

Continue reading “Using Lasagna To Make Cost-Saving Molds”

Shmoocon: Advanced Low Power Techniques And A Watch

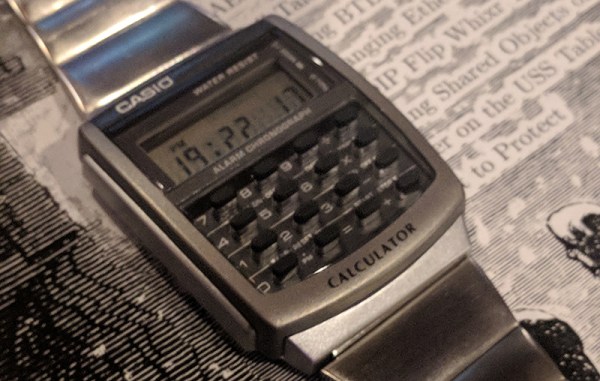
Real quick question: how do you increase productivity at work? The greatest (highest paid) minds would just say: do agile or scrum or something. What’s scrum? That’s where you gather ’round every morning for a waste of time meeting that kills your every desire to be productive. A while back, [Travis Goodspeed] was stuck in some lesser circle of hell like this and in an effort to be polite by not looking at his phone too much, looked at his watch too much. This led to the creation of the Goodwatch, a new bit of hardware that replaces the guts of a Casio calculator watch with a hex editor, ISM-band radio, MSP430 disassembler, and of course an RPN calculator.

[Travis] has already introduced the GoodWatch to the world. We took a look back in December but haven’t heard anything since. His talk at Shmoocon 2018 put a little more light on how this project came to be.

Continue reading “Shmoocon: Advanced Low Power Techniques And A Watch”