Get Your Name On The Hottest List In The Solar System

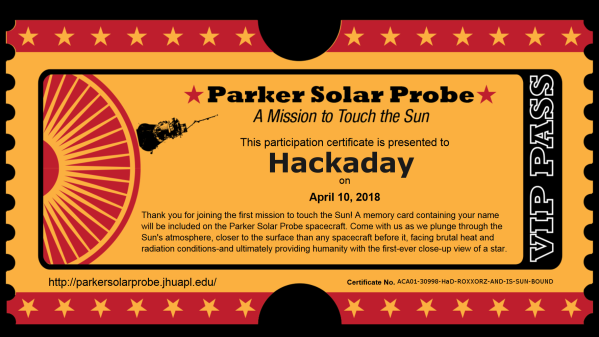
How often does NASA name a spacecraft after a living person? How often do you get to launch your name into a star? How often does NASA send probes to explore the sun? If your answer to all these questions is NEVER, then you win the honor of adding your name to an SD card bound for the center of our solar system. We’re already on the list with [William Shatner] so we’ll see you there. Submissions for the hot list aboard the Parker Solar Probe close on April 27th, 2018 and it launches in May.

The Parker Solar probe honors living astrophysicist [Eugene Parker] who theorized a great deal about how the sun, and other stars, emit energy. His work has rightly earned him the honor of seeing his name on a sun-bound probe. We even owe the term, “solar wind” to [Parker].

To draw more attention, you can have a few bits aboard this probe dedicated to you or someone you care about by adding your name to their list. Or you can send the name of your greatest enemy into the hottest furnace for millions of miles. Your call.

Even though our sun is the most prominent heavenly body, NASA hasn’t sent a probe to explore it before. They are good about sharing their models and they really know how to write standards for workmanship.

Continue reading “Get Your Name On The Hottest List In The Solar System”

Building The Perfect Home Router

When a favorite piece of hardware dies, it’s fairly common to experience a bit of dread. The thought that now you’ll have to go through the process of getting a replacement for the device can be very troubling, and is fraught with difficult questions. Is the hardware still available? Has it been made obsolete by something else in the time you’ve had it? But while it can be a hassle, there’s no question you can come out the other side better than you went in. Sometimes it takes the passing of an old piece of gear for you to really embrace what’s possible with the latest and greatest.

That’s exactly what happened to [Tyler Langlois]. When his trusty home router finally gave up the ghost, he was left with a couple of options. He could get another consumer router, upgrade to a enterprise-level model, or take the road less traveled and build his own router to his exacting specifications. Since you’re reading about it on Hackday, we’ll give you one guess as to which door he went through.

The blog post [Tyler] has written up about the saga of building his own router is an incredible resource for anyone who might be thinking of taking the plunge into DIY networking. From selecting the proper hardware to the nuances of getting all of the software packages installed, this is an absolute treasure trove. At the beginning of the post he mentions that the post shouldn’t be considered a comprehensive guide, but considering we’ve seen commercial hardware that wasn’t documented this well, we’d have to respectfully disagree on that point.

Some elements of his homespun may come as something of a surprise. For one, [Tyler] bucked the hive mentality and determined the Raspberry Pi simply wasn’t up to the task due (at least in part) to the single 100 Mbps network interface. He ended up going with an ESPRESSObin, a relatively niche Linux SBC that features an onboard gigabit switch in addition to a fairly hefty spec sheet. He also decided to forgo WiFi entirely, and leave the intricacies of wireless networking to a standalone access point from Ubiquity.

A router is often overlooked as just another piece of consumer kit sitting around the house, but it’s actually an excellent place to flex your creative and technical muscle. From adding a remote display to converting it into a mobile battle tank, there’s a lot more you can do with your router than stare at the blinkenlights.

Hackaday And Tindie Are Coming To London On Sunday!

Hackaday and Tindie have arrived in London at the weekend, fresh from our Dublin Unconference. Join us this Sunday afternoon, as we convene at the Artillery Arms, a pub on the northeastern edge of the City. It’s a free event, we ask though that you sign up for it via Eventbrite if you’d like to attend.

We’re following our usual Bring-a-Hack style format, so come along and hang out with members of the London Hackaday community, and if you have a project to bring along then don’t be shy as we’d love to see it. And especially if you have a Hackaday Prize entry to show then we’d particularly like to see it. You never cease to amaze us with the work you do, be it the simplest of hacks or the most technically advanced. Just one thing though, if you bring something, make sure it’s handheld or portable enough to easily sit on a pub tabletop, space may be limited.

In attendance will be Tindie’s [Jasmine Brackett] and Hackaday’s [Jenny List], as well as quite a few of our community regulars. What better way could there be to spend a spring Sunday afternoon in London?

But what if you can’t make London, and face the prospect of missing out on us entirely? Fortunately, this one is not the only meetup we have planned, we’re heading to Nottingham and Cambridge on the 18th and 19th of April, respectively, and might even squeeze in another date if we can.

Pocket-Sized Workstation Sports Pi Zero, Pop-Up Screen

Many of us could use a general-purpose portable workstation, something small enough to pocket but still be ready for a quick troubleshooting session. Terminal apps on a smartphone will usually do the job fine, but they lack the panache of this pocketable pop-top Raspberry Pi workstation.

It doesn’t appear that [Michael Horne] has a specific mission in mind for his tiny Linux machine, but that’s OK — we respect art for art’s sake. The star of the show is the case itself, a unit intended for dashboard use with a mobile DVD player or backup camera. The screen is a 4.3″ TFT with a relatively low-resolution, so [Michael] wasn’t expecting too much from it. And he faced some challenges, like dealing with the different voltage needs for the display and the Raspberry Pi Zero W he intended to stuff into the base. Luckily, the display regulates the 12-volt supply internally to 3.3-volts, so he just tapped into the 3.3-volt pin on the Pi and powered everything from a USB charger. The display also has some smarts built in, blanking until composite video is applied, which caused a bit of confusion at first. A few case mods to bring connectors out, a wireless keyboard, and he had a nice little machine for whatever.

No interest in a GUI machine? Need a text-only serial terminal? We’ve seen that before too. And here’s one with a nice slide-out keyboard built in.

Continue reading “Pocket-Sized Workstation Sports Pi Zero, Pop-Up Screen”

Zephyr Adds Features, Platforms, And Windows

Zephyr is an open source real-time operating system (RTOS) that appeared on the scene a few years ago with support for a few boards. The new 1.11 release adds a lot of features, a lot of new boards, and also has a Windows development environment. But don’t worry, the environment is portable so it still runs on Linux and Mac, as well.

The OS has support for many ARM and x86 boards. It also supports ESP32, NIOS II, and can also target Linux which is useful for debugging or studying execution using desktop tools.

Continue reading “Zephyr Adds Features, Platforms, And Windows”

Need A Thousand Extra PWM Pins?

If your Arduino runs out of I/O lines, you can always add one of the several I/O expander chips that takes a serial interface to set its several pins. Or perhaps you could buy something like an Arduino Mega, with its extra sockets to fulfil your needs. But what would you do if you really needed more pins, say a thousand of them? Perhaps [Brian Lough] has the answer. OK, full disclosure: If you really need a thousand, the video isn’t exactly for you, as he shows you how to add up to 992 PWM outputs. The chip he uses works with any microcontroller (the video shows an ESP8266), and we suppose you could use two daisy chains of them and break the 1,000 barrier handily.

We like how short the video is (just two minutes; see below) as it gets right to the point. The PCA9685 chip gives you 16 12-bit PWM channels via an I2C interface. You can daisy chain up to 62 of the boards to get the 992 outputs promised.

Continue reading “Need A Thousand Extra PWM Pins?”

Universal Chip Analyzer: Test Old CPUs In Seconds

Collecting old CPUs and firing them up again is all the rage these days, but how do you know if they will work? For many of these ICs, which ceased production decades ago, sorting the good stuff from the defective and counterfeit is a minefield.

Testing old chips is a challenge in itself. Even if you can find the right motherboard, the slim chances of escaping the effect of time on the components (in particular, capacitor and EEPROM degradation) make a reliable test setup hard to come by.

Enter [Samuel], and the Universal Chip Analyzer (UCA). Using an FPGA to emulate the motherboard, it means the experience of testing an IC takes just a matter of seconds. Why an FPGA? Microcontrollers are simply too slow to get a full speed interface to the CPU, even one from the ’80s.

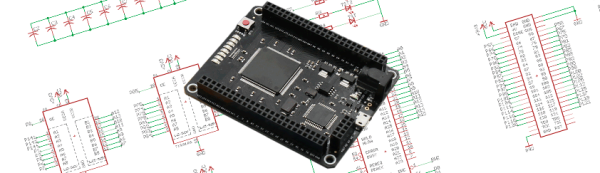
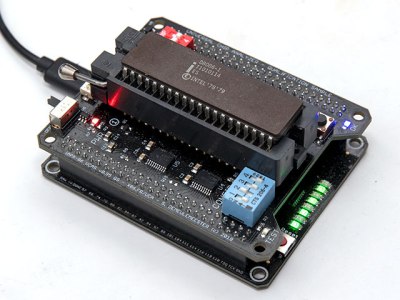
So, how does it actually test? Synthesized inside the FPGA is everything the CPU needs from the motherboard to make it tick, including ROM, RAM, bus controllers, clock generation and interrupt handling. Many testing frequencies are supported (which is helpful for spotting fakes), and if connected to a computer via USB, the UCA can check power consumption, and even benchmark the chip. We can’t begin to detail the amount of thought that’s gone into the design here, from auto-detecting data bus width to the sheer amount of models supported, but you can read more technical details here.

The Mojo v3 FPGA development board was chosen as the heart of the project, featuring an ATmega32U4 and Xilinx Spartan 6 FPGA. The wily among you will have already spotted a problem – the voltage levels used by early CPUs vary greatly (as high as 15V for an Intel 4004). [Samuel]’s ingenious solution to keep the cost down is a shield for each IC family – each with its own voltage converter.

Continue reading “Universal Chip Analyzer: Test Old CPUs In Seconds”