Another Defeat Of The Intel Management Engine

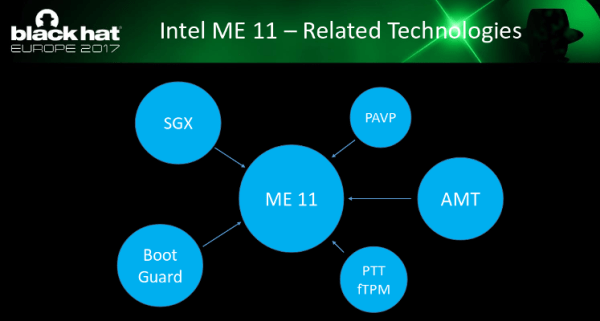
If you have a computer with an Intel processor that’s newer than about 2007, odds are high that it also contains a mystery software package known as the Intel Management Engine (ME). The ME has complete access to the computer below the operating system and can access a network, the computer’s memory, and many other parts of the computer even when the computer is powered down. If you’re thinking that this seems like an incredible security vulnerability then you’re not alone, and a team at Black Hat Europe 2017 has demonstrated yet another flaw in this black box (PDF), allowing arbitrary code execution and bypassing many of the known ME protections.

[Mark Ermolov] and [Maxim Goryachy] are the two-man team that discovered this exploit, only the second of its kind in the 12 years that the ME has been deployed. Luckily, this exploit can’t be taken advantage of (yet) unless an attacker has physical access to the device. Intel’s firmware upgrades also do not solve the problem because the patches still allow for use of older versions of the ME. [Mark] and [Maxim] speculate in their presentation that this might be fixed on the next version of the ME, but also note that these security vulnerabilities would disappear if Intel would stop shipping processors with the ME.

We won’t hold our breath on Intel doing the right thing by eliminating the ME, though. It’s only a matter of time before someone discovers a zero-day (if they haven’t already, there’s no way to know) which could cripple pretty much every computer built within the last ten years. If you’re OK with using legacy hardware, though, it is possible to eliminate the management engine and have a computer that doesn’t have crippling security vulnerabilities built into it. This post was even written from one. Good luck doing anything more resource-intensive with it, though.

Internet Of Things Opens Possibilities

While a lot of hardware gets put on the “Internet of Things” with only marginal or questionable benefits (or with hilariously poor security), every now and then a project makes use of this new platform in a way that illustrates the strengths of IoT. [ThingEngineer] turned to this platform as a cost-effective solution for an automatic gate, since new keyfobs were too expensive and a keypad was not an option.

Using an Electric IMP, [ThingEngineer] began by installing his IoT patch into the LiftMaster gate control box. This particular gate has easily accessible points that the controller can access to determine the gate’s status, so from there, an API was written to do the heavy lifting. A web server was deployed as well, so anyone with access can use a smartphone or other device to open the gate.

For anyone else looking to deploy a similar IoT solution, [ThingEngineer] has put all of the project code, schematics, and a thorough write-up about the project on his GitHub page. There are many useful ways to get on board the Internet of Things, though; so many that it’s been possible to win a substantial prize for using it in a creative way.

The King Of All Game Genies In An Arduino

While Nintendo is making a killing on nostalgic old consoles, there is a small but dedicated group of hackers still working with the original equipment. Since the original NES was rolled out in the 80s, though, there are a few shortcomings with the technology. Now, though, we have Arduinos, cheap memory, and interesting toolchains. What can we do with this? Absolutely anything we want, like playing modern video games on this antiquated system. [uXe] added dual-port memory to his ancient NES console, opening up the door to using the NES as a sort of video terminal for an Arduino. Of course, this is now also the King of All Game Genies and an interesting weekend project to boot.

Most NES cartridges have two bits of memory, the PRG and CHR ROMs. [uXe] is breaking out the cartridge connector onto an exceptionally wide rainbow ribbon cable, and bringing it into a custom Arduino Mega shield loaded up with two 16K dual-port RAM chips. These RAM chips effectively replace the PRG and CHR ROMs Since these are dual-port RAM chips, they can be written to by the Arduino and read by the NES simultaneously.

The NES sees one port of the RAM and can read and write from it while the Arduino still has access to make changes to the other post while that’s happening. A trick like this opens up a whole world of possibilities, most obviously with tiling and other graphics tricks that can push beyond the console’s original capabilities. [uXe] is currently playing Arduboy games on the NES — a really neat trick to pull off. Well done [uXe]!

Be sure to check out the video below of the NES running some games from the Arduboy system. It seems to integrate seamlessly into the hardware, so if you’ve always had a burning desire to fix crappy graphics on some of your favorite games, or run some special piece of software on an NES, now might just be your time to shine.

Continue reading “The King Of All Game Genies In An Arduino”

Raspberry Pi Compute Module 3 In A GameBoy Original

[Kite] has been making custom PCBs for GameBoys for a long time. Long enough, in fact, that other people have used his work to build even more feature-rich GameBoy platforms. Unfortunately some of their work had stagnated, so [Kite] picked it up and completed a new project: a GameBoy that uses a Raspberry Pi running on his upgraded GameBoy PCB.

At its core the build uses a Raspberry Pi 3, but one that has been shrunk down to the shape of a memory module, known as the Compute Module 3. (We featured the original build by [inches] before, but [Kite] has taken it over since then.) The upgrade frees up precious space in the GameBoy case to fit the custom PCB that was originally built by [Kite], and also eliminates the need to cut up a Raspberry Pi and solder it to the old version of his PCB. The build is very clean, and runs RetroPie like a champ. It has some additional features as well, such as having an HDMI output.

For anyone looking for that retro GameBoy feel but who wants important upgrades like a backlit color screen, or the ability to play PSP games, this might be the build for you. The video below goes into details about how it all fits together. If you’re looking for more of a challenge in your GameBoy hacks, though, there’s an ongoing challenge to build the tiniest GameBoy possible as well.

Continue reading “Raspberry Pi Compute Module 3 In A GameBoy Original”

Weather Station Needs Almost No Batteries

While the ESP8266 has made its way into virtually every situation where a low-cost WiFi solution is needed, it’s not known as being a low-power solution due to the amount of energy it takes to run WiFi. [Alex] took this design constraint as more of a challenge though, and with the help of an ATtiny microcontroller was able to develop a weather station using an ESP8266 that only needs new batteries every 2-4 years.

While the ESP8266 module consumes a bit of power, the ATtiny excels in low-power mode. To take advantage of this, [Alex] designed the weather station using the ATtiny to gather data every two minutes, store the data in a buffer, and upload all of it in bursts every hour using the ESP8266. This means that the power-hungry WiFi chip can stay off most of the time, drastically limiting the power demands of the station. [Alex] mostly details the setup of the ATtiny and the ESP8266 on his project page, so this could be applied anywhere that low power and network connectivity are required.

As for the weather reporting capabilities, the station is equipped to measure temperature, light, and humidity. Presumably more could be added but this might increase the power demands for the weather station as a whole. Still, changing batteries once a year instead of once every two years might be a worthwhile trade-off for anyone else attempting such an ambitious project. Other additions to the weather station that we’ve seen before might include a low-power display, too.

IoT With The Ethereum Blockchain

Anyone keeping up with financial news today is surely inundated with stories about Bitcoin and other cryptocurrencies. While most of the news is about the potentially inflated value of some of these coins, and how drastically they have changed in price in just a decade, there are other interesting things going on behind the scenes. For example, the currency Ethereum allows for a distributed programming platform of sorts to be implemented in the blockchain, which [GusGorman402] has taken advantage of in his latest project (YouTube link, embedded below).

The device that he built is based on an ESP8266 which connects to a router running an instance of a Go Ethereum node. Essentially, he uses the Ethereum blockchain to control an LED connected to the ESP8266 using a feature of Ethereum called a smart contract. While this might be a misleading name, a smart contract is basically an autonomous program that can do virtually anything a programmer writes into it. While this is a roundabout way to write a “Hello World” program, it does demonstrate the power of the Ethereum platform when compared to other cryptocurrencies.

If you’re interested in currency trading, blockchains, cryptography, or the future of computing, be sure to check out the detailed video after the break. It’s a curious new tool, and it will be interesting to see how developers and hackers alike use it to accomplish things we’ve never thought of yet.

Continue reading “IoT With The Ethereum Blockchain”

Open Source Motor Controller Makes Smooth Moves With Anti-Cogging

Almost two years ago, a research team showed that it was possible to get fine motor control from cheap, brushless DC motors. Normally this is not feasible because the motors are built-in such a way that the torque applied is not uniform for every position of the motor, a phenomenon known as “cogging”. This is fine for something that doesn’t need low-speed control like a fan motor, but for robotics it’s a little more important. Since that team published their results, though, we are starting to see others implement their own low-speed brushless motor controllers.

The new method of implementing anti-cogging maps out the holding torque required for any position of the motor’s shaft so this information can be used later on. Of course this requires a fair amount of calibration; [madcowswe] reports that this method requires around 5-10 minutes of calibration. [madcowswe] also did analysis of his motors to show how much harmonic content is contained in these waveforms, which helps to understand how this phenomenon arises and how to help eliminate it.

While [madcowswe] plans to add more features to this motor control algorithm such as reverse-mapping, scaling based on speed, and better memory usage, it’s a good implementation that has visible improvements over the stock motors. The original research is also worth investigating if a cheaper, better motor is something you need.