Mechanisms: Hook And Loop Fasteners

As a species, we’ve done a pretty good job at inventing some useful devices. But as clever as we think we are, given sufficient time, natural selection will beat us at our game at almost every turn. So it makes sense that many of our best inventions are inspired by nature and the myriad ways life finds to get DNA from one generation to the next.

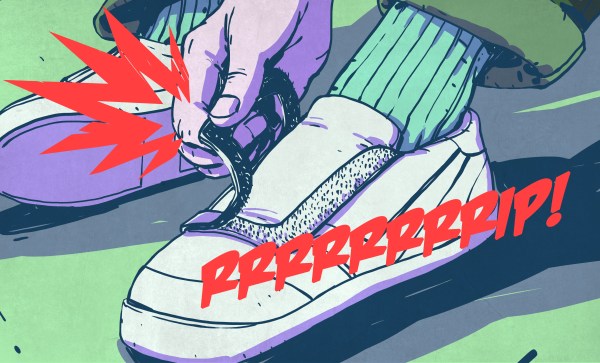
Hook and loop fasteners are one such design cribbed from nature, and the story behind this useful mechanism is a perfect example that a prepared mind, good observation skills, and a heck of a lot of perseverance are what it takes to bring one of Mother Nature’s designs to market.

Editor’s Note: As some predicted in the comments section, we were contacted by representatives of Velcro Companies and asked to change all mentions in this article to either VELCRO® Brand Fastener or to use the generic “Hook and Loop” term. If it seems weird that we’re calling this hook and loop, now you know why.

Continue reading “Mechanisms: Hook And Loop Fasteners”

Classic American Dial Phone Gets A GSM Makeover

For sturdy utilitarianism, there were few designs better than the Western Electric Model 500 desk phone. The 500 did one thing and did it well, and remained essentially unchanged from the mid-1940s until Touch Tone phones started appearing in the early 70s. That doesn’t mean it can’t have a place in the modern phone system, though, as long as you’re willing to convert it into a cellphone.

Luckily for [bicapitate], the Model 500 has plenty of room inside the case once the network interface is removed, because the new electronics take up a fair bit of space. There’s no build log per se, but the photo album makes it clear what’s going on. An Arduino reads the hook switch and dial pulses, while a Fona GSM module takes care of the cellular side of things. It looks like a small electret mic and a speaker replace the original transmitter and receiver. As a nice touch, the original ringer is used, but instead of trying to drive it electrically, [bicapitate] came up with a simple cam mechanism on a small motor. Driven at the right speed, the cam hooks the clapper arm, rings one bell, then releases it to let the clapper spring back to hit the other bell. Everything is powered by a LiPo, so it could be taken to the local coffee shop for some hipster hijinks.

We’ve seen similar retro-mods like this before using phones from all over the world; here’s a British take and one from Belgium, both using phones with equally classic lines.

[via r/arduino]

Low-Resolution Display Provides High-Nostalgia Animations

High-definition displays are the de facto standard today, and we’ve come to expect displays that show every pore, blemish, and bead of sweat on everything from phones to stadium-sized Jumbotrons. Despite this,  low-resolution displays continue to have a nostalgic charm all their own.

Take this 32 x 16 display, dubbed PixelTimes, for instance. [Dominic Buchstaller] has gone a step beyond his previous PixelTime, a minimalist weather clock and home hub built around the same P10 RGB matrix. The previous build was a little involved, though, with a nice wood frame that took some time and skill to create.

Building your own version of PixelTimes is really approachable. The case is mostly 3D-printed, and the acrylic parts [Dominic] laser cut could just as easily be cut with a saw. And that P10 board can be source for peanuts direct from Chine. The software for the project has been upgraded since the original version, supporting flicker-free animations. Everything runs on a NodeMCU, and there are even scripts to convert your favorite GIF to an animation. Oh, and it still displays the weather too.

This looks great and seems like a lot of fun, and [Dominic] kindly provides all the files you’ll need to build your own. It shouldn’t take more than an hour to build once you’ve got all the parts.

Shutter Bug Goes Extreme With Scratch-Built Film Camera

Should a camera build start with a sand mold and molten aluminum? That’s the route [CroppedCamera] took with this thoroughly impressive camera project.

When we think of cameras these days, chances are we picture the ones that live inside the phones in our pockets. They’re the go-to image capture devices for most of us, but even for the more photographically advanced among us, when a more capable camera is called for, it’s usually an off-the-shelf DSLR from Canon, Nikon, or the like. Where do hand-built cameras fall in today’s photography world? They’re a great way to add a film option to your camera collection.

[CroppedCamera] previously built a completely custom large-format view camera, but for this build he decided that something a bit more portable might do. The body of the camera is scratch-built from aluminum, acting as the lightproof box to hold the roll film and mount the leaf-shutter lens. There’s an impressive amount of metalwork here — sand casting, bending, TIG welding, and machining all came into play, and most of them new skills to [CroppedCamera]. We were especially impressed with the shrink-fit of the lens cone to the body. It’s unconventional looking for sure, but not without its charm, and it’s sure to make a statement dangling around his neck.

It’s tough to find non-digital DIY camera builds around here — best we could do were these laser-cut plywood modular cameras. Then again, you can’t beat this wearable camera for functional style.

Continue reading “Shutter Bug Goes Extreme With Scratch-Built Film Camera”

Hybrid 3D-Printer Creates Complete Circuits, Case And All

The cool kids these days all seem to think we’re on the verge of an AI apocalypse, at least judging by all the virtual ink expended on various theories. But our putative AI overlords will have a hard time taking over the world without being able to build robotic legions to impose their will. That’s why this advance in 3D printing that can incorporate electronic circuits may be a little terrifying, at least to some.

The basic idea that [Florens Wasserfall] and colleagues at the University of Hamburg have come up with is a 3D-printer with a few special modifications. One is a separate extruder than squirts a conductive silver-polymer ink, the other is a simple vacuum tip on the printer extruder for pick and place operations. The bed of the printer also has a tray for storing SMD parts and cameras for the pick-and-place to locate parts and orient them before placing them into the uncured conductive ink traces.

The key to making the hardware work together though is a toolchain that allows circuits to be integrated into the print. It starts with a schematic in Eagle, which joins with the CAD model of the part to be printed in a modified version of Slic3r, the open-source slicing package. Locations for SMD components are defined, traces are routed, and the hybrid printer builds the whole assembly at once. The video below shows it in action, and we’ve got to say it’s pretty slick.

Sure, it’s all academic for now, with simple blinky light circuits and the like. But team this up with something like these PCB motors, and you’ve got the makings of a robotic nightmare. Or not.

Continue reading “Hybrid 3D-Printer Creates Complete Circuits, Case And All”

To Ferrule Or Not To Ferrule?

We recently posted about a spectacular 3D-printer fire that was thankfully caught and extinguished before spreading to the hacker’s house or injuring his family. Analyzing the remains of the printer, the hacker determined that the fire was caused when a loose grub screw let the extruder’s heater cartridge fall out and touch the ABS fan shroud. It ran full-on and set things on fire.

A number of us have similar 3D printers, so the comments for this article were understandably lively, but one comment stood out by listing a number of best practices for wiring, including the use of ferrules. In particular, many 3D printers connect the heated bed, which draws a lot of current, with screw terminals to the motherboard. While not the cause of the fire in the original post, melted terminal blocks are a common complaint with many DIY 3D printer kits, and one reason is that simply jamming thick stranded wire into a screw terminal and hoping for the best can result in increased resistance, and heat, at the joint. In such situations, the absolutely right thing to do is to crimp on a ferrule. So let’s talk about that.


Continue reading “To Ferrule Or Not To Ferrule?”

Pocket-Sized Workstation Sports Pi Zero, Pop-Up Screen

Many of us could use a general-purpose portable workstation, something small enough to pocket but still be ready for a quick troubleshooting session. Terminal apps on a smartphone will usually do the job fine, but they lack the panache of this pocketable pop-top Raspberry Pi workstation.

It doesn’t appear that [Michael Horne] has a specific mission in mind for his tiny Linux machine, but that’s OK — we respect art for art’s sake. The star of the show is the case itself, a unit intended for dashboard use with a mobile DVD player or backup camera. The screen is a 4.3″ TFT with a relatively low-resolution, so [Michael] wasn’t expecting too much from it. And he faced some challenges, like dealing with the different voltage needs for the display and the Raspberry Pi Zero W he intended to stuff into the base. Luckily, the display regulates the 12-volt supply internally to 3.3-volts, so he just tapped into the 3.3-volt pin on the Pi and powered everything from a USB charger. The display also has some smarts built in, blanking until composite video is applied, which caused a bit of confusion at first. A few case mods to bring connectors out, a wireless keyboard, and he had a nice little machine for whatever.

No interest in a GUI machine? Need a text-only serial terminal? We’ve seen that before too. And here’s one with a nice slide-out keyboard built in.

Continue reading “Pocket-Sized Workstation Sports Pi Zero, Pop-Up Screen”