Putting 3D Printed Speaker Drivers To The Test

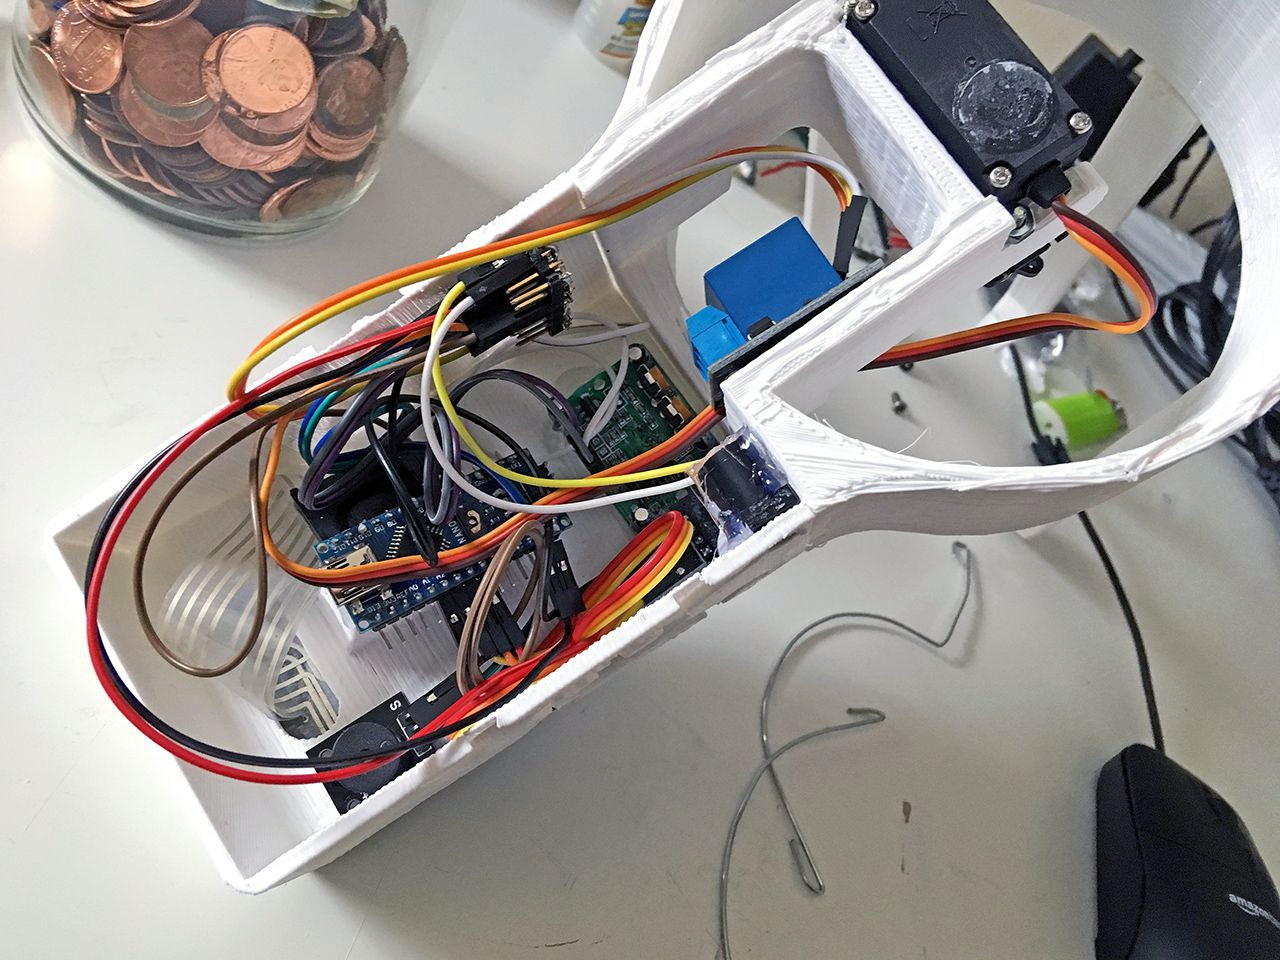
Over the years, we’ve seen numerous projects that attempted to 3D print speaker enclosures that deliver not only a bit of custom flair, but hopefully halfway decent sound. Though as you’d probably expect, the drivers themselves are always standard run-of-the mill hardware mounted into the plastic enclosure. But given the research being conducted by [Paul Ellis], that might not be a safe assumption for much longer.

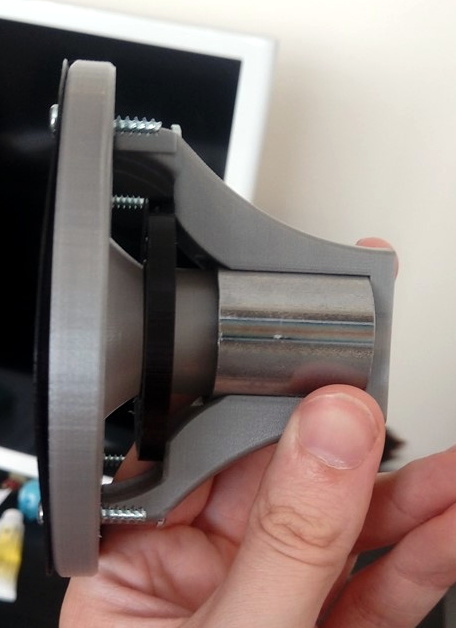
His quest to develop a full-range 3D speaker has taken him through several design revisions over the last two years, with each one being put through testing procedure that compared its frequency response to “real” speakers from manufacturers like Dayton and Bose. The project is very much ongoing, but a recently completed iteration of the driver design managed to exceed 80 dB at 1 W. In terms of audio quality, [Paul] reports they can hold their own against commercially available drivers. You can hear for yourself in the video after the break.

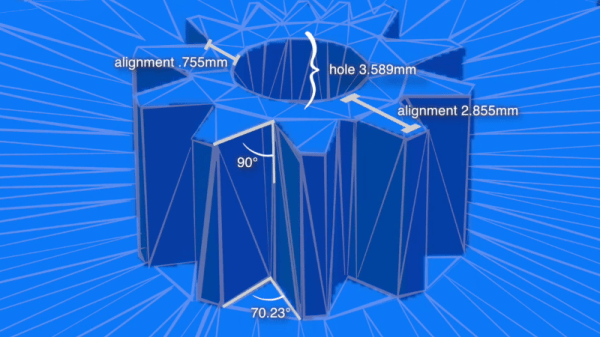
Ultimately, he hopes to be able to sell his 3D printed speakers in kit form to anyone who’s looking for the last word in bespoke audio hardware. The idea being that the drivers and enclosure will be completely modular, allowing the user to swap out individual components for ones printed (or not) in different materials so they can tune the in-person sound to their exact specifications. To facilitate this rapid reconfiguring of the drivers, the designs use some neat tricks like having the magnets be removable rather than glued in so they could be swapped out non-destructively.

This isn’t the first fully 3D printed speaker driver we’ve ever seen, Formlabs showed one off that was made on their SLA printer back in 2015, and we actually saw a rudimentary take on the same idea earlier this year. But the work that [Paul] has done here is certainly the most thorough, and dare we say practical, take we’ve ever seen on the concept.

Continue reading “Putting 3D Printed Speaker Drivers To The Test”

Reading The Water Meter In A Literal Sense With An ESP8266

In our info-obsessed culture, hackers are increasingly interested in ways to quantify the world around them. One popular project is to collect data about their home energy or water consumption to try and identify any trends or potential inefficiencies. For safety and potentially legal reasons, this usually has to be done in a minimally invasive way that doesn’t compromise the metering done by the utility provider. As you might expect, that often leads to some creative methods of data collection.

The latest solution comes courtesy of [Keilin Bickar], who’s using the ESP8266 and a serial TTL camera module to read the characters from the LCD of his water meter. With a 3D printed enclosure that doubles as a light source for the camera, the finished device perches on top of the water meter and sends the current reading to HomeAssistant via MQTT without any permanent wiring or mounting.

Of course, the ESP8266 is not a platform we generally see performing optical character recognition. Some clever programming was required to get the Wemos D1 Mini Lite to reliably read the numbers from the meter without having to push the task to a more computationally powerful device such as a Raspberry Pi. The process starts with a 160×120 JPEG image provided by a VC0706 camera module, which is then processed with the JPEGDecoder library. The top and bottom of the image are discarded, and the center band is isolated into blocks that correspond with the position of each digit on the display.

Within each block, the code checks an array of predetermined points to see if the corresponding pixel is black or not. In theory this allows detecting all the digits between 0 and 9, though [Keilin] says there were still the occasional false readings due to inherent instabilities in the camera and mounting. But with a few iterations to the code and the aid of a Python testing program that allowed him to validate the impact of changes to the algorithm, he was able to greatly improve the detection accuracy. He says it also helps that the nature of the data allows for some basic sanity checks;  for example the number only ever goes up, and only by a relatively small amount each time.

This method might not allow the per-second sampling required to pull off the impressive (if slightly creepy) water usage data mining we saw recently, but as long as you’re not after very high resolution data this is an elegant and creative way to pull useful data from your existing utility meter.

Building A GPS With Bug Eyes And Ancient Wisdom

The Global Positioning System (GPS) is so ingrained into our modern life that it’s easy to forget the system was created for, and is still operated by, the United States military. While there are competing technologies, such as GLONASS and Galileo, they are still operated by the governments of their respective countries. So what do you do if you want to know your position on the globe without relying on any government-operated infrastructure?

According to the team behind [Aweigh], all you have to do is take a cue from ancient mariners and insects and look up. Using two light polarization sensors, a compass, and a bit of math, their device can calculate your latitude and longitude by looking at the daytime sky. With their custom Raspberry Pi shield and open source Python 3 software, the team envisions a future where fully-independent global positioning can be tacked onto all sorts of projects.

The concept relies on the Rayleigh model, which is essentially a polarization map of the sky. As light from the sun is scattered in the Earth’s atmosphere, it creates bands of polarization which can be identified from the ground. Essentially it’s the same principle that makes the sky appear blue when viewed with human eyes, but if you have two light sensors looking at the proper wavelengths, you can use the effect to figure out where the sun is; which the team says is precisely how some insects navigate. Once the position of the sun is known, [Aweigh] operates like a modernized, automatic, sextant.

Naturally, this is not an ideal solution in all possible situations. In an urban environment, a clear view of the sky isn’t always possible, and of course the system won’t work at all once the sun goes down. In theory you could switch over to navigating by stars at night, but then you run into the same problems in urban areas. Still, it’s a fascinating project and one that we’re eager to see develop further.

Incidentally, we’ve seen automated sextants before, if you’re looking for a similar solution that still retains that Horatio Hornblower vibe.

High Voltage Protects Low Denominations

How do you keep people out of your change jar? If you didn’t say with a 3D printed iris mechanism and high-voltage spark gap, then clearly you aren’t [Vije Miller]. Which is probably for the best, as we’re not sure we actually want to live in a world where there are two of these things.

Regular Hackaday readers will know that [Vije] has a way of using electromechanical trickery to inject a bit of excitement, and occasionally a little danger, into even the most mundane aspects of life. His latest project is an automated change jar that uses a pinpad to authenticate users, while everyone else gets the business end of a spark gap if the PIR sensor detects them getting to close.

You can see a demonstration of the jar in the video after the break, where he shows the jar’s ability to stop…himself, from getting access to it. Hey, nobody said it was meant to keep out real intruders. Though we do think a similar gadget could be a fun way to keep the kids out of the cookie jar before dinner, though we’d strongly suggest deleting the high-voltage component from the project before deploying it with a gullet full of Keebler’s best.

[Vije] was able to adapt a printable iris design he found on Thingiverse to fit over the mouth of the jar, and uses servos in the base to rotate the whole assembly around and open it up. The internal Arduino Nano handles reading from the pinpad, controlling the stepper, and of course firing up the spark generator for 1000 milliseconds each time the PIR sensor detects somebody trying to be cute. Just the sound of the arc should be enough to get somebody to reconsider the value of literal pocket change.

Some of the design elements used in this change jar’s high voltage components were influenced by the lessons learned when [Vije] was building his plasma-powered toilet air freshener. There’s a sentence we bet you never expected to read today.

Continue reading “High Voltage Protects Low Denominations”

PCIe Multiplier Expands Raspberry Pi 4 Possibilities

It probably goes without saying that hardware hackers were excited when the Raspberry Pi 4 was announced, but it wasn’t just because there was a new entry into everyone’s favorite line of Linux SBCs. The new Pi offered a number of compelling hardware upgrades, including an onboard PCI-Express interface. The only problem was that the PCIe interface was dedicated to the USB 3.0 controller; but that’s nothing a hot-air rework station couldn’t fix.

We’ve previously seen steady-handed hackers remove the USB 3.0 controller on the Pi 4 to connect various PCIe devices with somewhat mixed results, but [Colin Riley] has raised the bar by successfully getting a PCIe multiplier board working with the diminutive Linux computer. While there are still some software kinks to work out, the results are very promising and he already has  a few devices working.

Getting that first PCIe port added to the Pi 4 is already fairly well understood, so [Colin] just had to follow the example set by hackers such as [Tomasz Mloduchowski]. Sure enough, when he plugged the port multiplier board in (after a bit of what he refers to as “professional wiggling”), the appropriate entry showed up in lspci.

But there was a problem. While the port multiplier board was recognized by the kernel, nothing he plugged into it showed up. Checking the kernel logs, he found messages relating to bus conflicts, and one that seemed especially important: “devices behind bridge are unusable because [bus 02] cannot be assigned for them“. To make a long story short, it turns out that the Raspbian kernel is specifically configured to only allow a single PCI bus.

Fortunately, it’s an easy fix once you know what the problem is. Using the “Device Tree Compiler” tool, [Colin] was able to edit the Raspbian Device Tree file and change the PCI “bus-range” variable from <0x0 0x1> to <0x0 0xff>. From there, it was just a matter of plugging in different devices and seeing what works. Simple things such as USB controllers were no problem, but getting ARM Linux support for the NVIDIA GTX 1060 he tried will have to be a topic for another day.

[Thanks to Paulie for the tip.]

3D Printering: The Search For Better Search

There’s no question that a desktop 3D printer is at its most useful when it’s producing parts of your own design. After all, if you’ve got a machine that can produce physical objects to your exacting specifications, why not give it some? But even the most diligent CAD maven will occasionally defer to an existing design, as there’s no sense spending the time and effort creating their own model if a perfectly serviceable one is already available under an open source license.

But there’s a problem: finding these open source models is often more difficult than it should be. The fact of the matter is, the ecosystem for sharing 3D printable models is in a very sorry state. Thingiverse, the community’s de facto model repository, is antiquated and plagued with technical issues. Competitors such as Pinshape and YouMagine are certainly improvements on a technical level, but without the sheer number of models and designers that Thingiverse has, they’ve been unable to earn much mindshare. When people are looking to download 3D models, it stands to reason that the site with the most models will be the most popular.

It’s a situation that the community is going to have to address eventually. As it stands, it’s something of a minor miracle that Thingiverse still exists. Owned and operated by Makerbot, the company that once defined the desktop 3D printer but is today all but completely unknown in a market dominated by low-cost printers from the likes of Monoprice and Creality, it seems only a matter of time before the site finally goes dark. They say it’s unwise to put all of your eggs in one basket, and doubly so if the basket happens to be on fire.

So what will it take to get people to consider alternatives to Thingiverse before it’s too late? Obviously, snazzy modern web design isn’t enough to do it. Not if the underlying service operates on the same formula. To really make a dent in this space, you need a killer feature. Something that measurably improves the user experience of finding the 3D model you need in a sea of hundreds of thousands. You need to solve the search problem.

Continue reading “3D Printering: The Search For Better Search”

A Teeny Tiny 3D Printed Macro Extension Tube

When you hear the term “extension tube”, you probably think of something fairly long, right? But when [Loudifier] needed an extension tube to do extreme close-ups with a wide-angle lens on a Canon EF-M camera, it needed to be small…really small. The final 3D printed extension provides an adjustable length between 0 and 10 millimeters.

But it’s not just an extension tube, that would be too easy. According to [Loudifier], the ideal extension distance would be somewhere around 3 mm, but unfortunately the mounting bayonet for an EF-M lens is a little over 5 mm. To get around this, the extension tube also adapts to an EF/EF-S lens, which has a shorter mount and allows bringing it in closer than would be physically possible under otherwise.

[Loudifier] says the addition of electrical connections between the camera and the lens (for functions like auto focus) would be ideal, but the logistics of pulling that off are a bit daunting. For now, the most reasonable upgrades on the horizon are the addition of some colored dots on the outside to help align the camera, adapter, and lens. As the STLs and Fusion design file are released under the Creative Commons, perhaps the community will even take on the challenge of adapting it to other lens types.

For the polar opposite of this project, check out the 300 mm long 3D printed extension tube we covered a few weeks back that inspired [Loudifier] to send this project our way.