X Marks The Clock

There’s no shortage of Arduino-based clocks around. [Mr_fid’s] clock, though, gets a second look because it is very unique looking. Then it gets a third look because it would be very difficult to read for the uninitiated.

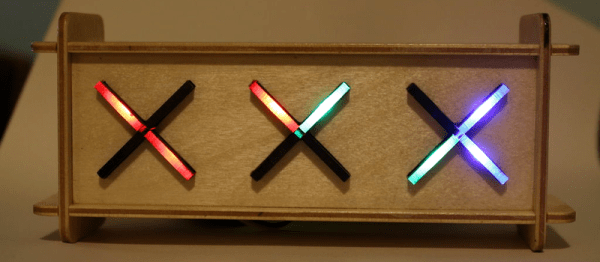
The clock uses three Xs made of LEDs. There is one X for the hours (this is a 24-hour clock), another for the minutes, and one for the seconds. The left side of each X represents the tens’ digit of the number, while the right-side is the units.

But wait… even with two segments on each side of the X, that only allows for numbers from 0 to 3 in binary, right? [Mr_fid] uses another dimension–color–to get around that limitation. Although he calls this a binary clock, it is more accurately a binary-coded-decimal (BCD) clock. Red LEDs represent the numbers one to three. Green LEDs are four to six. Two blue segments represent seven to nine. It sounds complicated, but if you watch the video, below, it will make sense.

Continue reading “X Marks The Clock”

Hack A Whiteboard And Never Lose Screws Again

If you are reading this, it is a fair bet you like to take things apart. Sometimes, you even put them back together. There are two bad moments that can occur when you do this. First, when you get done and there is some stuff left over. That’s usually not good. The other problem is when you are trying to find some little tiny bolt and a washer and you can’t find it. SMD parts are especially easy to lose.

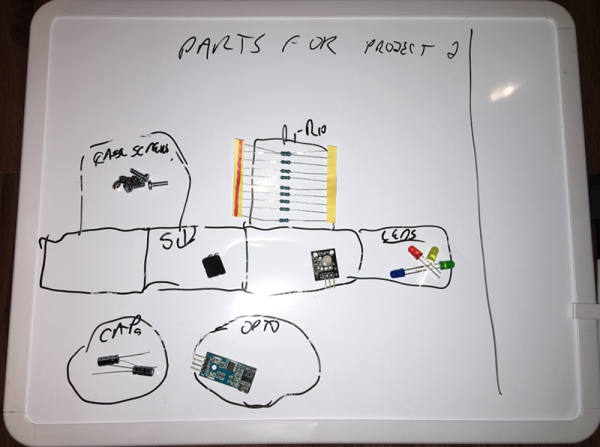
A few months ago, I was browsing through a local store and I saw a  neat idea. It was basically a small whiteboard with lines dividing it into cells. It was magnetic and the idea is you’d put your small loose (and ferrous) parts like screws, bolts, nuts, and resistors on the board. Since it was a marker board, you could make notes about what each cell contained. Great idea! But the thing was about $20 and I thought I could do better than that. As you might guess from the picture, I was successful. I spent about $5, although I had some rare-earth magnets hanging around. If you don’t, strong magnets aren’t that expensive and you can often raid them out of hard drives.

Continue reading “Hack A Whiteboard And Never Lose Screws Again”

Encoders Spin Us Right Round

Rotary encoders are great devices. Monitoring just a few pins you can easily and quickly read in rotation and direction of a user input (as well as many other applications). But as with anything, there are caveats. I recently had the chance to dive into some of the benefits and drawbacks of rotary encoders and how to work with them.

I often work with students on different levels of electronic projects. One student project needed a rotary encoder. These come in mechanical and optical variants. In a way, they are very simple devices. In another way, they have some complex nuances. The target board was an ST Nucleo. This particular board has a small ARM processor and can use mbed environment for development and programming. The board itself can take Arduino daughter boards and have additional pins for ST morpho boards (whatever those are).

The mbed system is the ARM’s answer to Arduino. A web-based IDE lets you write C++ code with tons of support libraries. The board looks like a USB drive, so you download the program to this ersatz drive, and the board is programmed. I posted an intro to mbed awhile back with a similar board, so if you want a refresher on that, you might like to read that first.

Reading the Encoder

The encoder we had was on a little PCB that you get when you buy one of those Chinese Arduino 37 sensor kits. (By the way, if you are looking for documentation on those kinds of boards, look here.; in particular, this was a KY-040 module.) The board has power and ground pins, along with three pins. One of the pins is a switch closure to ground when you depress the shaft of the encoder. The other two encode the direction and speed of the shaft rotation. There are three pull-up resistors, one for each output.

I expected to explain how the device worked, and then assist in writing some code with a good example of having to debounce, use pin change interrupts, and obviously throw in some other arcane lore. Turns out that was wholly unnecessary. Well… sort of.

Continue reading “Encoders Spin Us Right Round”

Custom Zynq/CMOS Camera Unlocks Astrophotography

Around here we love technology for its own sake. But we have to admit, most people are interested in applications–what can the technology do? Those people often have the best projects. After all, there’s only so many blinking LED projects you can look at before you want something more.

[Landingfield] is interested in astrophotography. He was dismayed at the cost of commercial camera sensors suitable for work like this, so he decided he would create his own. Although he started thinking about it a few years ago, he started earnestly in early 2016.

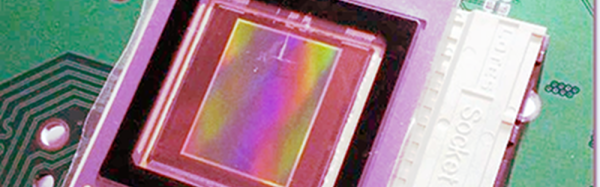
The project uses a Nikon sensor and a Xilinx Zynq CPU/FPGA. The idea is the set up and control the CMOS sensor with the CPU side of the Zynq chip, then receive and process the data from the sensor using the FPGA side before dumping it into memory and letting the CPU take over again. The project stalled for a bit due to a bug in the vendor’s tools. The posts describe the problem which might be handy if you are doing something similar. There’s still work to go, but the device has taken images that should appear on the same blog soon.

Continue reading “Custom Zynq/CMOS Camera Unlocks Astrophotography”

Amstrad On An FPGA

If you are from the United States and of a certain age, it is very likely you owned some form of Commodore computer. Outside the US, that same demographic was likely to own an Amstrad. The Z80-based computers were well known for game playing. [Freemac] implemented a working Amstrad CPC6128 using a Xilinx FPGA on a NEXYS2 demo board.

The wiki posting is a bit long, but it covers how to duplicate the feat, and also gives technical details about the design. It also outlines the development process used ranging from starting with a simple Z80 emulation and moving on to more sophisticated attempts. You can see a video of the device below.

Continue reading “Amstrad On An FPGA”

Browsing Forth

Forth has a strong following among embedded developers. There are a couple of reasons for that. Almost any computer can run Forth, even very small CPUs that would be a poor candidate for running programs written in C, much less host a full-blown development environment. At its core, Forth is very simple. Parse a word, look the word up in a dictionary. The dictionary either points to some machine language code or some more Forth words. Arguments and other things are generally carried on a stack. A lot of higher-level Forth constructs can be expressed in Forth, so if your Forth system reaches a certain level of maturity, it can suddenly become very powerful if you have enough memory to absorb those definitions.

If you want to experiment with Forth, you probably want to start learning it on a PC. There are several you can install, including gForth (the GNU offering). But sometimes that’s a barrier to have to install some complex software just to kick the tires on a system.

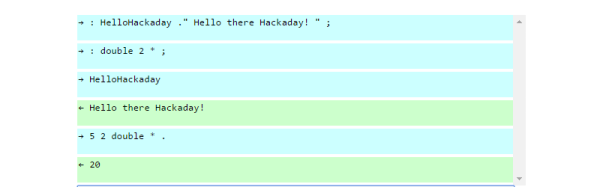
We have all kinds of other applications running in browsers now, why not Forth? After all, the system is simple enough that writing Forth in Javascript should be easy as pie. [Brendanator] did just that and even enhanced Forth to allow interoperability with Javascript. The code is on GitHub, but the real interesting part is that you can open a Web browser and use Forth.

Continue reading “Browsing Forth”

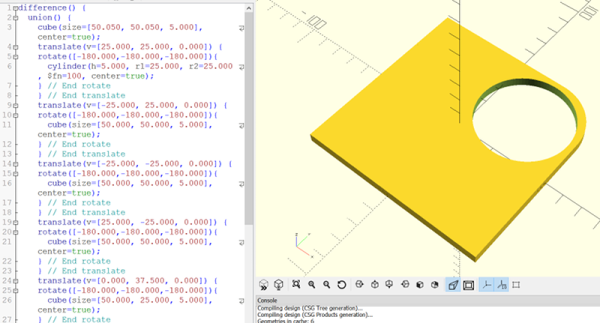
Ditch OpenSCAD For C++

There’s an old saying that a picture is worth a thousand words. If you’ve ever tried to build furniture or a toy with one of those instructions sheets that contains nothing but pictures, you might disagree. 3D design is much the same for a lot of people. You think you want to draw things graphically, but once you start doing complex things and making changes, parametric modeling is the way to go. Some CAD tools let you do both, but many 3D printer users wind up using OpenSCAD which is fully parametric.

If you’ve used OpenSCAD you know that it is like a simple programming language, but with some significant differences from what you normally use. It is a good bet that most Hackaday readers can program in at least one language. So why learn something new? A real programming language is likely to have features you won’t find readily in OpenSCAD that, in theory, ought to help with reuse and managing complex designs.

I considered OpenJSCAD. It is more or less OpenSCAD for JavaScript. However, JavaScript is a bit of a scripting language itself. Sure, it has objects and some other features, but I’m more comfortable with C++. I thought about using the OpenCSG library that OpenSCAD uses, but that exposes a lot of detail.

Instead, I turned to a project that uses C++ code to generate OpenSCAD output, OOML (the Object Oriented Mechanics Language)). OpenSCAD does the rendering, exporting, and other functions. Unfortunately, the project seems to have stalled a few years back and the primary web-based documentation for it seems to be absent. However, it is very usable and if you know how to find it, there is plenty of documentation available.

Why not OpenSCAD?

Continue reading “Ditch OpenSCAD For C++”