While SpaceX’s constellation of Starlink satellites is nowhere near its projected final size, the company has enough of the birds zipping around in low Earth orbit to start a limited testing period they call the Better Than Nothing Beta. If you’re lucky enough to get selected, you have to cough up $500 for the hardware and another $100 a month for the service. Despite the fairly high bar for getting your hands on one, [Kenneth Keiter] decided to sacrifice his Starlink dish to the teardown Gods.
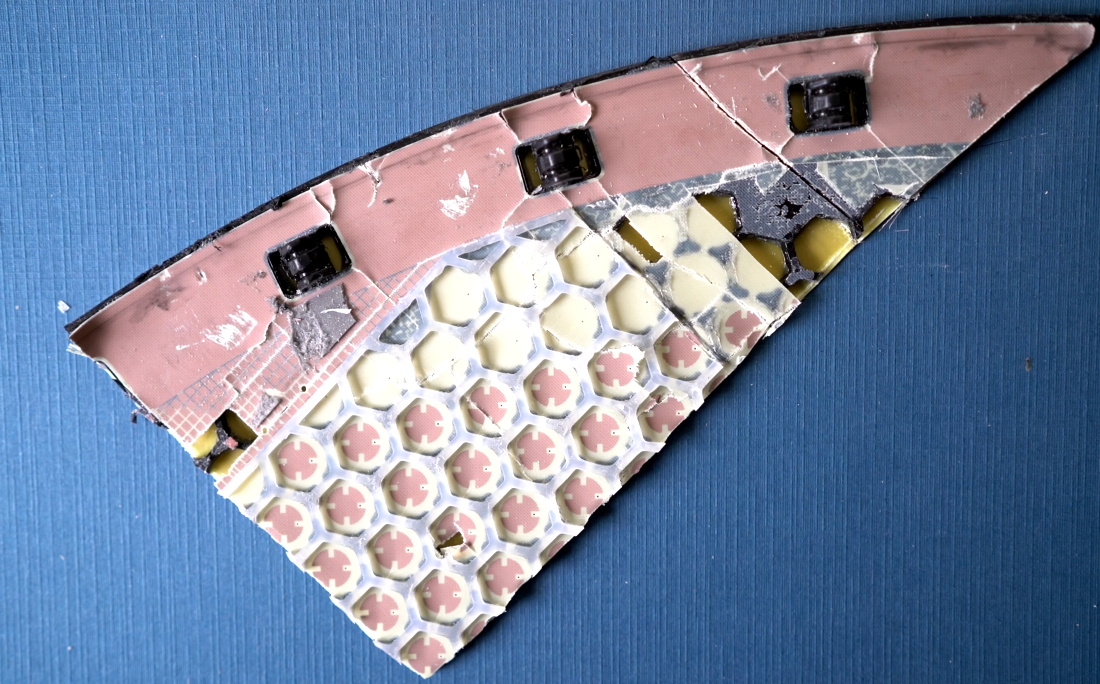
We say sacrifice because [Kenneth] had to literally destroy the dish to get a look inside. It doesn’t appear that you can realistically get into the exceptionally thin antenna array without pulling it all apart, thanks in part to preposterous amount of adhesive that holds the structural back plate onto the PCB. The sky-facing side of the phased array, the key element that allows the antenna to track the rapidly moving Starlink satellites as they pass overhead, is also laminated to a stack-up comprised of plastic hexagonal mesh layers, passive antenna elements, and the outer fiberglass skin. In short, there are definitely no user-serviceable parts inside.
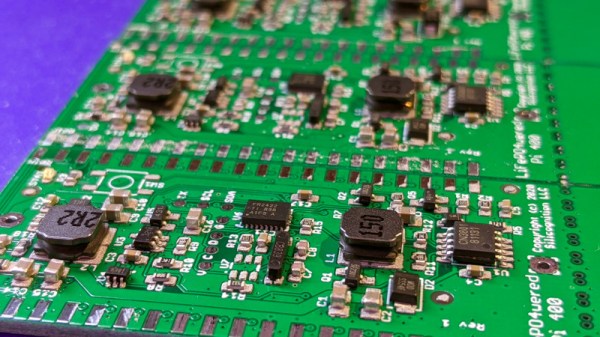
Beyond attempting to analyze the RF magic that’s happening inside the antenna, [Kenneth] also takes viewers through a tour of some of the more recognizable components of the PCB; picking out things like the Power over Ethernet magnetics, a GPS receiver, some flash storage, and the H-Bridge drivers used to control the pan and tilt motors in the base of the dish.
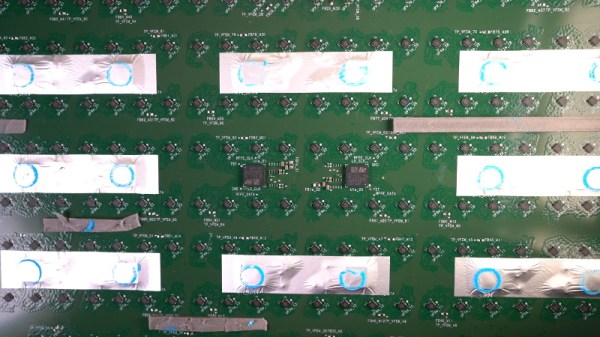
It also appears that the antenna is a self-contained computer of sorts, complete with ARM processor and RAM to run the software that aims the phased array. Speaking of which, it should come as no surprise to find that not only are the ICs that drive the dizzying array of antenna elements the most numerous components on the PCB, but that they appear to be some kind of custom silicon designed specifically for SpaceX.
In short, there’s still plenty we don’t know about how this high-tech receiver actually works. While [Kenneth] does a respectable job of trying to make sense of it all, and we admire the dedication required to rip apart such a rare and expensive piece of kit, it’s still going to be awhile before the hacker community truly masters the tech that SpaceX is putting into their ambitions global Internet service.
Continue reading “Literally Tearing Apart A SpaceX Starlink Antenna”