Finding Your Motorbike Using Wi-Fi

An urban planner once told me that every car requires at least four times as much space as they actually occupy. Each needs a spot on the roads, and three available parking spaces: one at home, one at work, and one to shop. Motorcycles are much smaller, but they still spend most of their time parked.

Motorcycles are the primary means of transport in Southeast Asia, and learning to safely drive one is an essential part of adapting to life here. Assuming it’s not pouring rain and you’re not flooded past your ankles, it’s actually quite a pleasant experience… until you have to park.

Unlike the parking lots you may be familiar with, there’s no expectation that your bike won’t be moved. In fact, it might very well end up on another floor, in another parking lot, or behind hundreds of impassable parked bikes on the roof. In the latter case, the attendant will shrug and suggest you come back in a few hours. Eventually, this won’t even register as a frustration – you will simply reason that there are plenty of other things that are more convenient here, like the weather (recent typhoon aside) or unlimited symmetrical fiber to the home for USD 5 a month.

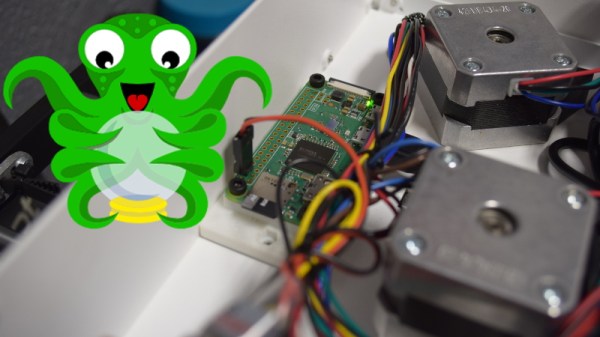
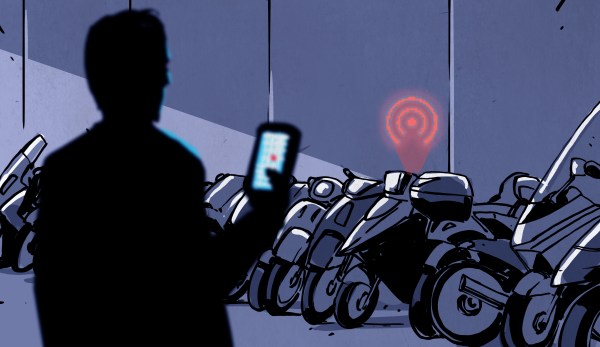
That being said, with a little technology the problem could be lessened a bit while waiting for automated parking lots to become commonplace. On rare occasions I see people with little radio emitters that make their headlights flash, but they’re not terribly common here and require carrying yet another thing on my already full key chain (homes here typically use several different locks). It seemed pretty easy to pull off something similar using my smart phone with an ESP8266 running NodeMCU. I had been meaning to try out the sleep modes to save battery power anyway, so off I went.

Continue reading “Finding Your Motorbike Using Wi-Fi”

Guide: Why Etch A PCB When You Can Mill?

I recall the point I started taking electronics seriously, although excited, a sense of dread followed upon the thought of facing the two main obstacles faced by hobbyists and even professionals: Fabricating you own PCB’s and fiddling with the ever decreasing surface mount footprints. Any resistance to the latter proves futile, expensive, and frankly a bit silly in retrospect. Cheap SMD tools have made it extremely easy to store, place, and solder all things SMD.

Once you’ve restricted all your hobbyist designs/experiments to SMD, how do you go about producing the PCBs needed for prototyping? Personally, I dread the thought of etching my own boards. The process is laborious and involves messy chemicals and specially sensitized PCB’s — none of which interest me. I’ve only ever done it a few times, and have promised myself never to do it again. Professional but cheap PCB manufacturing is more like it board pooling services such as OSH park have made this both easy and affordable — if you can wait for the turnaround.

So what are the alternatives? If you are really serious about swift prototyping from your own Lab, I put forth the case of milling your own PCB’s. Read on as I take you through the typical workflow from design to prototype and convince you to put up with the relatively high start up cost of purchasing a PCB mill.

Continue reading “Guide: Why Etch A PCB When You Can Mill?”

Repairing A Macbook Charger… With A Pistachio Nut

Laptop chargers face a hard life. They’re repeatedly plugged and unplugged, coiled up, stuffed into bags, thrown around, and just generally treated fairly poorly. Combine this with fairly lightweight design and it’s not uncommon for a laptop charger to fail after a few years. It’s usually the connector that goes first. Such was the case when I found myself face to face with a failed Macbook charger, and figured it’d be a simple fix. Alas, I was wrong.

Unlike most PC manufacturers, who rely on the humble barrel jack and its readily available variants, Apple liked to use the Magsafe connector on its Macbook line. This connector has many benefits, such as quick release in the event someone trips over the cable, and the fact that it can be plugged in without regard to orientation. However, it’s not the easiest to fix. When the charger began failing, I noticed two symptoms. The first was that the charger would only function if the cable was held just so, in exactly the right orientation. The other, was that even when it would charge, the connector would become very hot. This led me to suspect an intermittent connection was the culprit, and it was quite a poor one at that; the high resistance leading to the heat issue.

It’s at this point with any other charger that you get out your trusty sidecutters, lop the end off, and tap away at Digikey to get a replacement part on the way. With Magsafe? No dice. Replacement parts simply aren’t available — a common problem with proprietary connectors. I endeavoured to fix the problem anyway. I began to strip away the metal shell around the back of the connector with my sidecutters, and eventually an angle grinder. A Dremel would have been the perfect tool for the job, actually, but I persevered regardless. After much consternation, I had the connector peeled back and was able to identify the problem.

Continue reading “Repairing A Macbook Charger… With A Pistachio Nut”

Upgrading A 3D Printer With OctoPrint

If you’ve been hanging around 3D printing communities, or reading the various 3D printing posts that have popped up here on Hackaday, you’ve almost certainly heard of OctoPrint. Created and maintained by Gina Häußge, OctoPrint allows you to turn an old computer (or more commonly a small ARM board like the Raspberry Pi or BeagleBone) into a network-accessible control panel for your 3D printer. Thanks to a thriving collection of community developed plugins, it can even control other hardware such as lights, enclosure heaters, smart plugs, or anything else you can think to hook onto the GPIO pins of your chosen ARM board. The project has become so popular that the new Prusa i3 MK3 has a header on the control board specifically for connecting a Pi Zero W running OctoPrint.

Even still, I never personally “got” OctoPrint. I was happy enough with my single printer connected to my computer and controlled directly from my slicer over USB. The majority of the things I print are of my own design, so when setting up the printer it only seemed logical that I would have it connected to the machine I’d be doing my designing on. If I’m sitting at my computer, I just need to rotate my chair to the right and I’m at my printer. What do I need to control the thing over WiFi for?

But things got tricky when I wanted to set up a second printer to help with speeding up larger projects. I couldn’t control them both from the same machine, and while I could print from SD on the second printer if I really had to, the idea seemed painfully antiquated. It would be like when Scotty tried talking into the computer’s mouse in “Voyage Home”. Whether I “got it” or not, I was about to dive headfirst into the world of OctoPrint.

Continue reading “Upgrading A 3D Printer With OctoPrint”

44 Layers Of Katharine Burr Blodgett

Whether you realize it or not, Katharine Burr Blodgett has made your life better. If you’ve ever looked through a viewfinder, a telescope, or the windshield of a car, you’ve been face to face with her greatest achievement, non-reflective glass.

Katharine was a surface chemist for General Electric and a visionary engineer who discovered a way to make ordinary glass 99% transparent. Her invention enabled the low-cost production of nearly invisible panes and lenses for everything from picture frames and projectors to eyeglasses and spyglasses.

Katharine’s education and ingenuity along with her place in the zeitgeist led her into other fields throughout her career. When World War II erupted, GE shifted their focus to military applications. Katharine rolled up her sleeves and got down in the scientific trenches with the men of the Research Lab. She invented a method for de-icing airplane wings, engineered better gas masks, and created a more economical oil-based smokescreen. She was a versatile, insightful scientist who gave humanity a clearer view of the universe.

Continue reading “44 Layers Of Katharine Burr Blodgett”

When A Skimmer Isn’t A Skimmer

I have a confession to make: ever since the first time I read about them online, I’ve been desperate to find an ATM skimmer in the wild. It’s the same kind of morbid curiosity that keeps us from turning away from a car accident, you don’t want to be witness to anyone getting hurt, but there’s still that desire to see the potential for danger up close. While admittedly my interest is largely selfish (I already know on which shelf I would display it), there would still be tangible benefits to the community should an ATM skimmer cross my path. Obviously I would remove it from the machine and prevent others from falling prey to it, and the inevitable teardown would make interesting content for the good readers of Hackaday. It’s a win for everyone, surely fate should be on my side in this quest.

So when my fingers brushed against that unmistakable knobby feel of 3D printed plastic as I went to insert my card at a local ATM, my heart skipped a beat. After all these years, my dream had come true. Nobody should ever be so excited about potentially being a victim of fraud, but there I was, grinning like an idiot in the farmer’s market. Like any hunter I quickly snapped a picture of my quarry for posterity, and then attempted to free it from the host machine.

But things did not go as expected. I spend most of my free time writing blog posts for Hackaday, so it’s safe to say that physical strength is not an attribute I possess in great quantity, but even still it seemed odd I couldn’t get the skimmer detached. I yanked it in every direction, tried to spin it, did everything short of kicking it; but absolutely no movement. In fact, I noticed that when pulling on the skimmer the whole face plate of the ATM bulged out a bit. I realized this thing wasn’t just glued onto the machine, it must have actually been installed inside of it.

I was heartbroken to leave my prize behind, but at the very least I would be able to alert the responsible party. The contact info for the ATM’s owner was written on the machine, so I emailed them the picture as well as all the relevant information in hopes that they could come check the machine out before anyone got ripped off.

Continue reading “When A Skimmer Isn’t A Skimmer”

Try This For 3D Printing Without Support

Have a look at the object to the right. Using a conventional fused deposition printer, how would you print the object? There’s no flat surface to lay on the bed without generating a lot of overhangs. That usually requires support.

In theory, you might be able to print the bottom of the sphere down, but it is difficult to get that little spot to adhere to the bed. If you have at least two extruders and you are set up to print support material, that might even be the best option. However, printing support out of the same material you are printing with makes it hard to get a good clean print. There is another possibility. It does require some post-processing, but then again, not as much as hacking away a bunch of support material.

A Simple Idea

The idea is simple and — at first — it will sound like a lot of trouble. The basic idea is to cut the model in half at some point where both halves would be easy to print and then glue them together.  Stick around (no pun intended), though, because I’ll show you a way to make the alignment of the parts almost painless no matter how complex the object might be.

The practical problem with gluing together half models is getting the pieces in the exact position, but that turns out to be easy if you just make a few simple changes to your model. Another lesser problem is clamping a piece while gluing. You can use a vise, but some oddly-shaped parts are not conducive to traditional vise jaws.

In Practice

Starting with an OpenSCAD object, it is easy to cut the model in half. Actually, you could cut it anywhere. Then it is easy to rotate half of it so the cut line is at the bottom of each part. That doesn’t solve the alignment problem nor does it help you clamp when you glue.

The trick is to build a flange around each part. The flanges mate with a few screws after printing so alignment is perfect and bolts through the flange holes can keep the parts together and immobilized while your glue of choice sets. The kicker is that I even have an automated process to make the design side of this trick very easy.

Continue reading “Try This For 3D Printing Without Support”