Decapping The CC2630 And CC2650

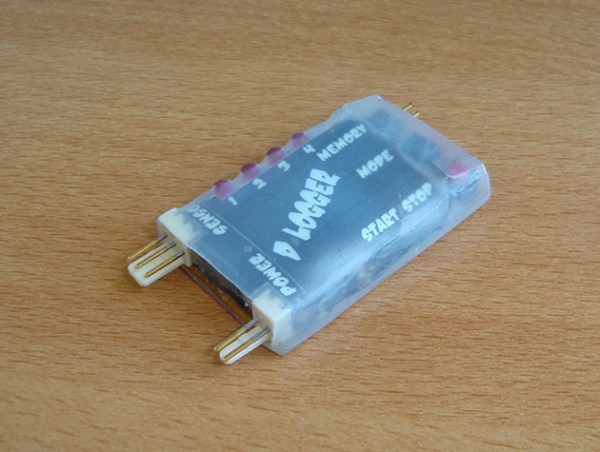
[Jelmer] got curious about the TI CC26XX wireless MCUs and did a little decapping.

TI sells four different models of their CC26XX wireless MCUs. Three support one of the following: RF4CE, Zigbee/6LoWPAN, and Bluetooth and a further model which supports all protocols. Each IC has the same baseline specification: 128Kb Flash, 20Kb RAM and 15 GPIOs. cc26xx_nitric[Jelmer] was curious to know if the price difference was all in the software. And in order to verify this decided that decapping was the only thing to do!

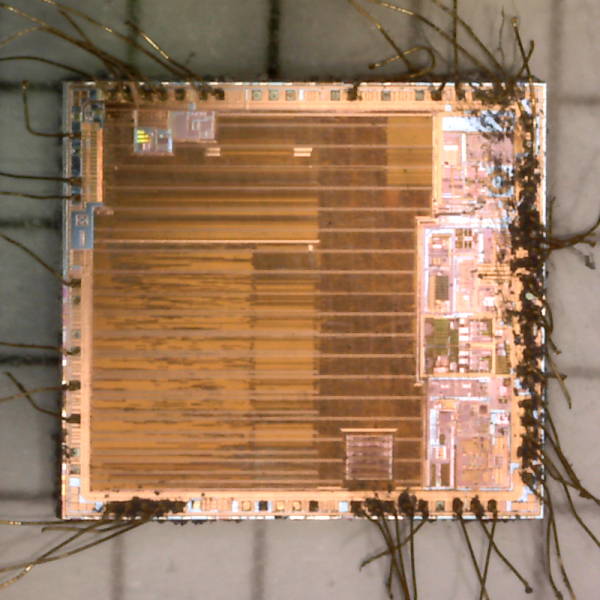
We’ve covered decapping using Nitric acid before, as well as lower tech techniques. Luckily [Jelmer] had access to Nitric acid and a fume hood, not the easiest items to get hold of outside of a research lab (checkout the video of the IC bubbling away below). [Jelmer] got some great die shots under an optical microscope and was able to confirm that the die markings are identical. This opens the door to future hacks, which might allow the cheaper models to be re-flashed, expanding their capabilities.

Continue reading “Decapping The CC2630 And CC2650”

UController Code Profiler Debugs Your Microcontroller

When working on digital circuits that operate at high frequencies it helps to have some special tools on hand. Things like oscilloscopes and logic analyzers are priceless when something isn’t working right. Another great tool would be this hardware-based profiler that [Mike] came up with while he was working on another project.

The profiler connects to USB and shows up as a serial port. Normally [Mike] used a set of LEDs to get information about how his microcontrollers work, but for this project that wasn’t enough. The uController Code Profiler can provide the main loop running time, time functions and sections of code, keep track of variables, and a few other tasks as well, all with nanosecond resolution.

The source code isn’t provided but a hex file is available, along with a schematic and an include file, if you want to try this one out on your next project. Like this homemade logic analyzer, this could be a powerful tool in your microcontroller arsenal. Simply include the file with various pieces of your code to get it up and running!

Embed With Elliot: We Don’t Need No Stinkin’ RTCs

A lot of microcontroller projects out there need some sense of wall-clock time. Whether you’re making (yet another) crazy clock, logging data, or just counting down the time left for your tea to steep, having access to human time is key.

The simplest solution is to grab a real-time-clock (RTC) IC or module. And there’s good reason to do so, because keeping accurate time over long periods is very hard. One second per day is 1/86,400 or around eleven and a half parts per million (ppm), and it’s tricky to beat twenty ppm without serious engineering.

Chronodot uses a Maxim TXCO

Good RTC ICs like Maxim’s DS3231, used in the Chronodot, can do that. They use temperature correction logic and a crystal oscillator to get as accurate as five parts per million, or under half a second per day. They even have internal calendar functions, taking care of leap years and the day of the week and so on. The downside is the cost: temperature-compensated RTCs cost around $10 in single quantity, which can break the budget for some simple hacks or installations where multiple modules are needed. But there is a very suitable alternative.

What we’re looking for is a middle way: a wall-time solution for a microcontroller project that won’t break the bank (free would be ideal) but that performs pretty well over long periods of time under mellow environmental conditions. The kind of thing you’d use for a clock in your office. We’ll first look at the “obvious” contender, a plain-crystal oscillator solution, and then move on to something experimental and touchy, but free and essentially perfectly accurate over the long term: using power-line frequency as a standard.

Continue reading “Embed With Elliot: We Don’t Need No Stinkin’ RTCs”

True Random Number Generator For A True Hacker

How can you generate random bits? Some people think it’s not easy, others will tell you that it’s pretty damn hard, and then there are those who wonder if it is possible at all. Of course, it is easy to create a very long pseudorandom sequence in software, but even the best PRNG (Pseudorandom Number Generator) needs a good random seed, as we don’t want to get the same sequence each time we switch on the unit, do we? That’s why we need a TRNG (True Random Number Generator), but that requires special hardware.

Some high-end microprocessors are equipped with an internal hardware TRNG, but it is, unfortunately, not true for most low-cost microcontrollers. There are a couple of tricks hackers use to compensate. They usually start the internal free running counter and fetch its contents when some external event occurs (user presses a button, or so). This works, but not without disadvantages. First, there is the danger of “locking” those two events, as a timer period may be some derivative of input scan routine timing. Second, the free running time (between switching on and the moment the unit requests a random number) is often too short, resulting in the seed being too close to the sequence start, and thus predictable. In some cases even, there is no external input before the unit needs a random seed!

Despite what has already been discussed, microcontrollers do have a source of true randomness inside them. While it might not be good enough for crypto applications, it still generates high enough entropy for amusement games, simulations, art gadgets, etc.

Continue reading “True Random Number Generator For A True Hacker”

New Part Day: STM32F7, An ARM Cortex-M7

It was announced last year, but ST is finally rolling out the STM32F7, the first microcontroller in production that is based on the ARM Cortex-M7.

The previous go-to part from the ST catalog was the STM32F4, an extremely powerful chip based on the ARM Cortex M4 processor. This chip was incredibly powerful in its time, and is still a respectable choice for any application that needs a lot of horsepower, but not a complete Linux system. We’ve seen the ~F4 chip pump out 800×600 VGA, drive a thermal imaging camera, and put OpenCV inside a webcam. Now there’s a new, even more powerful part on the market, and the mind reels thinking what might be possible.

Right now there a few STM32F7 parts out, both with speeds up to 216MHz, Flash between 512k and 1MB, and 320kB of RAM. Peripherals include Ethernet, USB OTG, SPDIF support, and I²S. The most advanced chip in the line includes a TFT LCD controller, and a crypto processor on-chip. All of the chips in the STM32F7 line are pin compatible with the STM32F4 line, with BGA and QFP packages available.

As with the introduction of all of ST’s microcontrollers, they’re rolling out a new Discovery board with this launch. It features Ethernet, a bunch of audio peripherals, USB OTG, apparently an Arduino-style pin layout, and a 4.3 inch, 480×272 pixel LCD with capacitive touch. When this is available through the normal distributors, it will sell for around $50. The chips themselves are already available from some of the usual distributors, for $17 to $20 in quantity one. That’s a chunk of change for a microcontroller, but the possibilities for what this can do are really only limited by an engineer’s imagination.

Embed With Elliot: I2C Bus Scanning

A lot of great ICs use I2C to communicate, but debugging a non-working I2C setup can be opaque, especially if you’re just getting started with the protocol/bus. An I2C bus scanner can be a helpful first step in debugging an I2C system. Are all the devices that I think should be present actually there and responding? Do they all work at the bus speed that I’m trying to run? If you’ve got an Arduino or Bus Pirate sitting around, you’re only seconds away from scanning your I2C bus, and answering these questions.

Continue reading “Embed With Elliot: I2C Bus Scanning”

Temperature Logger

Logging Engine Temperature For RC Models

[Rui] enjoys his remote-controlled helicopter hobby and he was looking for a way to better track the temperature of the helicopter’s engine. According to [Rui], engine temperature can affect the performance of the craft, as well as the longevity and durability of the engine. He ended up building his own temperature logger from scratch.

The data logger runs from a PIC 16F88 microcontroller mounted to a circuit board. The PIC reads temperature data from a LM35 temperature sensor. This device can detect temperatures up to 140 degrees Celsius. The temperature sensor is mounted to the engine using Arctic Alumina Silver paste. The paste acts as a glue, holding the sensor in place. The circuit also contains a Microchip 24LC512 EEPROM separated into four blocks. This allows [Rui] to easily make four separate data recordings. His data logger can record up to 15 minutes of data per memory block at two samples per second.

Three buttons on the circuit allow for control over the memory. One button selects which of the four memory banks are being accessed. A second button changes modes between reading, writing, and erasing. The third button actually starts or stops the reading or writing action. The board contains an RS232 port to read the data onto a computer. The circuit is powered via two AA batteries. Combined, these batteries don’t put out the full 5V required for the circuit. [Rui] included a DC-DC converter in order to boost the voltage up high enough.