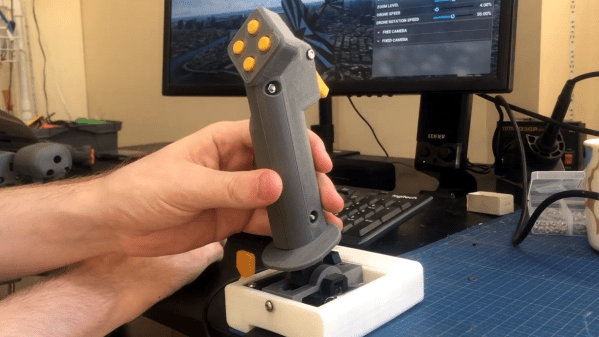
We have seen quite a few DIY joystick designs that use Hall effect sensors, but [Akaki Kuumeri]’s controller designs (YouTube video, embedded below) really make the most of 3D printing to avoid the need for any other type of fabrication. He’s been busy using them to enhance his Microsoft Flight Simulator 2020 experience, and shares not just his joystick design, but makes it a three-pack with designs for throttle and pedals as well.
Hall effect sensors output a voltage that varies in proportion to the presence of a magnetic field, which is typically provided by a nearby magnet. By mounting sensors and magnets in a way that varies the distance between them depending on how a control is moved, position can be sensed and communicated to a host computer.
In [Akaki]’s case, that communication is done with an Arduino Pro Micro (with ATmega32U4) whose built-in USB support allows it to be configured and recognized as a USB input device. The rest is just tweaking the physical layouts and getting spring or elastic tension right. You can see it all work in the video below.
The classic serial null-modem cable was, among other things, used to connect two computers together for communications and file transfer. Largely eliminated in daily use by the advent of home networking, there are still fringe applications where such a thing can come in handy. [Nick Sayer] needed just such a tool, but one that would work in a modern USB environment. Enter the isolated USB null-modem.
The device consists of two USB Communication Device Class, or CDC chips, creating a USB serial port for each attached computer. The TX and RX lines are cross-connected to allow communication between the two sides. Rather than directly connect the lines, however, they pass through an opto-isolator. This is important, as it allows two computers at different ground potentials to be safely connected to each other without damage.
[Nick] originally created the device to solve a specific problem at his day job, but community response was large enough that he was kind enough to share the project online. Expect to see devices available on Tindie in future for those that need a hookup. While it’s not something everyone will need, for those that do, it should come in handy. If you’re looking for other useful applications for USB-serial devices, there’s plenty – you can even try your hand at software-defined radio!
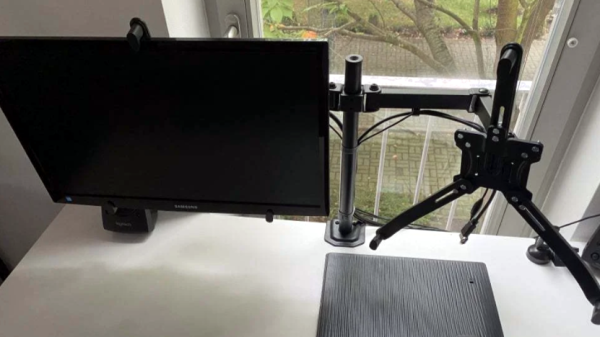
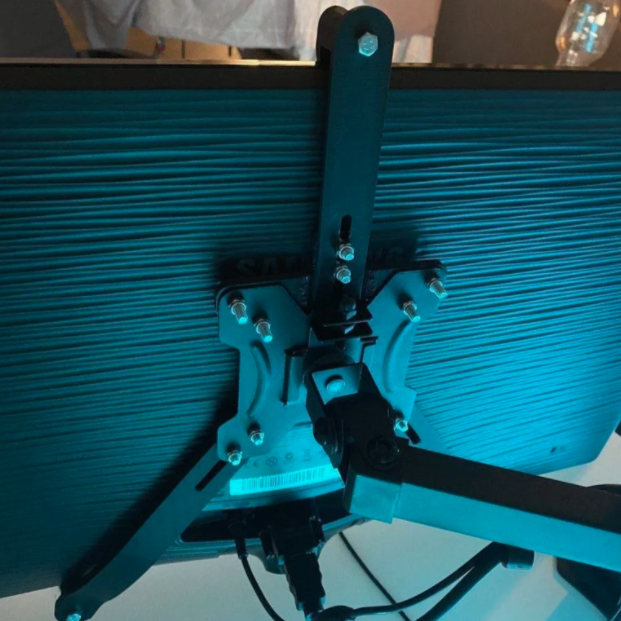
Some monitors lack the holes on the back that make them VESA-compliant, so mounting them on a monitor arm can be a non-starter. To handle this, [Patrick Hallek] designed and 3D printed these adapter arms to make flat monitors mount to VESA hardware whether they want to or not.
How does it work? When a monitor can’t attach directly to a VESA mount, this assembly attaches to the mount instead. The three arms extend around the edge of the monitor to grip it from the bottom and top. Some hex-head M5 bolts and nuts are all that are required to assemble the parts, and the top arm is adjustable to accommodate different sizes of monitor. As long as the screen size is between 17 and 27 inches diagonal, and the monitor thickness falls between 30 mm and 75 mm, it should fit.
It’s a smart design that leverages one of the strengths of 3D printing: that of creating specialized adapters or fixtures that would be troublesome to make by hand. That is not to say that there’s no other way to make exactly what one wants when it comes to mounting monitors: check out this triple-monitor setup using some common metal struts, no welding required.
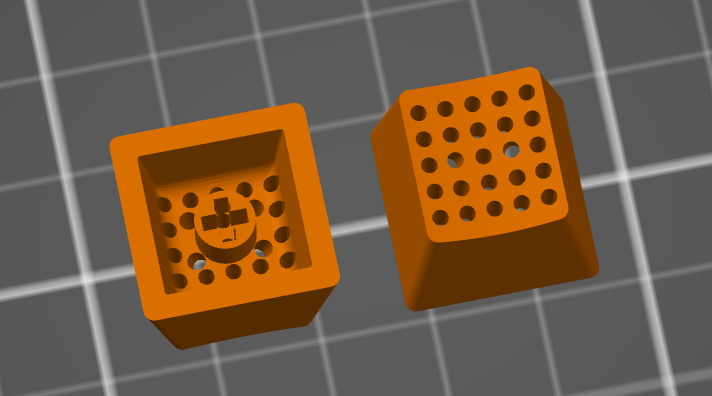
The idea is to take a standard keycap blank and pop an array of 25 holes in the face. Your thread or yarn is run through these holes, allowing you to create whatever shape you wish within the 5 x 5 matrix. While it’s somewhat tight quarters on the underside of the cap, nothing prevents you from using multiple colors or even materials to do your stitching. As an added bonus, the soft threads should provide a very comfortable and particularly tactile surface to tap on.
Now the most obvious application is to simply stitch up versions of all the alphanumeric keys, but there’s clearly room for some interpretation here. [Billie] has already shown off some simple iconography like a red heart and we’re sure creative folks will have no trouble coming up with all sorts of interesting needlepoint creations to top their prized mechanical keyboards.
The intricate details necessary to make this idea work may be beyond the common desktop FDM 3D printer, so [Billie] ran these prototypes off on a resin printer (she attributes the visible layer lines to a hasty print). She’d love to hear feedback from other keyboard aficionados who’ve made the leap to liquid goo printing, so be sure to drop her a line if you print out a set of your own. It sounds like a new version is in the works which will provide a false bottom to cover the stitching from below, but functionally these should get you started.
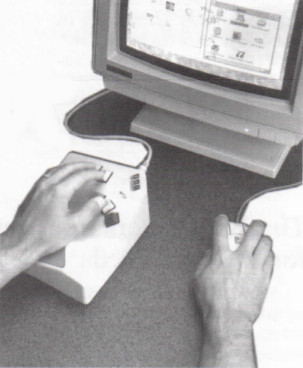
I guess it shouldn’t surprise me that by researching weird and interesting keyboards, I would uncover more weird and interesting keyboards. This is the BAT personal keyboard by Infogrip, and it’s something I came across while researching the DataHand keyboard and mentally filed away as something cool to look into.
When I came across a used BAT for a reasonable price, I snagged it, even though it didn’t come with any of the manuals or software, not even a cord. Like I said, reasonable price. I looked these keyboards up and found out that you can buy them new for a lot more than what I paid.
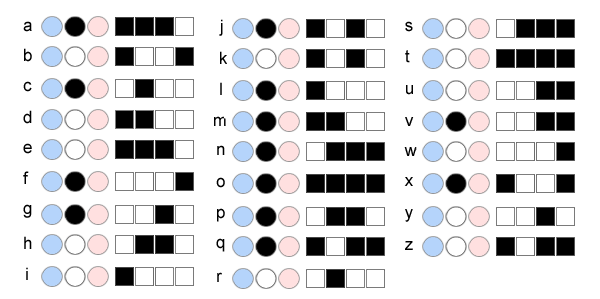
My gently used BAT in all its angular glory.The lowercase letter chords use either the middle thumb key or no thumb key. Image via Infogrip
Instead of stretching your fingers all over a regular keyboard, poking keys one at a time to spell out words, you press combinations of keys simultaneously, like playing chords on a piano.
You’re meant to use your thumb for the red, grey, and blue keys, and lay the other four on the rest of the keys. All of the alphabet keys are chorded with or without the gray thumb key, and all the number, symbol, and modifier keys are accessed through the red and blue layers.
Why would you want one of these? Well, given enough time to learn the chords, you can do anything a standard 104+ keyboard can do with only seven keys. You would never need to look down, not even for those weird seldom-used keys, and the only finger that ever travels is your thumb. All of this reduced hand/finger/wrist travel is going to be easier on the body.
The BAT lets you CAD like a madlad. Via Bill Buxton
The BAT is also part programmable macro pad, and from what I can gather, the main selling point was that you could quickly input shortcuts in CAD programs and the like, because you could keep one hand on the mouse.
The BAT came in both left- and right-handed versions that can be used either alone or together. Imagine how fast you could type if you chorded everything and split the typing duties between both hands! The only trouble is learning all those different finger combinations, although they say it doesn’t take that long.
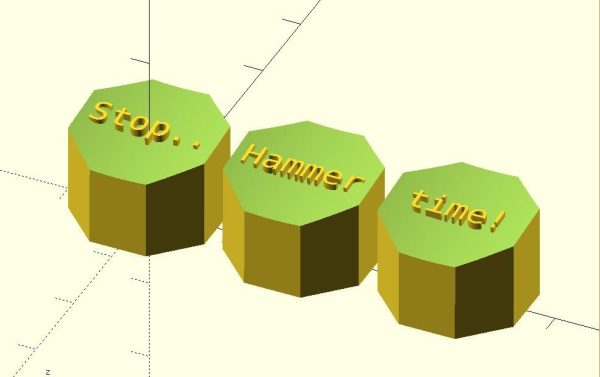
With bright colors and often intricate designs, after the physical shape of a keyboard the most conspicuous elements are surely the keycaps. Historically dictated by the stem of the key switch it attaches to, keycaps come in a variety of sizes, colors, profiles, and designs. As they necessarily include small features with tight tolerances to fit the stem of their key switch, injection molding is the classic manufacturing technique for a keycap. But as hobbyist 3D printing matures and resin printers become more accessible, home keycap manufacturing is increasingly good option. Instead of designing each cap by hand, consider trying [rsheldiii]’s KeyV2 OpenSCAD script to create custom caps with ease.
To cover the basics, KeyV2 can generate full keycap sets with Cherry or Alps stems, in the SA, DSA, DCS profiles (and more!) for any typically sized keyboard. Generating a particular cap of arbitrary profile, position, and size is just a short chain of function calls away. But standard keycap sets aren’t the highlight of this toolset.
If you’re not an OpenSCAD aficionado yet, visit [Brian Benchoffs] great getting-started guide or our other coverage to get a feel for what the tool can do. Part of OpenSCAD’s attraction is that it is the the paragon of parametric modeling. It’s declarative part files ensure that no parameter goes undefined, which is a perfect fit for KeyV2.
The root file upon which all caps are based on has about 150 keycap parameters which can be tweaked, and that’s before more elaborate customization. Making simple “artisan” caps is a snap, as the magic of OpenSCAD means the user can perform any Boolean operations they need on top of the fully parameterized keycap. Combining an arbitrary model with a keycap is one union() away. See the README for examples.
For the prospective user of KeyV2 worried about complexity; don’t be, the documentation is a treat. Basic use to generate standard keycaps is simple, and there are plenty of commented source files and examples to make more complex usage easy. Thinking about a new keyboard? Check out our recent spike in clacky coverage.
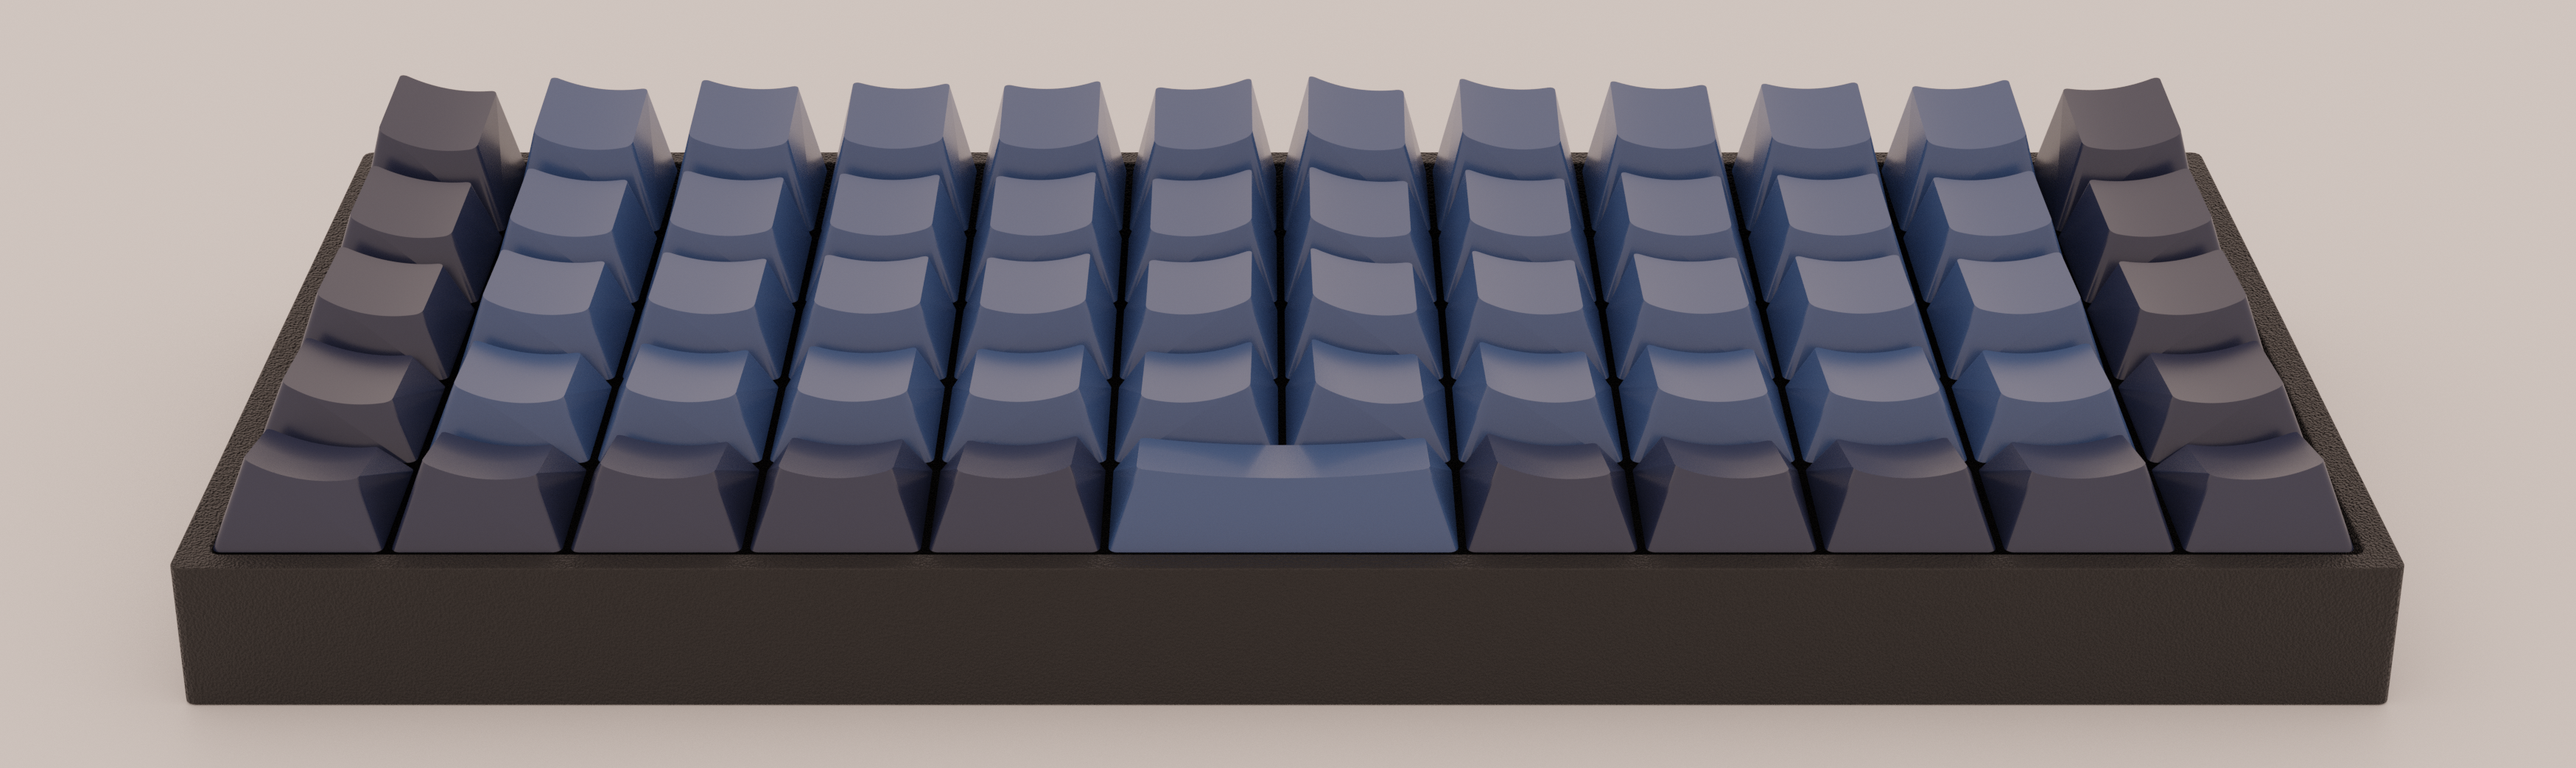
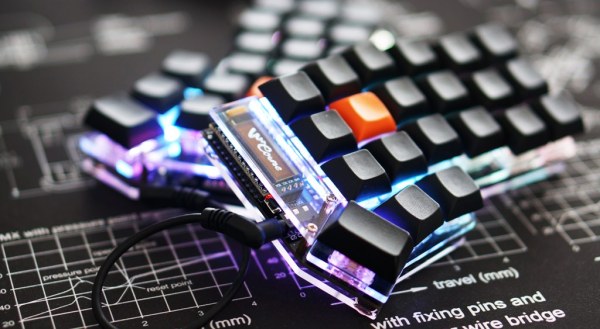
Tired of a boring, single piece keyboard? Thinking about a change but don’t know what all your options are? Well prospective-keyboard-shopper, today is your lucky day. We at the Hackaday are here to facilitate the habit with two excellent resources for the eager keyboard shopper; [pvinis]’s awesome-split-keyboards and [jhelvy]’s splitkbcompare.
As indicated by its title, awesome-split-keyboards is an awesome list of split keyboards 50 examples strong. Every split we’ve come across seems to be represented here, many with at least an image or two along with links to more information about how to build or buy the model in question. If that’s not enough, the bottom of the page has a wealth of background information about building or buying your own.
But before making such an important decision it’s important to make sure the keyboard in question will be a good fit in the hands. This is where splitkbcompare comes in, providing a visualization of many popular split layouts. If we hadn’t just found awesome-split-keyboards this filterable list and wide selection would have been the highlight here. But what does stand out is the ability to generate 1:1 scale printouts of the layouts in question, even stacking them for comparison, allowing a prospective buyer get a hands on feel for what they’re considering.
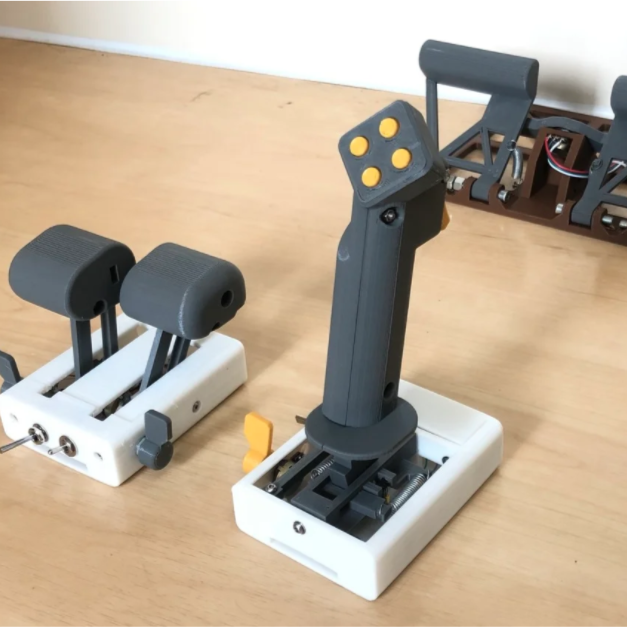 We have seen quite a few DIY joystick designs that use Hall effect sensors, but [Akaki Kuumeri]’s controller designs (YouTube video, embedded below) really make the most of 3D printing to avoid the need for any other type of fabrication. He’s been busy using them to enhance his Microsoft Flight Simulator 2020 experience, and shares not just his joystick design, but makes it a three-pack with designs for throttle and pedals as well.