Optocouplers: Defending Your Microcontroller, MIDI, And A Hot Tip For Speed

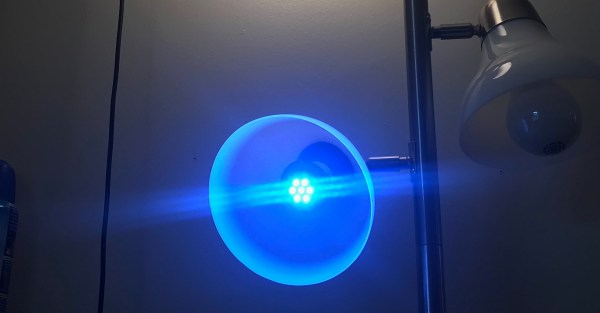
Deep in the heart of your latest project lies a little silicon brain. Much like the brain inside your own bone-plated noggin, your microcontroller needs protection from the outside world from time to time. When it comes to isolating your microcontroller’s sensitive little pins from high voltages, ground loops, or general noise, nothing beats an optocoupler. And while simple on-off control of a device through an optocoupler can be as simple as hooking up an LED, they are not perfect digital devices.

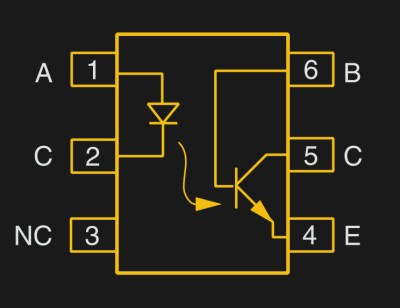
But first a step back. What is an optocoupler anyway? The prototype is an LED and a light-sensitive transistor stuck together in a lightproof case. But there are many choices for the receiver side: photodiodes, BJT phototransistors, MOSFETs, photo-triacs, photo-Darlingtons, and more.

So while implementation details vary, the crux is that your microcontroller turns on an LED, and it’s the light from that LED that activates the other side of the circuit. The only connection between the LED side and the transistor side is non-electrical — light across a small gap — and that provides the rock-solid, one-way isolation.

Continue reading “Optocouplers: Defending Your Microcontroller, MIDI, And A Hot Tip For Speed”

An Ode To Belgrade

In two weeks the Hackaday Community is gathering in Belgrade for Europe’s greatest hardware con, The Hackaday Belgrade Conference — an event not to be missed — but of course the city itself is a spectacular place to visit and has the perfect feel for those who like to build electronics. Why not join us for your own geek world tour to Serbia? Here’s a few of the things you’ll want to see while in Belgrade.

Aeronautical Museum Belgrade

Aircraft, Inventor, Architecture

Belgrade is a tech center and a hidden jewel of Europe. Need proof? Fly into Belgrade, and you’ll land at Nikola Tesla Airport. Pick up a car at the airport and you’ll pass a great glass torus housing Serbia’s Museum of Aviation. Here, you’ll find aircraft from both sides of the cold war, Sabres and MiGs, Hurricanes and Messerschmitts, a quite rare Sud Caravelle, and the canopy of the only stealth bomber ever to be shot down. It’s an aviation geek’s paradise, and you haven’t even left the airport.

What else is in store for you when you visit Belgrade? For the Hackaday crowd, the most interesting bit will probably be the Nikola Tesla Museum. You might know of Nikola Tesla from a webcomic, but he’s actually the greatest inventor of all time, even more so than Elon Musk. Tesla invented radio, even though Marconi got the credit. Tesla invented radar and discovered x-rays. The only person they could find to portray a figure like Tesla in The Prestige was David Bowie. Nikola Tesla is the most iconic inventor to ever live (change my mind), and his museum is in Belgrade.

Continue reading “An Ode To Belgrade”

How To Build Anything Out Of Aluminum Extrusion And 3D Printed Brackets

The real power of 3D printing is in infinite customization of parts. This becomes especially powerful when you combine 3D printing with existing materials. I have been developing a few simple tricks to make generic fasteners and printed connectors a perfect match for aluminum extrusion, via a novel twist or two on top of techniques you may already know.

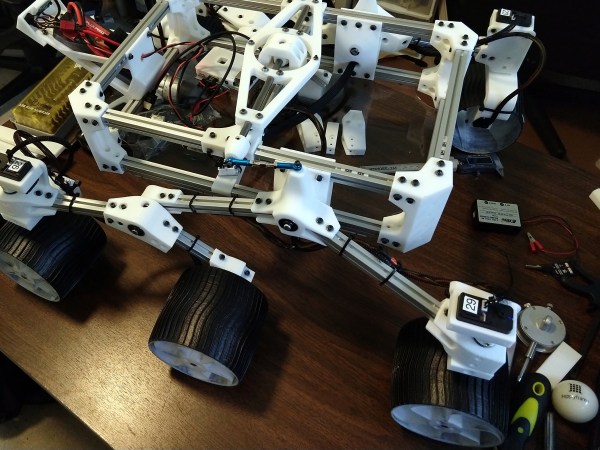
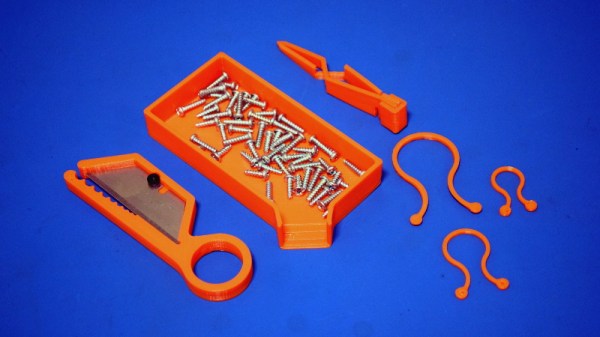
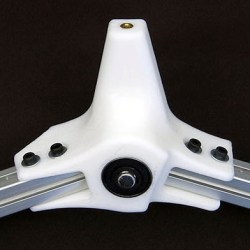
Work long enough with 3D printers, and our ideas inevitably grow beyond our print volume. Depending on the nature of the project, it may be possible to divide into pieces then glue them together. But usually a larger project also places higher structural demands ill-suited to plastic.

Those of us lucky enough to have nice workshops can turn to woodworking, welding, or metal machining for larger projects. Whether you have that option or not, aluminum extrusion beams provide the structure we need to go bigger and to do it quickly. And as an added bonus, 3D printing can make using aluminum extrusion easier and cheaper.

Continue reading “How To Build Anything Out Of Aluminum Extrusion And 3D Printed Brackets”

Raspberry Pi Becomes Cycle Exact Commodore Drive Emulator

The Commodore 1541 disk drive is unlike anything you’ll ever see in modern computer hardware. At launch, the 1541 cost almost as much as the Commodore 64 it was attached to ($400, or about $1040 at today’s value). This drive had a CPU, and had its own built-in operating system. Of course, anyone using a Commodore 64 now doesn’t deal with this drive these days — you can buy an SD2IEC for twenty dollars and load all your C64 games off an SD card. If you’re cheap, there’s always the tape drive interface and a ten dollar Apple Lightning to 3.5mm headphone adapter.

But the SD2IEC isn’t compatible with everything, and hacking something together using the tape drive doesn’t have the panache required of serious Commodoring. What’s really needed is a cycle-accurate emulation of the 1541 disk drive, emulating the 6502 CPU and the two 6522 VIAs in this ancient disk drive. The Raspberry Pi comes to the rescue. [Steve White] created the Pi1541, an emulation of the Commodore 1541 disk drive that runs on the Raspberry Pi 3B.

Pi1541 is a complete emulation of the 6502 and two 6522s found inside the Commodore 1541 disk drive. It runs the same code the disk drive does, and supports all the fast loaders, demos, and copy protected original disk images that can be used with an original drive.

The only hardware required to turn a Raspberry Pi 3 into a 1541 are a few transistors in the form of a bi-directional logic level shifter, and a plug for a six-pin serial port cable. This can easily be constructed out of some Sparkfun, Adafruit, Amazon, or AliExpress parts, although we suspect anyone could whip up a Raspberry Pi hat with the same circuit in under an hour. The binaries necessary to run Pi1541 on the Raspberry Pi are available on [Steve]’s website, and he’ll be releasing the source soon.

This is a great project for the retrocomputing scene, although there is one slight drawback. Pi1541 requires a Raspberry Pi 3, and doesn’t work on the Raspberry Pi Zero. That would be an amazing bit of software, as ten dollars in parts could serve as a complete emulation of a Commodore disk drive. That said, you’re still likely to be under $50 in parts and you’re not going to find a better drive emulator around.

Continue reading “Raspberry Pi Becomes Cycle Exact Commodore Drive Emulator”

Printed It: Toolbag Essentials

While complex devices assembled from 3D printed components are certainly impressive, it’s the simple prints that have always held the most appeal to me personally. Being able to pick an object up off the bed of your printer and immediately put it to use with little to no additional work is about as close as we can get to Star Trek style replicators. It’s a great demonstration to show off the utility of your 3D printer, but more importantly, having immediate access to some of these tools and gadgets might get you out of a jam one day.

With that in mind, I thought we’d do things a little differently for this installment of Printed It. Rather than focusing on a single 3D model, we’ll be taking a look at a handful of prints which you can put to practical work immediately. I started by selecting models based on the idea that they should be useful to the average electronic hobbyist in some way or another, and relatively quick to print. Each one was then printed and evaluated to determine its real-world utility. Not all made the grade.

Each model presented here is well designed, easy to print, and most critically, legitimately useful. I can confidently say that each one has entered into my standard “bag of tricks” in some capacity, and I’m willing to bet a few will find their way into yours as well.

Continue reading “Printed It: Toolbag Essentials”

The Aluminum Wiring Fiasco

Someone who decides to build a house faces a daunting task. It’s hard enough to act as the general contractor for someone else, but when you decide to build your own house, as my parents did in the early 1970s, it’s even tougher. There are a million decisions to make in an information-poor and rapidly changing environment, and one wrong step can literally cast in stone something you’ll have to live with forever. Add in the shoestring budget that my folks had to work with, and it’s a wonder they were able to succeed as well as they did.

It was a close call in a few spots, though. I can recall my dad agonizing over the wiring for the house. It would have been far cheaper to go with aluminum wiring, with the price of copper wire having recently skyrocketed. He bit the bullet and had the electrician install copper instead, which ended up being a wise choice, as houses that had succumbed to the siren call of cheaper wiring would start burning down all over the United States soon thereafter.

What happened in the late 60s and early 70s in the residential and commercial electrical trades was an expensive and in some cases tragic lesson in failure engineering. Let’s take a look at how it all happened.

Continue reading “The Aluminum Wiring Fiasco”

Giving An LED Bulb Some Smarts

How many of your projects been spawned purely out of bored daydreaming? For want of something more productive to do, [dantheflipman] hacked a standard LED bulb from Wal-Mart into a smart bulb.

After pulling it apart, they soldered wires to the threaded socket and added a connector for a Hi-Link hlk-pm01 power module. The output caps at 5 V and 600 mA, but who says this was going to be a searchlight? A Wemos D1 Mini clone slides nicely beside the power module, and stacked on top is a NeoPixel Jewel 7. [dantheflipman] admits he has yet to add a capacitor to ahead of the Jewel, so we’ll see how long the LEDs last. Crammed back together, the bulb is controlled via a prototype Blynk app. Good enough for a quick hack.

[dantheflipman] is upfront about messing with mains voltages: don’t do it unless you absolutely know what you’re doing. In this case, he has taken care with their soldering and epoxied all wire and solder joints to be sure nothing will come loose and short, and a ‘stress test’ is forthcoming.

Smart bulbs are cool no matter how you slice it, so a little more insight into how smart bulbs work with some of the nitty gritty that goes into hacking them might sate your thirst for knowledge.

[Via /r/arduino]