Flat Transformer Gives This PCB Tesla Coil Some Kick

Arguably, the most tedious part of any Tesla coil build is winding the transformer. Getting that fine wire wound onto a suitable form, making everything neat, and making sure it’s electrically and mechanically sound can be tricky, and it’s a make-or-break proposition, both in terms of the function and the aesthetics of the final product. So this high-output printed circuit Tesla should take away some of that tedium and uncertainty.

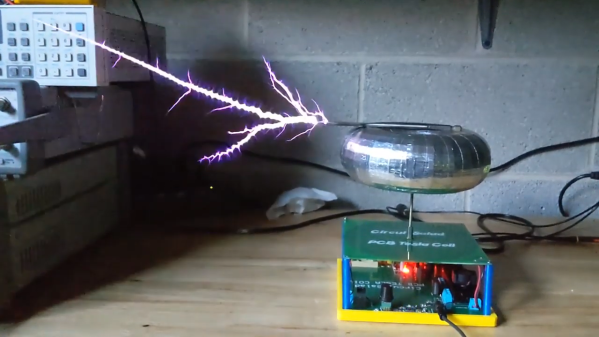
Now, PCB coils are nothing new — we’ve seen plenty of examples used for everything from motors to speakers. We’ve even seen a few PCB Tesla coils, but as [Ray Ring] points out, these have mostly been lower-output coils that fail to bring the heat, as it were. His printed coil generates some pretty serious streamers — a foot long (30 cm) in some cases. The secondary of the coil has 6-mil traces spaced 6 mils apart, for a total of 240 turns. The primary is a single 240-mil trace on the other side of the board, and the whole thing is potted in a clear, two-part epoxy resin to prevent arcing. Driven by the non-resonant half-bridge driver living on the PCB below it, the coil can really pack a punch. A complete schematic and build info can be found in the link above, while the video below shows off just what it can do.

Honestly, for the amount of work the PCB coil saves, we’re tempted to give this a try. It might not have the classic good looks of a hand-wound coil, but it certainly gets the job done. Continue reading “Flat Transformer Gives This PCB Tesla Coil Some Kick”

Faux Stained Glass Effect, With 3D Printing And Epoxy

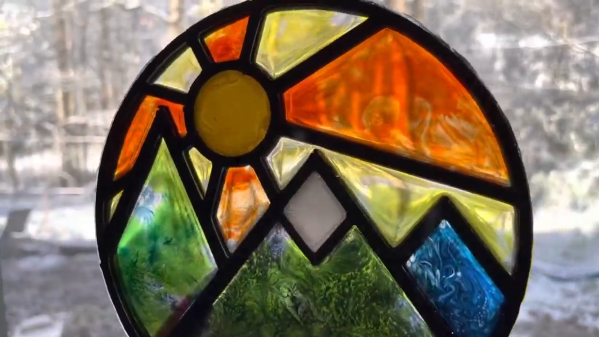
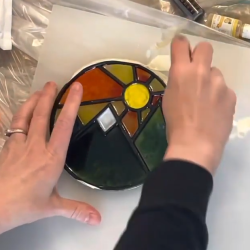
Like the looks of stained glass, but not the amount of work, skill, and materials involved? Well, [Northern Geometry] shows how to sidestep all that nonsense and use a 3D printed frame, epoxy, and some alcohol-based inks to create a pretty good fake stained-glass effect piece of art.

A smooth polypropylene board is the key to a glassy smooth back.

[Northern Geometry] has played with this idea before, but shares some refinements and tips on getting the best results. One suggestion is to begin by securely taping the 3D printed frame to a smooth polypropylene board as a backer. Giving the cured resin a smooth surface is important to get the right look, and since resin will not bond to the polypropylene, it can be used as a backer to get that done.

Once the frame is mounted, pour a small amount of epoxy into each cavity and ensure it gets into every corner, then let it cure. The thin bottom layer of resin will seal things as well as create a glassy-smooth backing that is the perfect foundation for finishing the piece with colored resin as needed.

Once that is done, and everything has had plenty of time to cure fully, just pop the piece off the board. Check it out in the video embedded below, where [Northern Geometry] shows the process from start to finish.

Continue reading “Faux Stained Glass Effect, With 3D Printing And Epoxy”

3D-Printed Press-Forming Tools Dos And Don’ts

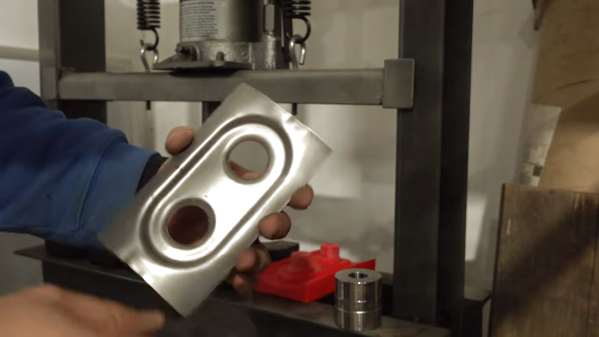
Press-forming is a versatile metal forming technique that can quickly and easily turn sheet metal into finished parts. But there’s a lot of time and money tied up in the tooling needed, which can make it hard for the home-gamer to get into. Unless you 3D-print your press-form tooling, of course.

Observant readers will no doubt recall our previous coverage of press-forming attempts with plastic tooling, which were met with varying degrees of success. But [Dave]’s effort stands apart for a number of reasons, not least of which is his relative newbishness when it comes to hot-squirt manufacturing. Even so, he still came up with an interesting gradient infill technique that put most of the plastic at the working face of the dies. That kept print times in the reasonable range, at least compared to the days of printing that would have been needed for 100% infill through the whole tool profile.

The other innovation that we liked was the idea to use epoxy resin to reinforce the tools. Filling the infill spaces on the tools’ undersides with resin resulted in a solid, strong block that was better able to withstand pressing forces. [Dave] didn’t fully account for the exothermic natures of the polymerization reaction, though, and slightly warped the tools. But as the video below shows, even suboptimal tools can perform, bending everything he threw at them, including the hydraulic press to some extent.

It sure seems like this is one technique to keep in mind for a rainy day. And hats off to [Dave] for sharing what didn’t work, since it points the way to improvements.

Continue reading “3D-Printed Press-Forming Tools Dos And Don’ts”

Homebrew Doorknob Caps For High-Voltage Fun

Mouser and Digi-Key are great for servicing most needs, and the range of parts they offer is frankly bewildering. But given the breadth of the hardware hacking community’s interests, few companies could afford to be the answer to everyone’s needs.

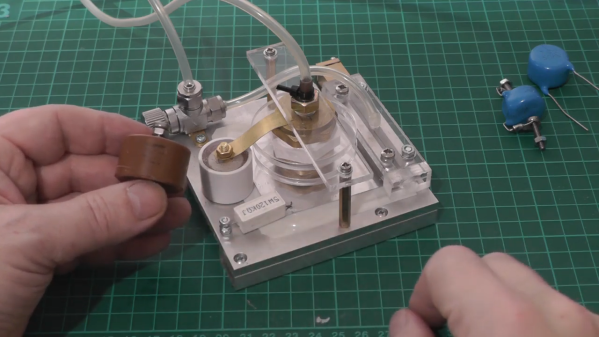
That’s especially true for the esoteric parts needed when one’s hobby involves high voltages and homemade lasers, like [Les Wright]. He recently came up with a DIY doorknob capacitor design that makes the hard-to-source high-voltage caps much easier to obtain. We’ve seen [Les] use these caps in his transversely excited atmospheric (TEA) lasers, a simple design that uses high-voltage discharge across a long, narrow channel filled with either room air or nitrogen. The big ceramic caps are needed for the HV supply, and while [Les] has a bunch, they’re hard to come by online. He tried a follow-up using plain radial-lead ceramic capacitors, and while the laser worked, he did get some flashover between the capacitor leads.

[Les]’s solution was to dunk the chunky caps in acetone for a week or so to remove their epoxy covering. Once denuded, the leads were bent into a more axial configuration and soldered to brass machine screws. The dielectric slug is then put in a small section of plastic tubing and potted in epoxy resin with the bolts protruding from each end. The result is hard to distinguish from a genuine doorknob cap; the video below shows the build process as well as some testing.

Hats off to [Les] for taking pity on those of us who want to replicate his work but find ourselves without these essentials. It’s nice to know there’s a way to make unobtanium parts when you need them.

Continue reading “Homebrew Doorknob Caps For High-Voltage Fun”

Apple Watch Gets Custom Transparent Case

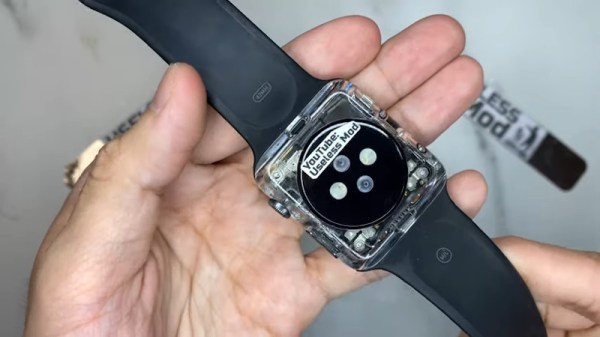
The Apple Watch was the tech company’s attempt to bring wrist computers into the mainstream. It’s naturally available in a variety of fits and finishes, but if you want something properly original, you’ve got to go custom. [Useless Mod] does just that with a clear case for the popular smartwatch.

The mod starts with a patient, careful disassembly of the watch – necessary given the delicate components inside. It’s achieved in the end with only having to drill out 1 screw and an unfortunately snapping of the crown wheel axle. However, [Useless Mod] presses on, and silicone casts the original Apple enclosure. The video goes over all the finer points, from degassing to using strips of acrylic plastic to act as runners. Once done, the silicone mold is used to produce a replica case in transparent epoxy, and the watch is reassembled.

The final result is impressive, with the case optically clear and showing off the watch’s internals. The look is improved by removing some of the original insulation tape to better reveal the PCBs inside. Unfortunately, the design of the watch, which is largely covered by a screen and heartbeat sensor, means it’s not the greatest choice for a clear case mod, but it works nonetheless. We’ve seen similar work before from [Useless Mod] too – like this transparent drone case for the Mavic Mini. Video after the break.

Continue reading “Apple Watch Gets Custom Transparent Case”

Magnetocuring: Curing Epoxy With A Magnetic Field

Who doesn’t love epoxy? Epoxy resins, also known as polyepoxides, are an essential adhesive in many applications, both industrially and at smaller scales. Many polyepoxides however require the application of heat (around 150 °C for most types) in order to cure (harden), which can be complicated when the resin is applied to or inside layers of temperature sensitive materials. Now researchers at Nanyang Technological University (NTU) in Singapore have found a way to heat up resins using an alternating magnetic field (PDF), so-called magnetocuring.

As detailed in the research article by R. Chaudhary et al., they used commercially available epoxy resin and added nano particles of a MnxZn1-xFe2O4 alloy. This mixture was exposed to an alternating magnetic field to induce currents in the nano particles and subsequently produce heat that served to raise the temperature of the surrounding resin to about 160 °C in five minutes, allowing the resin to cure. There is no risk of overheating, as the nano particles are engineered to reach their Curie temperature, at which point the magnetic field no longer affects them. The exact Curie temperature was tweaked by changing the amount of manganese and zinc in the alloy.

After trying out a number of different alloy formulations, they settled on Mn0.7Zn0.3Fe2O4 as the optimal formulation at which no resin scorching occurred. As with all research it’s hard to tell when (and if) it will make it into commercial applications, but if this type of technology works out we could soon be gluing parts together using epoxy resin and an EM field instead of fumbling with the joys of two-component epoxy.

(Thanks, Qes)

Friendly Fiberglassing: Can Hide Glue Replace Epoxy?

Hide glue has been around for thousands of years, and some of it is holding wood pieces three thousand years after application. It is made from animal protein, so vegetarians may want to stick to the petroleum-based adhesives. [Surjan Singh] wanted to see if its longevity made it a contender with modern epoxy by casting a couple of fiberglass car parts with the competing glues. In short, it doesn’t hold up in this situation, but it is not without merit.

Musical instrument makers and antique restorers still buy and use hide glue, but you would never expose it to heat or moisture. To its credit, hide glue doesn’t require a ventilator. All you need is boiling water and a popsicle stick, and you are in business. [Surjan] writes his findings like a narrative rather than steps, so his adventures are a delight to read. He found that a car part made with fiberglass and epoxy will withstand the weather better than the alternative because heat and humidity will soften hide glue. His Saab 96 isn’t the right application, but since it is nearly as strong as epoxy once set, you could make other fabric shapes, like a flannel nightstand or a lace coffee table, and you could shape them in the living room without toxifying yourself

No matter how you want to work with glues and substrates, Bil Herd has you covered, and here is an excellent tip for a cheap degassing setup.