Using SPICE to simulate an electrical circuit is a common enough practice in engineering that “SPICEing a circuit” is a perfectly valid phrase in the lexicon. SPICE as a software tool has been around since the 70s, and its open source nature means there are more SPICE tools around now to count. It also means it is straightforward enough to use with other software as well, like integrating LTspice with Python for some interesting signal processing circuit simulation.
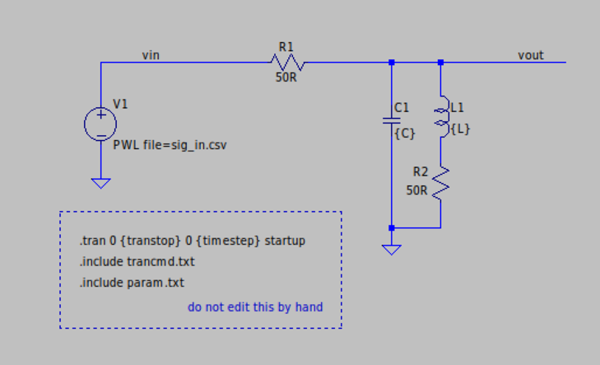
[Michael]’s latest project involves simulating filters in LTspice (a SPICE derivative) and then using Python/NumPy to both provide the input signal for the filter and process the output data from it. Basically, it allows you to “plug in” a graphical analog circuit of any design into a Python script and manipulate it easily, in any way needed. SPICE programs aren’t without their clumsiness, and being able to write your own tools for manipulating circuits is a powerful tool.
This project is definitely worth a look if you have any interest in signal processing (digital or analog) or even if you have never heard of SPICE before and want an easier way of simulating a circuit before prototyping one on a breadboard.