Make A Mean-Sounding Synth From Average Components

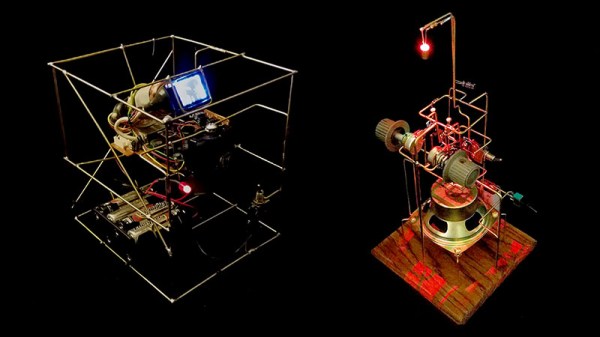
A while back, [lonesoulsurfer] stumbled upon a mind-blowing little DIY synth on YouTube and had to make one of his own. We don’t blame him one bit for that, ’cause we’ve been down that cavernous rabbit hole ourselves. You might want to build one too, after you hear the deliciously fat and guttural sounds waiting inside those chips and passives. Don’t say we didn’t warn you.

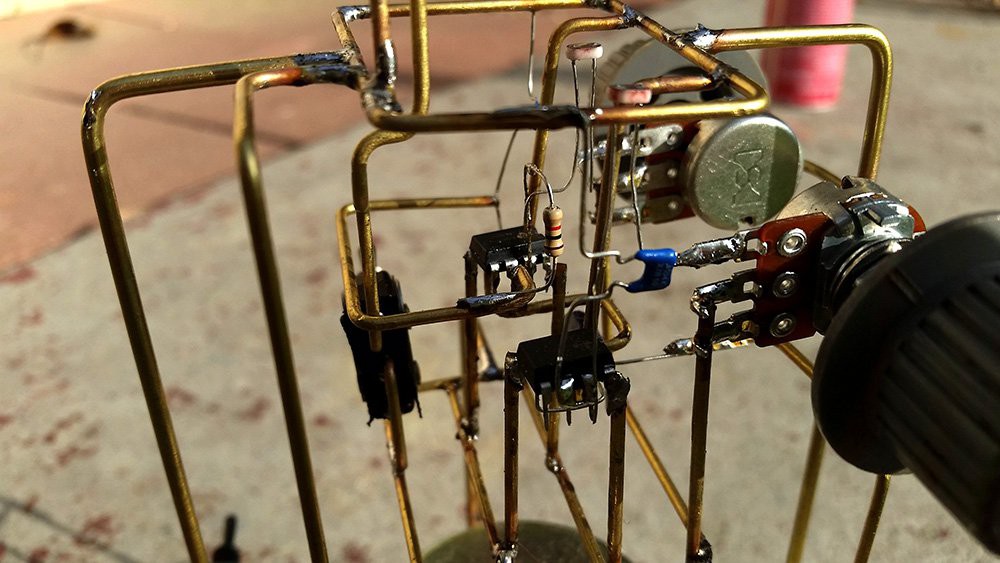
The main synth is built on five LM358 op-amps that route PWM through a pair of light-dependent resistors installed near the top. There are two more oscillators courtesy of a 40106 hex inverting Schmitt trigger, which leaves four more oscillators to play with should you take the plunge and build your own.

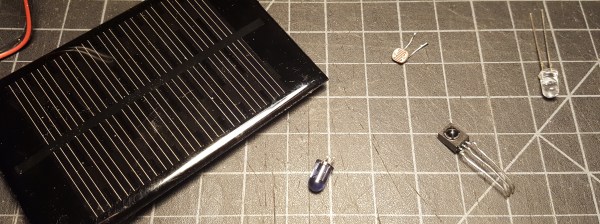
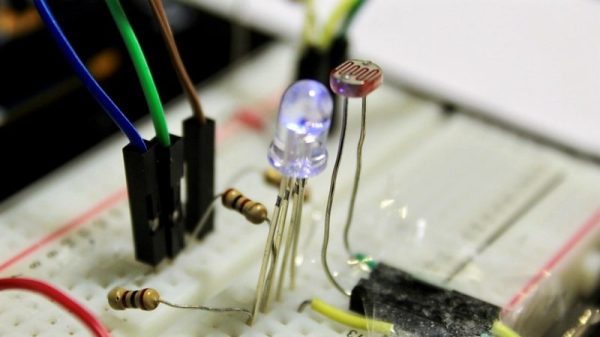
He didn’t just copy the guy’s schematic and call it good. He added [a 555-based arpeggiator that’s controlled with two homebrew optocouplers. These sound fancy and expensive, but can be bred easily at home by sealing an LED and an LDR inside a piece of black heat shrink tubing and applying a bit of PWM. With the flick of a toggle, he can bypass the momentary buttons and use the yellow knob at the top to sweep through the pitch range with a single input.

Although he doesn’t hold your hand through the build, [lonesoulsurfer] has plenty of nice, clear pictures of the process that nearly give a step-by-step guide. That plus the video demo and walk-through should get you well on your way to DIY synthville.

If this all seems very cool, but you’d really like to understand what’s happening as you descend into the rabbit hole, our own [Elliot Williams]’s Logic Noise series is an excellent start.

Continue reading “Make A Mean-Sounding Synth From Average Components”

Retrotechtacular: The Speaking Clock Goes Silent

It used to be that time was a lot more relative than it is today. With smartphones synced to GPS and network providers’ clocks, we all pretty much have access to an authoritative current time, giving few of us today the wiggle room to explain a tardy arrival at work to an impatient boss by saying our watch is running slow.

Even when that excuse was plausible, it was a bit weak, since almost every telephone system had some sort of time service. The correct time was but a phone call away, announced at first by live operators then later by machines called speaking clocks. Most of these services had been phased out long ago, but one, the speaking clock service in Australia, sounded for the last time at the end of September.

While the decommissioned machine was just another beige box living in a telco rack, the speaking clocks that preceded it were wonderfully complex electromechanical devices, and perfect fodder for a Retrotechtacular deep-dive. Here’s a look at the Australian speaking clock known as “George” and why speaking clocks were once the highest of technology.

Continue reading “Retrotechtacular: The Speaking Clock Goes Silent”

Talking Washer Is A Clean Solution For The Visually Impaired

Have you shopped for an appliance lately? They’re all LEDs, LEDs everywhere. You might say that manufacturers are out of touch with the utility of tactile controls. [Wingletang]’s fancy new washing machine is cut from this modern cloth. While it does have a nice big knob for selecting cycles, the only indication of your selection is an LED. This isn’t an issue for [Wingletang], but it’s a showstopper for his visually impaired wife.

They tried to make tactile signposts for her most-used cycles with those adhesive rubber feet you use to keep cabinet doors quiet. But between the machine’s 14(!) different wash cycles and the endlessly-rotating selector knob, the tactile map idea was a wash. It was time to make the machine talk.

For his very first microcontroller project, [Wingletang] designed a completely non-invasive and totally awesome solution to this problem. He’s using LDRs arranged in a ring to detect which LED is lit. Recycled mouse pad foam and black styrene keep ambient light from creating false positives, and double as enclosure for the sensor and support boards. As [Mrs. Wingletang] cycles through with the knob, an Arduino clone mounted in a nearby project box determines which program is selected, and a Velleman KA02 audio shield plays a recorded clip of [Wingletang] announcing the cycle number and description.

The system, dubbed SOAP (Speech Output Announcing Programmes), has been a great help to [Mrs. Wingletang] for about the last year. Watch her take it for a spin after the break, and stick around for SOAP’s origin story and walk-through videos.

It’s baffling that so few washers and dryers let you know when they’re finished. Don’t waste your time checking over and over again—Laundry Spy waits for the vibrations to end and sends you a text.

Continue reading “Talking Washer Is A Clean Solution For The Visually Impaired”

Freeforming The Atari Punk Console

This stunning piece of art is [Emily Velasco’s] take on the Atari Punk Console. It’s a freeform circuit that synthesizes sound using 555 timers. The circuit has been around for a long time, but her fabrication is completely new and simply incredible!

This isn’t [Emily’s] first rodeo. She previously built the mini CRT sculpture project seen to the left in the image above. Its centerpiece is a tiny CRT from an old video camera viewfinder, and it is fairly common for the driver circuit to understand composite video. And unlike CRTs, small video cameras with composite video output are easily available today for not much money. Together they bring a piece of 1980s-era video equipment into the modern selfie age. The cubic frame holding everything together is also the ground plane, but its main purpose is to give us an unimpeded view. We can admire the detail on this CRT and its accompanying circuitry representing 1982 state of the art in miniaturized consumer electronics. (And yes, high voltage components are safely insulated. Just don’t poke your finger under anything.)

With the experience gained from building that electrically simple brass frame, [Emily] then stepped up the difficulty for her follow-up project. It started with a sound synthesizer circuit built around a pair of 555 timers, popularized in the 1980s and nicknamed the Atari Punk Console. Since APC is a popular circuit found in several other Hackaday-featured projects, [Emily] decided she needed to add something else to stand out. Thus in addition to building her circuit in three-dimensional brass, two photocells were incorporated to give it rudimentary vision into its environment. Stimulus for this now light-sensitive APC were provided in the form of a RGB LED. One with a self-contained circuit to cycle through various colors and blinking patterns.

These two projects neatly bookend the range of roles brass rods can take in your own creations. From a simple frame that stays out of the way to being the central nervous system. While our Circuit Sculpture Contest judges may put emphasis the latter, both are equally valid ways to present something that is aesthetic in addition to being functional. Brass, copper, and wood are a refreshing change of pace from our standard materials of 3D-printed plastic and FR4 PCB. Go forth and explore what you can do!

Continue reading “Freeforming The Atari Punk Console”

Is It On Yet? Sensing The World Around Us, Starting With Light

Arduino 101 is getting an LED to flash. From there you have a world of options for control, from MOSFETs to relays, solenoids and motors, all kinds of outputs. Here, we’re going to take a quick look at some inputs. While working on a recent project, I realized the variety of options in sensing something as simple as whether a light is on or off. This is a fundamental task for any system that reacts to the world; maybe a sensor that detects when the washer has finished and sends a text message, or an automated chicken coop that opens and closes with the sun, or a beam break that notifies when a sister has entered your sacred space. These are some of the tools you might use to sense light around you.

Continue reading “Is It On Yet? Sensing The World Around Us, Starting With Light”

NES Controller Slider-Based Light Theremin

Having never use a 555 before, [lonesoulsurfer] decided that his first foray into the world’s most popular and versatile IC would be to use a 555 to make beautiful chiptunes. For that, we commend him. He found [Dean Segovis]’ Slidersynth light-based Theremin and got to work building his own version it and stuffing it into a (knockoff!) NES controller.

For the uninitiated, a Theremin is a touch-less synthesizer that uses human capacitance and a pair of antennae to control oscillation and amplitude. In a light-based Theremin such as this one, the oscillation is controlled by the intensity of photons from a white LED and their interaction with a light-dependent resistor, also known as a photocell or ‘squiggly resistor’.

The oscillations themselves are created by wiring up the 555 as an astable oscillator, and the pitch is controlled with a potentiometer mounted on the back. It has a small built-in speaker, but [lonesoulsurfer] replaced the B button with a 3.5 mm audio jack so he can plug it into a powered speaker and really rock out. We’ve got his demo tape queued up after the break.

We love pocket instruments around here. If you prefer brass and woodwinds, this pocket woodwind MIDI controller just might draw your lips into an O.

Continue reading “NES Controller Slider-Based Light Theremin”

Color Sensor From An RGB LED And A Photocell

When you need to quantify the color of an object, you’ve got quite a few options. You can throw a Raspberry Pi camera and OpenCV at the problem and approach it through software, or you can buy an off-the-shelf RGB sensor and wire it up to an Arduino. Or you can go back to basics and build this reflective RGB sensor from an LED and a photocell.

The principle behind [TechMartian]’s approach is simplicity itself: shine different colored lights on an object and measure how much light it reflects. If you know the red, green, and blue components of the light that correspond to maximum reflectance, then you know the color of the object. Their sensor uses a four-lead RGB LED, but we suppose a Neopixel could be used as well. The photosensor is a simple cadmium sulfide cell, which measures the intensity of light bouncing back from an object as an Arduino drives the LED through all possible colors with PWM signals. The sensor needs to be white balanced before use but seems to give sensible results in the video below. One imagines that a microcontroller-free design would be possible too, with 555s sweeping the PWN signals and op-amps taking care of detection.

And what’s the natural endpoint for a good RGB sensor? A candy sorter, or course, of which we have many examples, from the sleek and polished to the slightly more hackish.

Continue reading “Color Sensor From An RGB LED And A Photocell”