The Empire Strikes Back With The ESP8266

Like many of us, [Matthew Wentworth] is always looking for a reason to build something. So when he found a 3D model of the “DF.9” laser turret from The Empire Strikes Back intended for Star Wars board games on Thingiverse, he decided it was a perfect excuse opportunity to not only try his hand at remixing an existing 3D design, but adding electronics to it to create something interactive.

As the model was originally intended for a board game, it was obviously quite small. So the first order of business was scaling everything up to twice the original dimensions. As [Matthew] notes, the fact that it still looks so good when expanded by such a large degree is a credit to how detailed the original model is. Once blown up to more useful proportions, he modified the head of the turret as well as the barrel to accept the electronics he planned on grafting into the model.

He created a mount for a standard nine gram servo inside the head of the turret which allows it to rotate, and the barrel got an LED stuck in the end. Both of which are controlled with a NodeMCU ESP8266 development board, allowing [Matthew] to control the direction and intensity of the pew-pew over WiFi. He mentions that in the future he would like to add sound effects that are synchronized to the turret rotation and LED blinking.

For the software side of the project, he used Blynk to quickly build a smartphone interface for the turret. This is the first time he had used Blynk, and reports that outside of a little trial and error, it was some of the easiest code he’s ever written for the Arduino. This is a sentiment we’ve been seeing a lot of recently towards Blynk, and it’s interesting to see how often it shows up in ESP8266 projects now.

Looking ahead [Matthew] says he wants to paint and detail the turret, as the bright orange color scheme probably wouldn’t do terribly well on Hoth. If he can manage the time, he’d also like to add it to the long list of OpenCV-powered turrets that hackers love harassing their friends and family with.

Continue reading “The Empire Strikes Back With The ESP8266”

Palm-Sized Gatling Gun Has 32 Mini Elastics With Your Name On Them

One thing 3D printers excel at is being able to easily create objects that would be daunting by other methods, something that also allows for rapid design iteration. That’s apparent in [Canino]’s palm-sized, gatling-style, motorized 32-elastic launcher.

The cannon has a rotary barrel driven by a small motor, and a clever sear design uses the rotation of the barrels like a worm gear. The rotating barrel has a spiral formation of hooks which anchor the stretched elastic bands. A small ramp rides that spiral gap, lifting ends of stretched bands one at a time as the assembly turns. This movement (and therefore the firing control) is done with a small continuous rotation servo. While in theory any motor would do, using a servo has the advantage of being a standardized shape, and therefore easy to integrate into the design. A video is embedded below in which you can see it work, along with some close-ups of the action.

Continue reading “Palm-Sized Gatling Gun Has 32 Mini Elastics With Your Name On Them”

Freeform Wire Frame Tulip Blooms To The Touch

Holidays are always good for setting a deadline for finishing fun projects, and every Valentine’s Day we see projects delivering special one-of-a-kind gifts. Why buy a perishable bulk-grown biological commodity shipped with a large carbon footprint when we can build something special of our own? [Jiří Praus] certainly seemed to think so, his wife will receive a circuit sculpture tulip that blooms when she touches it.

via @jipraus

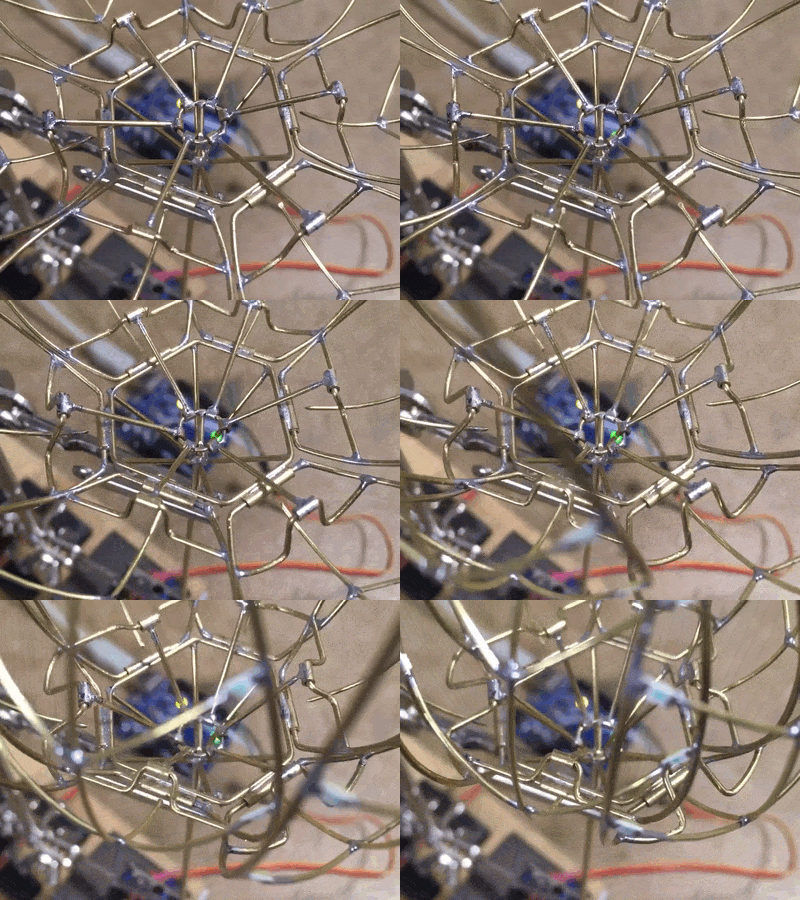
This project drew from [Jiří]’s experience with aesthetic LED projects. His Arduino-powered snowflake, with LEDs mounted on a custom PCB, is a product available on Tindie. For our recent circuit sculpture contest, his entry is a wire frame variant on his snowflake. This tulip has 7 Adafruit NeoPixel in the center and 30 white SMD LEDs in the petals, which look great. But with the addition of mechanical articulation, this project has raised the bar for all that follow.

We hope [Jiří] will add more details for this project to his Hackaday.io profile. In the meantime, look over his recent Tweets for more details on how this mechanical tulip works. We could see pictures and short videos of details like the wire-and-tube mechanism that allowed all the petals to be actuated by a single servo, and the components that are tidily packaged inside that wooden base.

Need more digital expressions of love? We have no shortage of hearts. Animated LED hearts, illuminated acrylic hearts, and talking hearts. We’re a little short on flower projects, but we do have X-ray of a rose among others to accompany [Jiří]’s tulip.

Continue reading “Freeform Wire Frame Tulip Blooms To The Touch”

Sound-Triggered Eye Protection For The Forgetful Among US

Eyes are fragile things. They tend to fail under extreme heat, pressure, and are easily damaged by flying objects. Enterprising humans have developed a wide range of eye protection solutions, but most only work when the user remembers to put them on. [gocivici] had just such a problem, forgetting to put his safety glasses back on when working. Naturally, the solution was found through hacking.

The build starts with a regular baseball cap. [gocivici] fitted an Arduino nano, which is connected to a small microphone. The Arduino uses the microphone to determine the sound level in the room. Above a certain trigger level, the Arduino triggers a servo to move protective glasses into place in front of the wearer’s eyes, protecting them from flying shrapnel from whatever they may be working on.

It’s a fun build, that obviously still has the pitfall that you’re going to get hurt if you forget to wear your magic hat for the day. Another approach could be putting your multimeter display in your goggles so you never want to take them off in the first place. Video after the break.

Continue reading “Sound-Triggered Eye Protection For The Forgetful Among US”

Well-Loved Toy Turned Into Robotic Glockenspiel

If there’s a happier word ever imported into the English language than “Glockenspiel”, we’re not sure what it is. And controlling said instrument with a bunch of servos and an Arduino makes us just as happy.

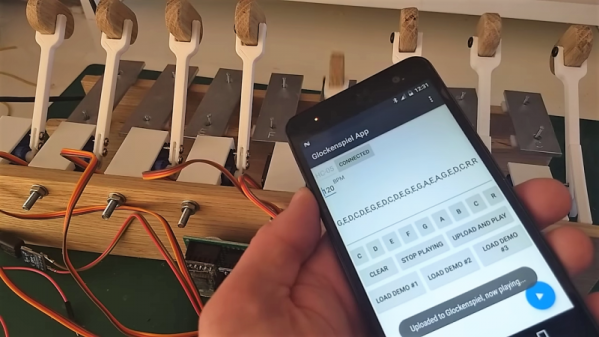
When [Leon van den Beukel] found a toy glockenspiel in a thrift store, he knew what had to be done – Arduinofy it. His first attempt was a single hammer on a pair of gimballed servos, which worked except for the poor sound quality coming from the well-loved toy. The fact that only one note at a time was possible was probably the inspiration for version two, which saw the tone bars removed from the original base, cleaned of their somewhat garish paint, and affixed to a new soundboard. The improved instrument was then outfitted with eight servos, one for each note, each with a 3D-printed arm and wooden mallet. An Arduino runs the servos, and an Android app controls the instrument via Bluetooth, because who doesn’t want to control an electronic glockenspiel with a smartphone app? The video below shows that it works pretty well, even if a few notes need some adjustment. And we don’t even find the servo noise that distracting.

True, we’ve featured somewhat more accomplished robotic glockenspielists before, but this build’s simplicity has a charm of its own.

Continue reading “Well-Loved Toy Turned Into Robotic Glockenspiel”

High-Style Ball Balancing Platform

If IKEA made ball-balancing PID robots, they’d probably look like this one.

This [Johan Link] build isn’t just about style. A look under the hood reveals not the standard, off-the-shelf microcontroller development board you might expect. Instead, [Johan] designed and built his own board with an ATmega32 to run the three servos that control the platform. The entire apparatus is made from a dozen or so 3D-printed parts that interlock to form the base, the platform, and the housing for the USB webcam that’s perched on an aluminum tube. From that vantage point, the camera’s images are analyzed with OpenCV and the center of the ball is located. A PID loop controls the three servos to center the ball on the platform, or razzle-dazzle it a little by moving the ball in a controlled circle. It’s quite a build, and the video below shows it in action.

We’ve seen a few balancing platforms before, but few with such style. This Stewart platform comes close, and this juggling platform gets extra points for closing the control loop with audio feedback. And for juggling, of course.

Continue reading “High-Style Ball Balancing Platform”

This Creepy Skull Shows Time With Its Eyes

Sometimes you have an idea, and despite it not being the “right” time of year you put a creepy skull whose eyes tell the time and whose jaw clacks on the hour into a nice wooden box for your wife as a Christmas present. At least, if you’re reddit user [flyingalbatross1], you do!

The eyes are rotated using 360 degree servos, which makes rotating the eyes based on the time pretty easy. The servos are connected to rods that are epoxied to the spheres used as eyes. Some water slide iris decals are put on the eyes offset from center in order to point in the direction of the minutes/hours. An arduino with a real time clock module keeps track of the time and powers the servos.

Check out the video after the break:

Continue reading “This Creepy Skull Shows Time With Its Eyes”