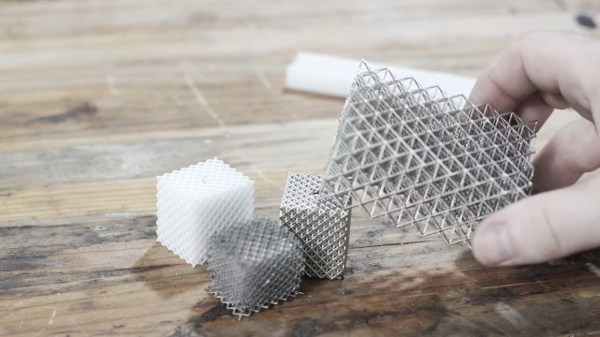
Xolography: A Method To Improve The Accuracy Of Volumetric 3D Printing

Over the past years, additive manufacturing (AM) has become a common tool for hackers and makers, with first FDM and now SLA 3D printers becoming affordable for the masses. While these machines are incredibly useful, they utilize a slow layer-by-layer approach to produce objects. A relatively new technology called Volumetric Additive Manufacturing (VAM) promises to change all that by printing the entire object in one go, and according to a recent article in Nature, it just got a big resolution boost.

The concept is similar to SLA printing, but instead of curing the resin by projecting a 2D image of the current layer into the container, VAM uses multiple lasers to create intersecting points within the liquid. After exposing the resin to this projection for several seconds, the 3D model is built all at once. Not only is this far faster, but it removes the need for support materials and even a traditional build plate is unnecessary.

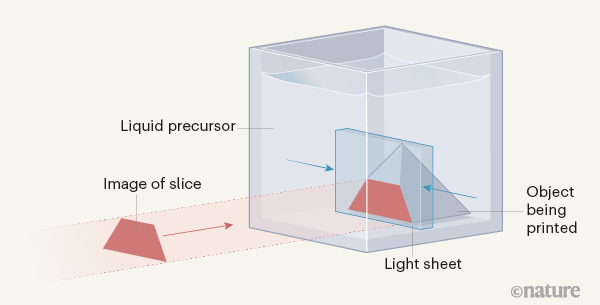
Visualization of the dual-color printing process as used by Regehly et al. (Credit: Nature)

Up till now the resolution and maximum object size of VAM has left a lot to be desired, but in this new research by Regehly et al. claim to have accomplished a feature resolution of ‘up to 25 micrometers’ and a solidification rate of ‘up to 55 cm3/s’. They used two crossing laser beams of different wavelengths, one to form the ‘light sheet’ (blue in the graphic) and a second beam (in red) to project the slide onto this light sheet. They refer to this technique as ‘xolography’, as a mesh-up of ‘holo’ (Greek for ‘whole’) and the ‘X’ shape formed by the crossing laser beams.

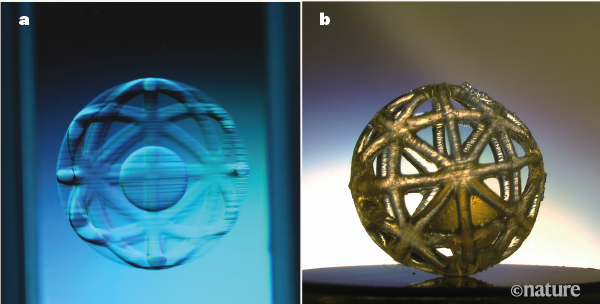
Key to making this work is the chemistry of the resin: the first wavelength excites the molecules called DCPI (Dual-Color Photo Initiators) that are dissolved in the resin. The second wavelength when hitting the same molecules initiates the resin polymerization process. The object pictured at the top of the page was a test print; producing such a design on a traditional 3D printer would have required a considerable amount of difficult to remove support material.

While this is obviously not a technology hobbyists will be using to replace their FDM and SLA printers with any time soon, there are still many companies and institutes working on various VAM technologies and approaches. As more and more of the complexities and challenges are dealt with, who knows when VAM may become a viable replacement for at least some SLA applications?

Thanks to [Qes] for the tip.

How To Get Into Lost Wax Casting (with A Dash Of 3D Printing)

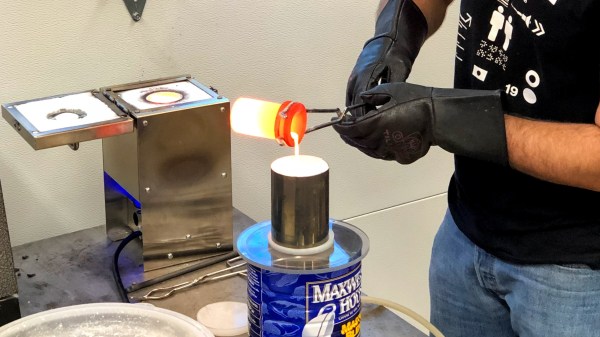
I’ve always thought that there are three things you can do with metal: cut it, bend it, and join it. Sure, I knew you could melt it, but that was always something that happened in big foundries- you design something and ship it off to be cast in some large angular building churning out smoke. After all, melting most metals is hard. Silver melts at 1,763 °F. Copper at 1,983 °F. Not only do you need to create an environment that can hit those temperatures, but you need to build it from materials that can withstand them.

Turns out, melting metal is not so bad. Surprisingly, I’ve found that the hardest part of the process for an engineer like myself at least, is creating the pattern to be replicated in metal. That part is pure art, but thankfully I learned that we can use technology to cheat a bit.

When I decided to take up casting earlier this year, I knew pretty much nothing about it. Before we dive into the details here, let’s go through a quick rundown to save you the first day I spent researching the process. At it’s core, here are the steps involved in lost wax, or investment, casting:

  1. Make a pattern: a wax or plastic replica of the part you’d like to create in metal
  2. Make a mold: pour plaster around the pattern, then burn out the wax to leave a hollow cavity
  3. Pour the metal: melt some metal and pour it into the cavity

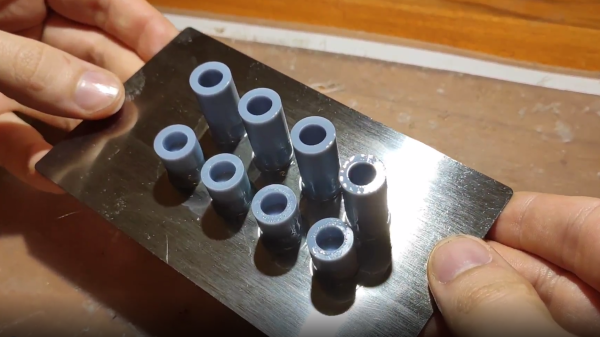
I had been kicking around the idea of trying this since last fall, but didn’t really know where to begin. There seemed to be a lot of equipment involved, and I’m no sculptor, so I knew that making patterns would be a challenge. I had heard that you could 3D-print wax patterns instead of carving them by hand, but the best machine for the job is an SLA printer which is prohibitively expensive, or so I thought. Continue reading “How To Get Into Lost Wax Casting (with A Dash Of 3D Printing)”

More LEDs Means Faster Print Times For 3D Printer, But There’s A Catch

[Jan Mrázek] is no stranger at all to home-grown improvements with his Elegoo Mars SLA 3D printer, and there is a lot going on in his experimental multi-LED upgrade which even involved casting his own lens array. In the end it did speed up his prints by a factor of three to four, though he cooked an LCD to failure in the process. Still, it was a fun project done during a COVID-19 lockdown; as usual there is a lot to learn from [Jan]’s experiences but the mod is not something he necessarily recommends people do for themselves.

[Jan] started by wondering whether better print quality and performance could be obtained by improving the printer’s UV light source. The stock printer uses a single large UV LED nestled into a reflector, but [Jan] decided to try making a more precise source of UV, aiming to make the UV rays as parallel as possible.

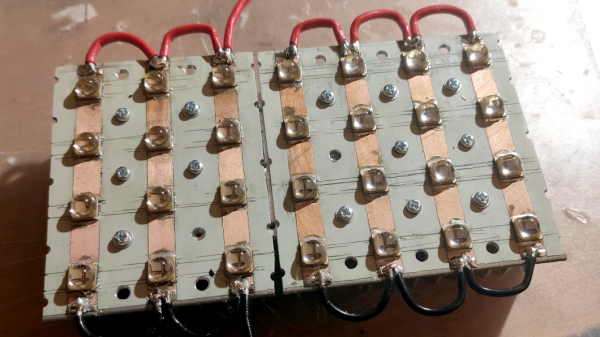
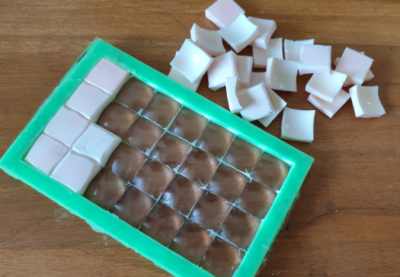
Custom LED array molded in clear epoxy.

To do this, he took a two-pronged approach. One was to replace the single large UV LED with a 4×7 array of emitters plus heat sink and fans. The other was to make a matching array of custom lenses to get the UV rays as parallel as possible.

Casting one’s own lens array out of clear epoxy was a lot of work and had mixed results, but again, it was a lockdown project and the usual “is-this-really-worth-it” rules were relaxed. In short, casting a single custom lens out of clear epoxy worked shockingly well, but when [Jan] scaled it up to casting a whole 4×7 array of them, results were mixed. Mold deformation and artifacts caused by the areas between individual lenses robbed the end result of much of its promise.

More success was had with the array of UV emitters, which enabled faster curing thanks to higher power, but the heat needs to be managed. The stock emitter of the printer is about 30 W, and [Jan] was running his new array at 240 W. This meant a blazing fast one second exposure time per layer, but the heat generated by the new lighting was higher than anticipated. After only ten hours the LCD failed, probably at least in part due to the heat. [Jan] halved the power of the array down to 120 W and added an extra fan, which appears to have done the trick. Exposure time is two to three seconds per layer, and it’s up to 150 hours of printing without problems.

Again, it’s not a process [Jan] necessarily recommends to others (and he definitely recommends buying lenses if at all possible instead of casting them) but as usual there is a lot to learn from his frank sharing of results, both good and bad. We’ve seen 3D-printed lenses as well as adding WiFi connectivity to one of these hobbyist printers, and it’s great to see the spirit of hacking alive and well when it comes to these devices.

Improved Flexible Build Plate For SLA Is Ready To Rock

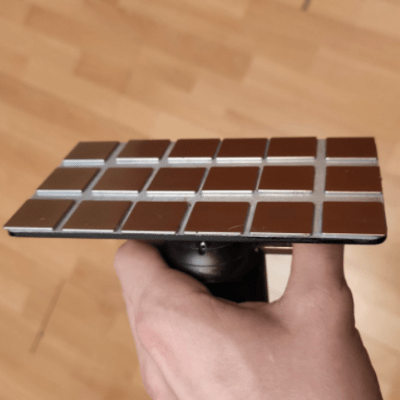
The Elegoo Mars is an affordable SLA (resin-based) 3D printer, and there are probably few that have seen more mods and experimentation than [Jan Mrázek]’s machine. The final design of his DIY flexible build plate is a refinement of his original proof of concept, which proved a flexible build platform can be every bit as useful on an SLA printer as it is for FDM; instead of chiseling parts off a rigid build platform, simply pop the flexible steel sheet off the magnetic base and flex it slightly for a much easier part removal process. His original design worked, but had a few rough edges that have since been ironed out.

[Jan]’s magnetic build platform.
We love how [Jan] walks through all of the design elements and explains what worked and what didn’t. For example, originally he used a galvanized steel sheet which was easy enough to work with, but ended up not being a viable choice because once it’s bent, it stays bent. Spring steel is a much better material for a flexible build platform, but is harder for a hobbyist to cut.

Fortunately, it’s a simple job for any metal fabrication shop and [Jan] got a variety of thicknesses cut very cheaply. It turns out that the sweet spot is 0.3 mm (although 0.2 mm is a better choice for particularly fragile parts.) [Jan] also suggests cutting the sheet a few millimeters larger than the build platform; it’s much easier to peel the sheet off the magnetic base when one can get a fingertip under an edge, after all.

The magnetic base that the steel sheet sticks to is very simple: [Jan] converted a stock build platform by mounting an array of 20 x 20 x 1 mm magnets with 3M adhesive mounting tape. He was worried that resin might seep in between the magnets and cause a problem, perhaps even interfering with the adhesive; but so far it seems to be working very well. Resin is viscous enough that it never penetrates far into the gaps, and no effect on the adhesive has been observed so far.

Watch how easily parts are removed in the short video embedded below, in which [Jan] demonstrates his latest platform design.

Continue reading “Improved Flexible Build Plate For SLA Is Ready To Rock”

Put That New Resin Printer To Work Making PCBs

With all the cool and useful parts you can whip up (relatively) quickly on a 3D printer, it’s a shame you can’t just print a PCB. Sure, ordering a PCB is quick, easy, and cheap, but being able to print one-offs would peg the needle on the instant gratification meter.

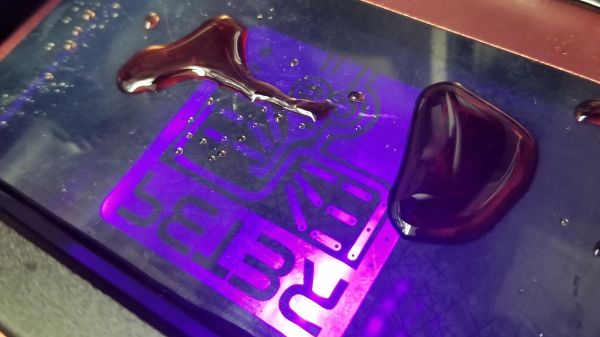
[Peter Liwyj] may just have come up with a method to do exactly that. His Instructables post goes into great detail about his method, which uses an Elegoo Mars resin printer and a couple of neat tricks. First, a properly cleaned board is placed copper-side down onto a blob of SLA resin sitting on the print bed. He tricks the printer into thinking the platform is all the way down for the first layer by interrupting the photosensor used to detect home. He lets the printer go through one layer of an STL file that contains his design, which polymerizes a thin layer of plastic onto the copper. The excess resin is wiped gently away and the board goes straight into a ferric chloride etching bath. The video below shows the whole process.

As simple as it sounds, it looks like it works really well. And [Peter] didn’t just stumble onto this method; he approached it systematically and found what works best. His tips incude using electrical tape as a spacer to lift the copper off the print surface slightly, cleaning the board with Scotchbrite rather than sandpaper, and not curing the resin after printing. His toolchain is a bit uncoventional — he used SketchUp to create the traces and exported the STL. But there are ways to convert Gerbers to STLs, so your favorite EDA package can probably fit in to the process too.

Don’t have a resin printer? Don’t worry — FDM printers can work too.

Continue reading “Put That New Resin Printer To Work Making PCBs”

Printing, Plating, And Baking Makes DIY Microlattices Possible

To be honest, we originally considered throwing [Zachary Tong]’s experiments with ultralight metallic microlattices into the “Fail of the Week” bucket. But after watching the video below for a second time, it’s just not fair to call this a fail, so maybe we’ll come up with a new category — “Qualified Success of the Week”, perhaps?

[Zachary]’s foray into the strange world of microlattices began when he happened upon a 2011 paper on the subject in Science. By using a special photocurable resin, the researchers were able to use light shining through a mask with fine holes to create a plastic lattice, which was then plated with nickel using the electroless process, similar to the first half of the electroless nickel immersion gold (ENIG) process used for PCBs. After removing the resin with a concentrated base solution, the resulting microlattice is strong, stiff, and incredibly light.

Lacking access to the advanced materials and methods originally used, [Zachary] did the best he could with what he had. An SLA printer with off-the-shelf resin was used to print the skeleton using the same algorithms used in the original paper. Those actually turned out pretty decent, but rather than electroless plating, he had to go with standard electroplating after a coat of graphite paint. The plated skeletons looked great — until he tried to dissolve the resin. When chemical approaches failed, into the oven went the plated prints. Sadly, it turns out that the polymers in the resin expand when heated, which blew the plating apart. A skeleton in PLA printed on an FDM printer fared little better; when heated to drive out the plastic, it became clear that the tortuous interior of the lattice didn’t plate very well.

From aerogels to graphene, we love these DIY explorations of new and exotic materials, so hats off to [Zachary] for giving it a try in the first place.

Continue reading “Printing, Plating, And Baking Makes DIY Microlattices Possible”

Building A Gimballed Motorcycle Helmet Camera From Scratch

[Nixie Guy] has hit all of important design elements in a single motorcycle helmet-cam project which packs in so much that the build log spans three posts. These cameras need to stand up to the elements and also to being pelted by insects at 80 MPH. They need to attach securely to the helmet without interfering with vision or movement of the head. And you should be able to adjust where they are pointing. The balance of features and cost available in consumer cameras make this list hard to satisfy — but with skills like these the bootstrapped camera came out great!

Where can you get a small, high quality camera? The drone industry has been iterating on this problem for a decade now and that’s where the guts of this creation come from. That produced an interesting issue, the board of the CADDX Turtle V2 camera gets really hot when in use and needs to have air flowing over it. So he threw a custom-milled heat sink into the side of the SLA resin printed housing to keep things somewhat cool.

Since the mill was already warmed up, why not do some mold making? Having already been working on a project to use a casting process for soft PCB membranes, this was the perfect technique to keep the buttons and the SD card slots weather tight on the helmet cam. A little pouch battery inside provides power, and the charging port on the back is a nice little magnet job.

Everything came together incredibly well. [Nixie Guy] does lament the color of the resin case, but that could be easily fixed by reprinting with colored resin.

While you’re bolting stuff onto your helmet, maybe some excessive bling is in order?

Continue reading “Building A Gimballed Motorcycle Helmet Camera From Scratch”