Recreating The “Stuck Throttle” Problem On A Toyota

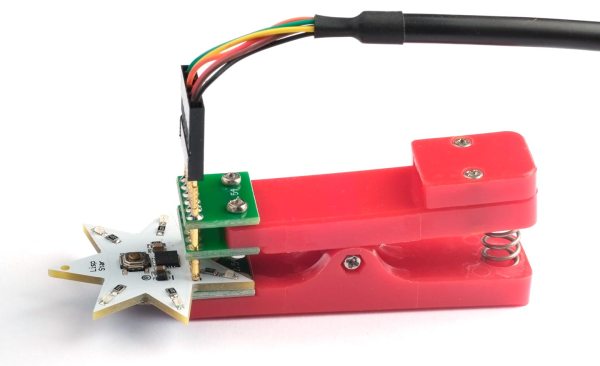
A few years ago, Toyota was in the news for a major safety issue with a number of their passenger vehicles. Seemingly at random, certain cars were accelerating without concern for driver input, causing many crashes and at least 37 confirmed deaths. They issued recalls both for the floor mats which were reported to have slid forward to jam the accelerator pedal, but this didn’t explain all of these crashes. There was another recall for stuck throttles, which [Colin O’Flynn] demonstrates a possible cause for on his test bench.

While most passenger vehicles older than about 15-20 years controlled the throttle with a cable connected directly from the throttle body to the accelerator pedal, most manufacturers have switched to a fly-by-wire system which takes sensor input from the accelerator pedal and sends that position information to the vehicle’s computer which in turn adjusts the throttle position. This might be slightly cheaper to manufacture, but introduces a much larger number of failure modes to a critical system. Continue reading “Recreating The “Stuck Throttle” Problem On A Toyota”

Play DOOM On Seven-Segment Displays

Getting DOOM to run on a computer it was never meant to run on is a fun trope in the world of esoteric retro computers. By now we’ve seen it run on everything from old NES systems to microwaves, treadmills, and basically anything with a computer inside of it. What we don’t often see are the displays themselves being set up specifically to run the classic shooter. This build might run the game itself on ordinary hardware, but the impressive part is that it’s able to be displayed on this seven-segment display.

This build makes extensive use of multiplexers to drive enough seven-segment displays to use as a passable screen. There are 1152 seven segment digits arranged in a 48 by 24 array, powered by a network of daisy-chained MAX7219 chips. A Python script running on a Raspberry Pi correlates actual image data with the digit to be displayed on each of the segments, and the Raspberry Pi sends all of that information out to the screen. The final result is a display that’s fast enough and accurate enough to play DOOM in a truly unique way.

There is much more information available about this project on their project page, and they have made everything open source for those who wish to follow along as well. The project includes more than just the ability to play DOOM, too. There’s a built-in video player and a few arcade programs programmed specifically to make use of this display. Perhaps one day we will also see something like this ported to sixteen-segment displays instead of the more common seven-segment.

Comparing Solar Energy Harvesters

There doesn’t have to be much more to setting up a simple solar panel installation than connecting the panel to a battery. Of course we would at least recommend the use of a battery management system or charge controller to avoid damaging the battery, although in a pinch it’s not always strictly necessary. But these simple systems leave a lot on the table, and most people with any sizable amount of solar panels tend to use a maximum power point tracking (MPPT) system to increase the yield of the panels. For a really tiny installation like [Salvatore] has, you’ll want to take a look at a similar system known as a solar energy harvester.

[Salvatore] is planning to use an energy harvester at his small weather station, which is currently powered by an LDO regulator and a small solar cell. While this is fairly energy efficient, the energy harvesters that he is testing with this build will go far beyond what an LDO is capable of. The circuit actually has two energy harvesters built onto it which allows him to test the capabilities of both before he makes a decision for his weather station. Every amount of energy is critical when using the cell he has on hand, which easily fits in the palm of one’s hand.

The testing of this module isn’t complete yet, but he does have two working prototypes to test in future videos to see which one truly performs the best. For a project of this size, this is a great way to get around the problem of supplying a small amount of power to something remote. For a larger solar panel installation, you’ll definitely want to build an MPPT system though.

Continue reading “Comparing Solar Energy Harvesters”

Building A Local Network With LoRaWAN

At its core, the Internet is really just a bunch of computers networked together. There’s no reason that there can’t be other separate networks of computers, or that we all have to tie every computer we have to The One Internet To Rule Them All. In fact, for a lot of embedded systems, it doesn’t make much sense to give them a full network stack and Cat6e Ethernet just to report a few details about themselves. Enter LoRaWAN, a wireless LAN that uses extremely low power for Internet-of-Things devices, and an implementation of one of these networks in an urban environment.

The core of the build is the LoRaWAN gateway which sits at the top of a tall building to maximize the wireless range of all of the other devices. It’s running ChirpStack on the software side and uses a Kerlink Wigrid station to broadcast. The reported range is a little over 9 km with this setup. Other gateways can also be added, and the individual LoRa modules can report to any available gateway. From there, the gateways all communicate back to the central server and the information can be sent out to the wider network, Internet or otherwise.

The project’s creator [mihai.cuciuc] notes that this sort of solution might not be best for everyone. There are other wide area networks available, but using LoRaWAN like this would be likely to scale better as more and more devices are added to the network. For some other ways that LoRa can be used to great effect, take a look at this project which builds an off-grid communications network with it.

Velomobile Gets Electric Assist

What do you get when you throw all accepted bicycle designs out the window and start fresh? Well, it might look a bit like [Saukki’s] velomobile.

Most bikes come in a fairly standard, instantly-recognizable shape which has been popular for over a century now. While it’s a vast improvement over its predecessor, the penny-farthing bicycle, there’s no reason that a bike needs to have this two-triangle frame shape other than that a pretentious bicycle racing standards group says they have to. If you want to throw their completely arbitrary rulebook out of the window, though, you can build much more efficient, faster bikes like recumbents or even full-fairing velomobiles. And if you want to go even faster than that, you can always add a standard ebike motor kit to one.

This is a lot harder than putting a motor on a normal bicycle. Bicycles tend to have standardized parts and sizes, and [Saukki]’s velomobile is far from the standard bike. First, he needed custom mounts for the display and also for the battery, which he needed to make extra wide so its weight wouldn’t rip through the carbon fiber body. The emergency brake lever motor cutoff needed to be dismantled to work with his control system too, and finally the mid-drive motor needed a custom mount as well. It’s a TSDZ2 motor that comes with torque-sensing pedal assist.

The changes didn’t stop there. The velomobile max speed is much higher than a standard bike. This called for some gear ratio changes, in the form of a monster 60-tooth chain ring.

This leads to the one major problem with this build which is that the velomobile can achieve such high speeds on its own that the electric assist cuts out for most of the ride. There is a legal requirement over much of Europe that e-bikes only have pedal assist (without a throttle) and that they stop assisting above a specific speed. But if you want to build an e-bike that pushes the boundary of the law instead of strictly adhering to it, take a look at this one which uses a motor from a washing machine.

Continue reading “Velomobile Gets Electric Assist”

Direction-Finding With Help From The Steam Deck

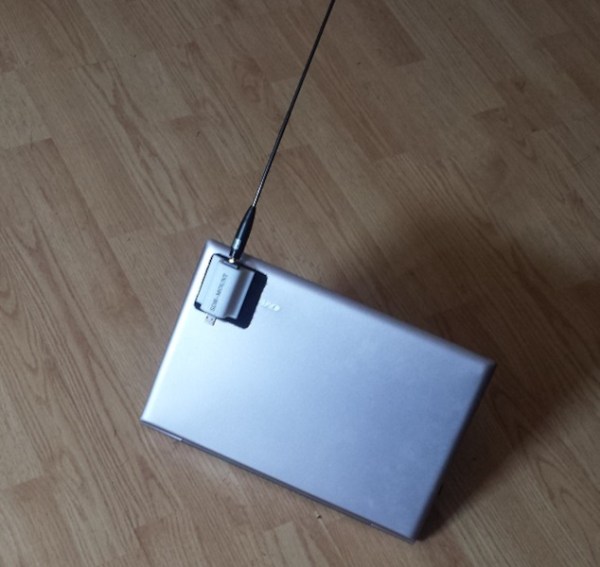
Direction-finding, or fox hunting, is a popular activity in ham radio circles where a group of people armed with radios attempt to locate a broadcasting source. Besides being a hobby for amateurs, it’s also a necessary tool in the belt of regulators who are attempting to track down violators of the air space. There are a lot of ways to figure out the precise location of a radio transmission, but this one manages to pull it off using both a boat and a Steam Deck, each armed with a software-defined radio.

This project comes to us from [Aaron] who is well known in the amateur radio circles for his SDR-focused Linux distribution called DragonOS; which has all the tools needed for a quality SDR experience, in this case KrakenSDR and DF Aggregator. He’s loaded everything up on a Steam Deck and left that in a secure location on the shore of a lake, while he carries second device with the same software with him on a boat. With the two devices listening for a specific signal, he’s able to quickly zero in on his friend on the shore who is broadcasting on the 70 cm band thanks to the help of all of these software packages.

While ham radio isn’t always known for being a youthful and exciting activity, the advent of software-defined radio and other digital modes seem to be shaking things up in that world. Certainly speeding around a lake on a boat is fun on its own as well, and a fox hunt like this can be done with something as small and simple as a Raspberry Pi too.

Continue reading “Direction-Finding With Help From The Steam Deck”

A 3D Printer With Quadruple The Output

While the polygraph is colloquially associated with pseudoscientific lie detector tests, the actual invention of the first polygraph was designed to mechanically duplicate the pen strokes of someone writing. Famously, a polygraph was used by former US President Thomas Jefferson in his “modern office”, a replica of which still sits in the Smithsonian museum. Few of us have a need for a pen-based polygraph anymore, but inspiration from the centuries-old invention can still be gleaned from the machine, like in this 3D printer which can output four identical prints at once.

The printer is a Core XY design with four separate print heads, which are all locked together. The printer behaves as if there is a single print head which keeps it simpler than it otherwise could be. Some extra consideration needs to be paid to the print bed to ensure it’s level and flat, and it also includes a unique Z-axis designed to prevent Z-banding from poor quality leadscrews. It has a fairly wide print area, but a noticeable restriction is that it’s essentially quartered, so while it can produce many parts at once, it can’t produce a single part that uses the entire area of the print bed.

Every printed part used to make this printer was designed by [Rick] in OpenSCAD. He also built a custom electronics board with the printer drivers, and all other associated circuitry in KiCad. For anyone who prints large volumes of parts, this might be just the trick to increase output without having to manage more printers. If you already have more printers and need an easier way to manage them all, take a look at this dedicated Raspberry Pi set up to do just that.

Continue reading “A 3D Printer With Quadruple The Output”