Wearable Sensor Trained To Count Coughs

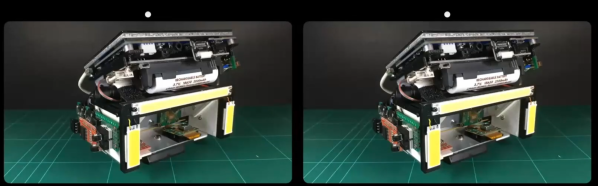
There are plenty of problems that are easy for humans to solve, but are almost impossibly difficult for computers. Even though it seems that with modern computing power being what it is we should be able to solve a lot of these problems, things like identifying objects in images remains fairly difficult. Similarly, identifying specific sounds within audio samples remains problematic, and as [Eivind] found, is holding up a lot of medical research to boot. To solve one specific problem he created a system for counting coughs of medical patients.

This was built with the idea of helping people with chronic obstructive pulmonary disease (COPD). Most of the existing methods for studying the disease and treating patients with it involves manually counting the number of coughs on an audio recording. While there are some software solutions to this problem to save some time, this device seeks to identify coughs in real time as they happen. It does this by training a model using tinyML to identify coughs and reject cough-like sounds. Everything runs on an Arduino Nano with BLE for communication.

While the only data the model has been trained on are sounds from [Eivind], the existing prototypes do seem to show promise. With more sound data this could be a powerful tool for patients with this disease. And, even though this uses machine learning on a small platform, we have seen before that Arudinos are plenty capable of being effective machine learning solutions with the right tools on board.

Blender Builds LEGO Models

Blender is a free and open source computer graphics package that’s used in the production of everything from video games to feature films. Now, as demonstrated by [Joey Carlino], the popular program can even be used to convert models into LEGO.

This new feature available in Blender 3.4 allows for the use of instance attributes in a way that a large number of points on a model can be created without causing undue strain on (and possible crashing of) the software. Essentially, an existing model is split into discrete points at specific intervals. The spacing of the intervals is set to be exactly that of LEGO bricks, which gives the model the low-resolution look of a real LEGO set. From there, a model brick is created and placed at each of these points, and then colors can be transferred to the bricks individually.

The demonstration that [Joey] uses is converting a beach ball model to LEGO, but using these tools on other models delivers some striking results. He goes over a lot of the details on how to create these, and it would only be a short step from there to ordering the bricks themselves. Or, using these models and sending them over to a 3D printer straight from Blender itself. Not bad for free software!

Continue reading “Blender Builds LEGO Models”

DIY USB Charging The Right Way

Since the widespread adoption of USB 1.1 in the 90s, USB has become the de facto standard for connecting most peripherals to our everyday computers. The latest revision of the technology has been USB 4, which pushes the data rate capabilities to 40 Gbit/s. This amount of throughput is mindblowing compared to the USB 1.x speeds which were three to four orders of magnitude slower in comparison. But data speeds haven’t been the only thing changing with the USB specifications. The amount of power handling they can do has increased by orders of magnitude as well, as this DIY USB charger demonstrates by delivering around 200 W to multiple devices at once.

The build comes to us from [tobychui] who not only needed USB rapid charging for his devices while on-the-go but also wanted to build the rapid charger himself and for the charger to come in a small form factor while still using silicon components instead of more modern gallium nitride solutions. The solution he came up with was to use a 24 V DC power supply coupled with two regulator modules meant for solar panel installations to deliver a staggering amount of power to several devices at once. The charger is still relatively small, and cost around $30 US dollars to make.

Part of what makes builds like this possible is the USB Power Delivery (PD) standard, which has enabled all kinds of electronics to switch to USB for their power needs rather than getting their power from dedicated, proprietary, and/or low-quality power bricks or wall warts. In fact, you can even use this technology to do things like charge lithium batteries.

Continue reading “DIY USB Charging The Right Way”

Go Fly A Kite

Harvesting energy from the wind has been a commercially viable way of generating clean energy for around three decades now. Wind turbines are a reliable, proven technology but they do have some downsides, one of which is that since there’s more wind higher above the ground this usually means tall, expensive towers. There is a way around this problem, though, which is using kites to generate energy instead of a fixed turbine.

While kite generators aren’t a new idea, [Benjamin] has been working on this kite generator which has a number of improvements over existing kite generators. Like other kite generators, this one uses a tether to spin a generator which is located on the ground. But while this is similar to other kite systems, this prototype has a much simpler design and sweeps a much larger area while in flight. It also has an autopilot with multiple independent steering systems, which [Benjamin] says will allow it to stay in flight for months at a time provided there is enough wind. If there isn’t, it can land reliably, and launching it is relatively fast and simple as well.

While kites do have some obvious downsides compared to fixed turbines including a single point of failure at the tether and a large amount of cleared area to operate, they have plenty of advantages as well. They’re smaller, simpler, require no complicated yaw system, and can be easily maintained on the ground. In fact, it’s possible to build very simple kite generators out of nothing more than a hobby kite and some readily-available electrical components.

Continue reading “Go Fly A Kite”

Taking Pokémon On A Walk

Emulating old computers or video game systems isn’t always about recreating childhood nostalgia or playing classics on hardware that doesn’t exist anymore. A lot of the time it can be an excellent way to learn about the mechanics of programming a video game. Plenty of older titles have available source code that anyone can pour over and modify, and one of those is Pokémon Emerald. This was the first Pokémon game that [Inkbox] played, and he added a few modern features to it with this custom ROM file.

The first thing to add to this game was the ability to have one’s Pokémon follow their character around in the overworld map. This is common in later games, but wasn’t yet a feature when Emerald and Ruby first came out. [Inkbox] needed to import sprites from later games into the Emerald game file, convert their color palettes to match the game’s palette, and then get to work on the mechanics. After everything was finished, the Pokémon not only follow the player around the map but are animated, enter and exit their Pokéballs, and even jump off ledges in a believable, 32-bit way.

One of the great things about older games like these is that they’ve been around long enough to have source code or decompiled code available, they often have plenty of documentation, and the platforms they operate on are well-known by now as well. Pokémon Emerald is not alone in this regard; in fact, there is a huge Game Boy Advance homebrew scene that is not too difficult to get involved in.

Continue reading “Taking Pokémon On A Walk”

Keeping An Eye On Heating Oil

Energy costs around the world are going up, whether it’s electricity, natural gas, or gasoline. This is leading to a lot of people looking for ways to decrease their energy use, especially heading into winter in the Northern Hemisphere. As the saying goes, you can’t manage what you can’t measure, so [Steve] has built this system around monitoring the fuel oil level for his home’s furnace.

Fuel oil is an antiquated way of heating, but it’s fairly common in certain parts of the world and involves a large storage tank typically in a home’s basement. Since the technology is so dated, it’s not straightforward to interact with these systems using anything modern. This fuel tank has a level gauge showing its current percentage full. A Raspberry Pi is set up nearby with a small camera module which monitors the gauge, and it runs OpenCV to determine the current fuel level and report its findings.

Since most fuel tanks are hidden in inconvenient locations, it makes checking in on the fuel level a breeze and helps avoid running out of fuel during cold snaps. [Steve] designed this project to be reproducible even if your fuel tank is different than his. You have other options beyond OpenCV as well; this fuel tank uses ultrasonic sensors to measure the fuel depth directly.

A Single-Watt Hydroponic Lighting System

Hydroponic systems are an increasingly popular way to grow plants indoors using a minimum of resources. Even some commercial farming operations are coming online using hydroponic growing techniques, as these methods consume much less water, land area, and other resources than traditional agricultural methods. The downside is that the required lighting systems often take an incredible amount of energy. That’s why [ColdDayApril] set up a challenge to grow a plant hydroponically using no more than a single watt.

The system is set up to grow a single pepper plant in what is known as a deep-water culture, where the plant is suspended in a nutrient solution which has everything it needs to grow. The lightning system is based around the Samsung LM301B which comes close to the physical limits for converting electricity into white light and can manage around 220 lumens. A special power supply is needed for these low-power diodes, and the light is efficiently directed towards the plant using a purpose-built reflective housing. By placing this assembly very close to the plant and adjusting it as it grows, [ColdDayApril] was able to take the pepper plant from seed to flowering in 92 days.

It’s worth noting that the rest of the system uses a little bit of energy too. A two watt fan helps circulate some air in the hydroponic enclosure, and deep-water systems usually require an air pump to oxygenate the water which uses another two watts. This is still an impressive accomplishment as most hobbyist builds use lighting systems rated in the hundreds of watts and use orders of magnitude more energy. But, if you’re willing to add some fish into the system you can mitigate some of the energy requirements needed for managing the water system even further.