Automation For The NES

Old hardware might not be anywhere close to as powerful as modern technology, but it does have a few perks. Aesthetics can of course drive the popularity of things like retro gaming systems, but the ease of understanding the underpinnings of their inner workings is also critical. The Nintendo Entertainment System, now nearly four decades old, is a relatively simple machine by modern standards and this lends the system to plenty of modifications, like this controller that allows the system to be somewhat automated.

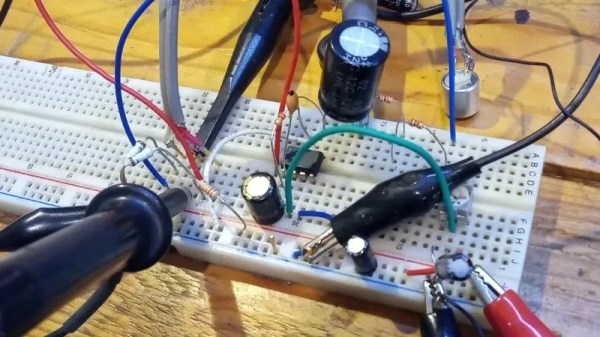
The original NES controller used a fairly simple shift register to send button presses to the system. The system outputted a latch signal to the controller, the shift register would take as input the current state of the buttons, and then would send them one-by-one to the system at a rate of around 1000 times per second. These signals can be sent without a controller easily enough, too. This build uses a CD4021 shift register, which is the same as the original controller, but instead of reading button states it accepts its inputs from a separate computer via a latching circuit. In this case, the separate computer is a custom design that came about through adapting cassette storage for a 6502-based computer, but it could come from anything else just as easily.

With this system in place, it’s possible to automate gameplay to some extent. Since the system can’t get feedback about the game in its current state, it requires some precise timing to get it to play the game well, and a lot of tuning needs to go into it. This isn’t just a one-off, either. Similar methods are how we get tool-assisted speedruns of games and although these are often done in emulators instead of on real hardware, they can result in some interesting exploits.

Continue reading “Automation For The NES”

Making Things Square In Three Dimensions

Measure twice, cut once is excellent advice when building anything, from carpentry to metalworking. While this adage will certainly save a lot of headache, mistakes, and wasted material, it will only get you part of the way to constructing something that is true and square, whether that’s building a shelf, a piece of furniture, or an entire house. [PliskinAJ] demonstrates a few techniques to making things like this as square as possible, in all three dimensions.

The first method for squaring a workpiece is one most of us are familiar with, which is measuring the diagonals. This can be done with measuring tape or string and ensures that if the diagonals are equal lengths, the workpiece is square. That only gets it situated in two dimensions, though. To ensure it’s not saddle-shaped or twisted, a little more effort is required. [PliskinAJ] is focused more on welding so his solutions involve making sure the welding tables are perfectly flat and level. For larger workpieces it’s also not good enough to assume the floor is flat, either, and the solution here is to minimize the amount of contact it has with the surface by using something like jack stands or other adjustable supports.

There are a few other tips in this guide, including the use of strategic tack welds to act as pivot points and, of course, selecting good stock to build from in the first place, whether that’s lumber or metal. Good design is a factor as well. We’ve also featured a few other articles on accuracy and precision,

Liquid Metal Battery Goes Into Production

The news is rife with claims of the next great thing in clean energy generation, but most of these technologies never make it to production. Whether that’s due to cost issues, production, or scalability, we’re often teased with industry breakthroughs that never come to fruition. Multi-layered solar panels, wave and tidal energy, and hydrogen fuel cells are all things that are real but can’t seem to break through and overtake other lower cost, simpler, and proven technologies. One that seems to be bucking this trend is the liquid metal battery, which startup Ambri is putting into service on the electrical grid next year.

With lithium ion battery installations running around $405 per kilowatt-hour, Ambri’s battery technology is already poised to be somewhat disruptive at a cost of about half that. The construction method is simpler than lithium as well, using molten metal electrodes and a molten salt electrolyte. Not only is this more durable, it’s also not flammable and is largely immune to degradation over time. The company’s testing results indicate that after 20 years the battery is expected to still retain 95% of its capacity. The only hitch in scaling this technology could be issues with sourcing antimony, one of the metals needed for this type of construction.

Even though Ambri can produce these batteries for $180 to $250 per kilowatt-hour, they need to get the costs down to about $20 for the technology to be cost-competitive with “base load” power plants (an outdated term in itself). They do project their costs to come down significantly and hit this mark by 2030, which would put electrical grids on course to be powered entirely by renewables. Liquid metal batteries aren’t the only nontraditional battery out there trying to solve this problem, though. Another promising interesting energy storage technology on the horizon is phase-change materials.

Solar Boat Makes Waves

The two best days in a boat owner’s life are the day they buy it, and the day they sell it. At least, that’s the common saying among people who actually spend money to buy a boat. [saveitforparts], on the other hand, looks like he’s going to have many more great days on this boat than that since he cobbled it together nearly for free, and he won’t even need to purchase any fuel for it since it runs on solar power.

The build starts with [saveitforparts] heading out to a literal pile of boats in his yard, unearthing an old single-person sailboat, and then fixing the major problems with its hull. With a new coat of red paint, the focus turns to the drivetrain. Propulsion is handled by an electric trolling motor found at an auction for $8 and is powered by an off-the-shelf battery bank provided by a sponsor of his channel. A pair of solar panels (which were traded for) fitted to outriggers keep the battery bank topped off, and there’s plenty of energy left over with this setup to charge drone batteries and other electronics while out on the lake.

[saveitforparts] reports that the single-passenger solar boat is remarkably stable on the water and fairly quick at full speed thanks to its light weight. He even hypothesizes that it could be fished from. The only thing not particularly stable was towing it to the lake, as the rough roads and permanently-attached solar panel outriggers weren’t particularly congruent with each other. If you’re looking for something similar to carry a few passengers, though, have a look at this much larger version.

Continue reading “Solar Boat Makes Waves”

Weather Station With Distributed Sensors

Building a weather station is a fairly common project that plenty of us have taken on, and for good reason. They can be built around virtually any microcontroller or full-scale computer, can have as many or few sensors as needed, and range from simple, straightforward projects to more complex systems capable of doing things like sending data off to weather services like Weather Underground. This weather station features a few innovations we don’t often see, though, with a modular and wireless design that makes it versatile and easy to scale up or down as needed.

Each of the modules in this build use the ESP32 platform, which simplifies design and also takes care of the wireless capability needed. The base station gets a few extra sensors including those for carbon dioxide, volatile organic compounds, and nitrogen oxides. It also includes a screen which can be used to display a wide variety of data gathered locally but also includes forecast information fetched from the free OpenWeatherMap API. For the sensor modules, BME280 sensors are used for temperature, pressure, and humidity and each module includes its own solar panel and battery with the ESP32 chips set to operate using as little energy as possible.

One of the things that helps easily integrate all of the sensor modules is the use of ESP-NOW, which we have seen a few times before. It essentially eliminates the need for a router and allows ESP modules to connect directly with one another. The build also goes into detail about most of the aspects of this project including the programming of the GUI that the ESP32 base station displays on its screen, so for anyone looking to start their own weather station project this should be an excellent guide. Make sure to check out this one as well if you want to send all of your weather data to Weather Underground.

Automated Drone Takes Care Of Weeds

Commercial industrial agriculture is responsible for providing food to the world’s population at an incredibly low cost, especially when compared to most of human history when most or a majority of people would have been involved in agriculture. Now it’s a tiny fraction of humans that need to grow food, while the rest can spend their time in cities and towns largely divorced from needing to produce their own food to survive. But industrial agriculture isn’t without its downsides. Providing inexpensive food to the masses often involves farming practices that are damaging to the environment, whether that’s spreading huge amounts of synthetic, non-renewable fertilizers or blanket spraying crops with pesticides and herbicides. [NathanBuildsDIY] is tackling the latter problem, using an automated drone system to systemically target weeds to reduce his herbicide use.

The specific issue that [NathanBuildsDIY] is faced with is an invasive blackberry that is taking over one of his fields. To take care of this issue, he set up a drone with a camera and image recognition software which can autonomously fly over the field thanks to Ardupilot and a LiDAR system, differentiate the blackberry weeds from other non-harmful plants, and give them a spray of herbicide. Since drones can’t fly indefinitely, he’s also build an automated landing pad complete with a battery swap and recharge station, which allows the drone to fly essentially until it is turned off and uses a minimum of herbicide in the process.

The entire setup, including drone and landing pad, was purchased for less than $2000 and largely open-source, which makes it accessible for even small-scale farmers. A depressing trend in farming is that the tools to make the work profitable are often only attainable for the largest, most corporate of farms. But a system like this is much more feasible for those working on a smaller scale and the automation easily frees up time that the farmer can use for other work. There are other ways of automating farm work besides using drones, though. Take a look at this open-source robotics platform that drives its way around the farm instead of flying.

Thanks to [PuceBaboon] for the tip!

Continue reading “Automated Drone Takes Care Of Weeds”

Laser Engraver Uses All Of The DVD Drive

For the last ten to fifteen years, optical drives have been fading out of existence. There’s little reason to have them around anymore unless you are serious about archiving data or unconvinced that streaming platforms will always be around. While there are some niche uses for them still, we’re seeing more and more get repurposed for parts and other projects like this tabletop laser engraver.

The build starts with a couple optical drives, both of which are dismantled. One of the shells is saved to use as a base for the engraver, and two support structures are made out of particle board and acrylic to hold the laser and the Y axis mechanism. Both axes are made from the carriages of the disassembled hard drives, with the X axis set into the base to move the work piece. A high-output laser module is fitted to the Y axis with a heat sink, and an Arduino and a pair of A4988 motor controllers are added to the mix to turn incoming G-code into two-dimensional movement.

We’ve actually seen a commercial laser engraver built around the same concept, but the DIY approach is certainly appealing if you’ve got some optical drives collecting dust. Otherwise you could use them to build a scanning laser microscope.

Continue reading “Laser Engraver Uses All Of The DVD Drive”