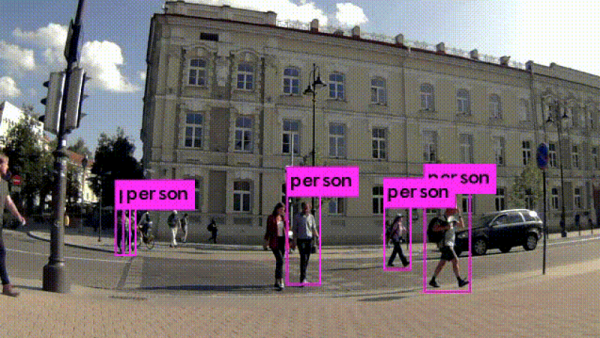
Most people are familiar with the idea that machine learning can be used to detect things like objects or people, but for anyone who’s not clear on how that process actually works should check out [Kurokesu]’s example project for detecting pedestrians. It goes into detail on exactly what software is used, how it is configured, and how to train with a dataset.
The application uses a USB camera and the back end work is done with Darknet, which is an open source framework for neural networks. Running on that framework is the YOLO (You Only Look Once) real-time object detection system. To get useful results, the system must be trained on large amounts of sample data. [Kurokesu] explains that while pre-trained networks can be used, it is still necessary to fine-tune the system by adding a dataset which more closely models the intended application. Training is itself a bit of a balancing act. A system that has been overly trained on a model dataset (or trained on too small of a dataset) will suffer from overfitting, a condition in which the system ends up being too picky and unable to usefully generalize. In terms of pedestrian detection, this results in false negatives — pedestrians that don’t get flagged because the system has too strict of an idea about what a pedestrian should look like.
[Kurokesu]’s walkthrough on pedestrian detection is great, but for those interested in taking a step further back and rolling their own projects, this fork of Darknet contains YOLO for Linux and Windows and includes practical notes and guides on installing, using, and training from a more general perspective. Interested in learning more about machine learning basics? Don’t forget Google has a free online crash course to get you up to speed.

 [Dan] feels that paper maché is an under-utilized and under-rated medium, and he puts out some stunning work on
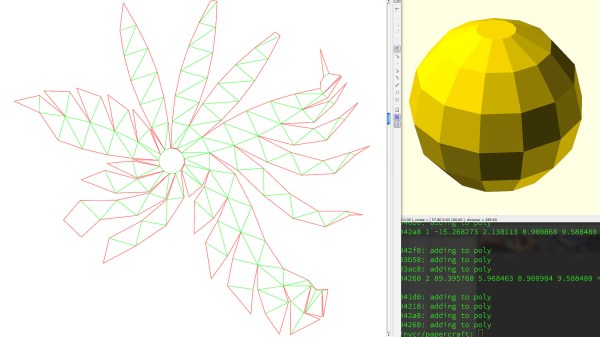
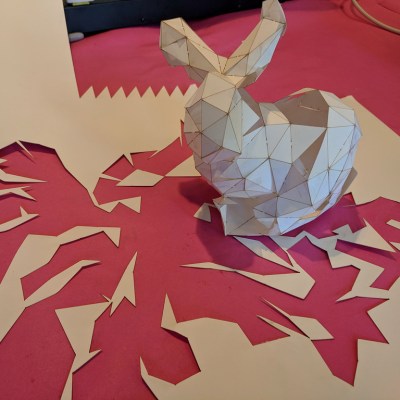 There are of course other and more full-featured tools for unfolding 3D models: