There are a ton of ways to go about building your own reflow oven. Most of these builds start with, well, an oven — usually a toaster oven — with a small but significant minority choosing to modify a hotplate. But this might be the first time we’ve seen a waffle iron turned into a reflow oven.
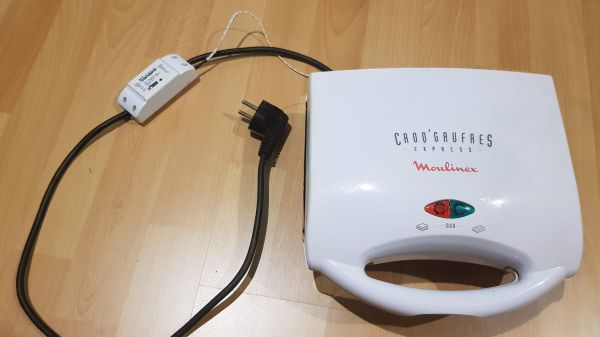
Of course, what [Vincent Deconinck] came up with is not an oven per se. But his “RefloWaffle” certainly gets the job done. It started with an old waffle maker and a few experiments to see just how much modification it would take to create the various thermal reflow profiles. As it turned out, the original cooking surfaces had too much thermal inertia, so [Vincent] replaced them with plain copper sheets. That made for quicker temperature transitions, plus created some space between the upper and lower heating elements for the SMD board.
As for control, [Vincent] originally used an Arduino with a relay and a thermocouple, but he eventually built a version 2.0 that used a hacked Sonoff as both controller and switch. Adding the thermocouple driver board inside the Sonoff case took a little finagling, but he managed to get everything safely tucked inside. A web interface runs on the Sonoff and controls the reflow process.
We think this is a great build, one that will no doubt see us trolling the thrift stores for cheap waffle irons to convert. We’ve seen some amazing toaster oven reflows, of course, but something about the simplicity and portability of RefloWaffle just works for us.
When it comes to machining, the material that springs to mind is likely to be aluminum, steel, or plastic. We don’t necessarily think of glass as a material suitable for machining, at least not in the chuck-it-up-in-the-lathe sense. But glass is a material that needs to be shaped, too, and there are a bunch of different ways to accomplish that. Few, though, are as interesting as micromachining glass with laser-induced plasma bubbles. (Video, embedded below.)
The video below is from [Zachary Tong]. It runs a bit on the longish side, but we found it just chock full of information. The process, formally known as “laser-induced backside wet-etching,” uses a laser to blast away at a tank of copper sulfate. When a piece of glass is suspended on the surface of the solution and the laser is focused through the glass from the top, some interesting things happen.
The first pulse of the laser vaporizes the solution and decomposes the copper sulfate. Copper adsorbs onto the glass surface inside the protective vapor bubble, which lasts long enough for a second laser pulse to come along. That pulse heats up the adsorbed copper and the vapor in the original bubble, enough to melt a tiny bit of the glass. As the process is repeated, small features are slowly etched into the underside of the glass. [Zachary] demonstrates all this in the video, as well as what can go wrong when the settings are a bit off. There’s also some great high-speed footage of the process that’s worth the price of admission alone.
We doubt this process will be a mainstream method anytime soon, not least because it requires a 50-Watt Nd:YAG fiber laser. But it’s an interesting process that reminds us of [Zachary]’s other laser explorations, like using a laser and Kapton to make graphene supercapacitors.
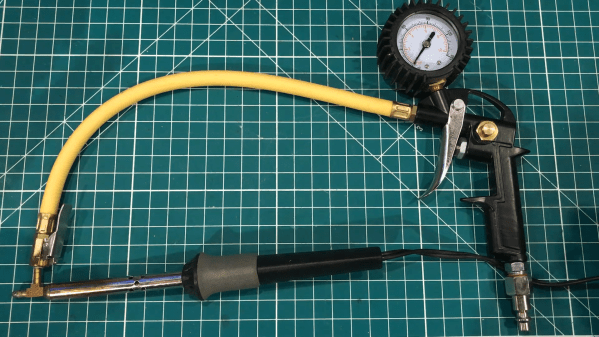
This video on building a DIY desoldering iron says it all right up front: this is stupid and dangerous, and you shouldn’t do it. But that doesn’t mean it doesn’t work, or that it doesn’t have potential to be turned into something else.
The story begins, as it often does these days, on the pages of Amazon as [AnotherMaker] shopped for a real desoldering setup. Despite a case of sticker shock, he took the plunge on a nice Hakko vacuum desolderer, but as is also often the case, it failed to arrive. Rather than accept defeat, [AnotherMaker] purchased a cheap-o soldering iron and a brass tee fitting for small-bore tubing that would chuck nicely into the spot where the stock tip once lived, giving him a way to both melt solder and move air.
Unfortunately, rather than applying a vacuum, he chose to blast 100 PSI compressed air through the tip, which certainly moves a lot of solder, perhaps at the cost of burns and eye injuries. The potential for accidental short circuits is pretty high too, but c’mon — it’s not like we all haven’t flicked or dropped a board to desolder something. Is this really much different?
As fraught with peril as this method may be, [AnotherMaker] is onto something here. Perhaps adding a 3D-printed venturi generator could turn that blast of air into a vacuum. Or maybe a vacuum pump for a manual pick-and-place would do the trick too.
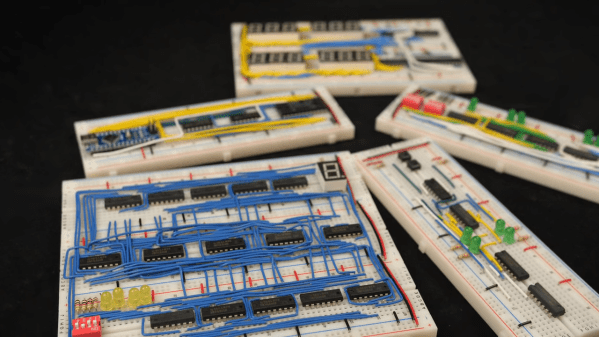
A solderless breadboard is a place where ideas go to become real for the first time. Usually, this is a somewhat messy affair, with random jumpers flying all about the place, connecting components that can be quickly swapped to zero in on the right values, or to quickly change the circuit topology. Breadboards aren’t the place to make circuit artwork.
That is, however, not always the case, and we’ve seen more than a few examples from [Ben Eater] on breadboarding that approaches the circuit sculpture level of craftsmanship. And like any good craftsman, [Ben] has shared some of his breadboarding tips and tricks in a new video. Starting with a simple 555 blinkenlight project that’s wired up in the traditional anything-goes fashion, [Ben] walks us through his process for making a more presentation-worthy version.
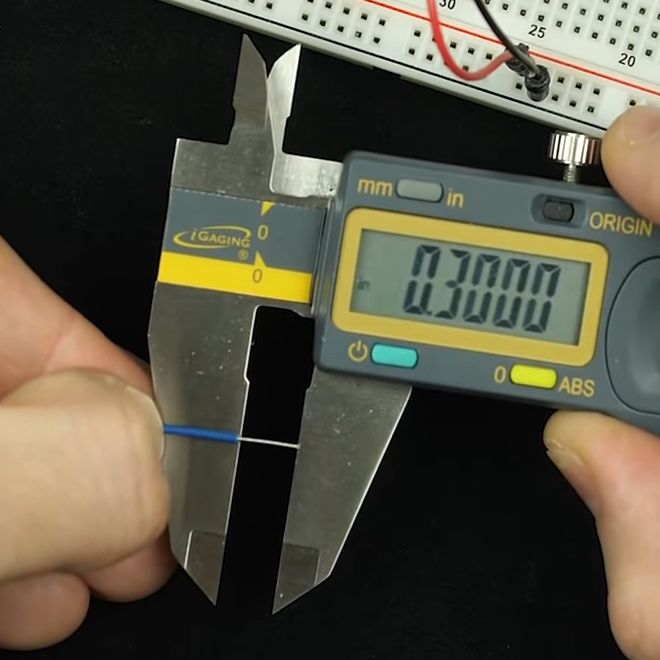
His tools are high-quality but simple, with the wire strippers being the most crucial to good results. Surprisingly, [Ben] relies most heavily on the simple “scissors-style” strippers for their versatility, rather than the complicated semi-automatic tools. We found that to be the biggest take-home from the video, as well as the results of practice. [Ben] has done tons of this type of breadboarding before, which means when he “eyeballs” stripping 0.3 inches of insulation, he can do it down to a ten-thousandth precision.
Granted, there’s not much new here, but watching this video is a little like watching [Bob Ross] paint — relaxing and strangely compelling at the same time. You can get more of the same with pretty much any of his videos that we’ve covered, like this 6502 breadboard computer build. We’ve also seen [Eater]-inspired builds that are pretty impressive, like this full-8-bit breadboard computer.
Last week we featured a story on the new rules regarding drone identification going into effect in the US. If you missed the article, the short story is that almost all unmanned aircraft will soon need to transmit their position, altitude, speed, and serial number, as well as the position of its operator, likely via WiFi or Bluetooth. The FAA’s rule change isn’t sitting well with Wing, the drone-based delivery subsidiary of megacorporation Alphabet. In their view, local broadcast of flight particulars would be an invasion of privacy, since observers snooping in on Remote ID traffic could, say, infer that a drone going between a pharmacy and a neighbor’s home might mean that someone is sick. They have a point, but how a Google company managed to cut through the thick clouds of irony to complain about privacy concerns and the rise of the surveillance state is mind boggling.
Speaking of regulatory burdens, it appears that getting an amateur radio license is no longer quite the deal that it once was. The Federal Communications Commission has adopted a $35 fee for new amateur radio licenses, license renewals, and changes to existing licenses, like vanity call signs. While $35 isn’t cheap, it’s not the end of the world, and it’s better than the $50 fee that the FCC was originally proposing. Still, it seems a bit steep for something that’s largely automated. In any case, it looks like we’re still good to go with our “$50 Ham” series.
Staying on the topic of amateur radio for a minute, it looks like there will be a new digital mode to explore soon. The change will come when version 2.4.0 of WSJT-X, the program that forms the heart of digital modes like WSPR and FT8, is released. The newcomer is called Q65, and it’s basically a follow-on to the current QRA64 weak-signal mode. Q65 is optimized for weak, rapidly fading signals in the VHF bands and higher, so it’s likely to prove popular with Earth-Moon-Earth fans and those who like to do things like bounce their signals off of meteor trails. We’d think Q65 should enable airliner-bounce too. We’ll be keen to give it a try whenever it comes out.
Look, we know it’s hard to get used to writing the correct year once a new one rolls around, and that time has taken on a relative feeling in these pandemic times. But we’re pretty sure it isn’t April yet, which is the most reasonable explanation for an ad purporting the unholy coupling of a gaming PC and mass-market fried foods. We strongly suspect this is just a marketing stunt between Cooler Master and Yum! Brands, but taken at face value, the KFConsole — it’s not a gaming console, it’s at best a pre-built gaming PC — is supposed to use excess heat to keep your DoorDashed order of KFC warm while you play. In a year full of incredibly stupid things, this one is clearly in the top five.
And finally, it looks like we can all breathe a sigh of relief that our airline pilots, or at least a subset of them, aren’t seeing things. There has been a steady stream of reports from pilots flying in and out of Los Angeles lately of a person in a jetpack buzzing around. Well, someone finally captured video of the daredevil, and even though it’s shaky and unclear — as are seemingly all videos of cryptids — it sure seems to be a human-sized biped flying around in a standing position. The video description says this was shot by a flight instructor at 3,000 feet (914 meters) near Palos Verdes with Catalina Island in the background. That’s about 20 miles (32 km) from the mainland, so whatever this person is flying has amazing range. And, the pilot has incredible faith in the equipment — that’s a long way to fall in something with the same glide ratio as a brick.
Here at Hackaday, we feature projects that are built of just about every material imaginable. Silicon-spangled fiber-reinforced epoxy resin is our primary medium, but we see plastic, wood, steel, aluminum, and even textiles from time to time. It’s not often we see slip-cast ceramic molding, though, and when it pops up, it’s always good to take a look at this versatile manufacturing method.
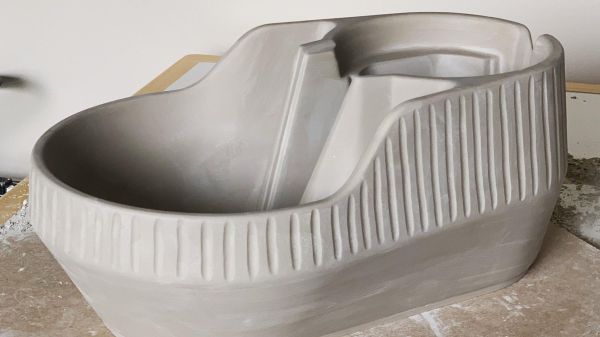
The back-story on this one is that [thoughtfulocean], a mechanical engineer idled by COVID lockdowns, wanted custom water bowls for his dogs, one of whom is clearly a grumpy Ewok. The design started with a 3D-print of the final vessel, printed in sections and glued together. These were used to create a two-piece plaster mold into which a watery slurry of clay, or slip, was poured. The plaster mold dehydrates the slip, leaving behind a semi-solid layer of clay of the desired thickness once the excess slip is poured off. The resulting casting is then fired in a kiln and glazed.
Of course, [thoughtfulocean] ran into a few problems along the way. The first mold was warped thanks to the mold box bowing under pressure from the plaster, so the whole molding process had to be revamped. The finished bowl also shrunk less than expected after firing, which led to some more revisions. But the finished bowl look really nice, and the included pump and filter keeps the Ewok’s water free from the yuck a dog’s face can introduce. As a bonus, it sounds like [thoughtfulocean] might have created a marketable product from all this. Take that, COVID!
Slip-casting ceramic may not be all that common around here, but ceramic as a material isn’t exactly a stranger. And who says slip casting is limited to ceramic? After all, we’ve seen a similar method used with plastic resin.
NASA is always keen to highlight the space agency’s many successes, and rightly so — those who pay for these expensive projects have a right to know what they’re getting for their money. And so the news was recently sprinkled with stories of the discovery of electron bursts beyond the edge of our solar system, caused by shock waves from coronal mass ejection (CME) from our Sun reflecting and accelerating electrons in interstellar plasmas. It’s a novel mechanism and an exciting discovery that changes a lot of assumptions about what happens out in the lonely space outside of the Sun’s influence.
The recent discovery is impressive in its own right, but it’s even more stunning when you dig into the details of how it was made: by the 43-year-old Voyager spacecraft, each now about 17 light-hours away from Earth, and each carrying an instrument so simple and efficient that they’re still working all after this time — and which very nearly were left out of the mission’s science payload.
 Of course, what [Vincent Deconinck] came up with is not an oven per se. But his “RefloWaffle” certainly gets the job done. It started with an old waffle maker and a few experiments to see just how much modification it would take to create the various thermal reflow profiles. As it turned out, the original cooking surfaces had too much thermal inertia, so [Vincent] replaced them with plain copper sheets. That made for quicker temperature transitions, plus created some space between the upper and lower heating elements for the SMD board.