NeRF: Shoot Photos, Not Foam Darts, To See Around Corners

Readers are likely familiar with photogrammetry, a method of creating 3D geometry from a series of 2D photos taken of an object or scene. To pull it off you need a lot of pictures, hundreds or even thousands, all taken from slightly different perspectives. Unfortunately the technique suffers where there are significant occlusions caused by overlapping elements, and shiny or reflective surfaces that appear to be different colors in each photo can also cause problems.

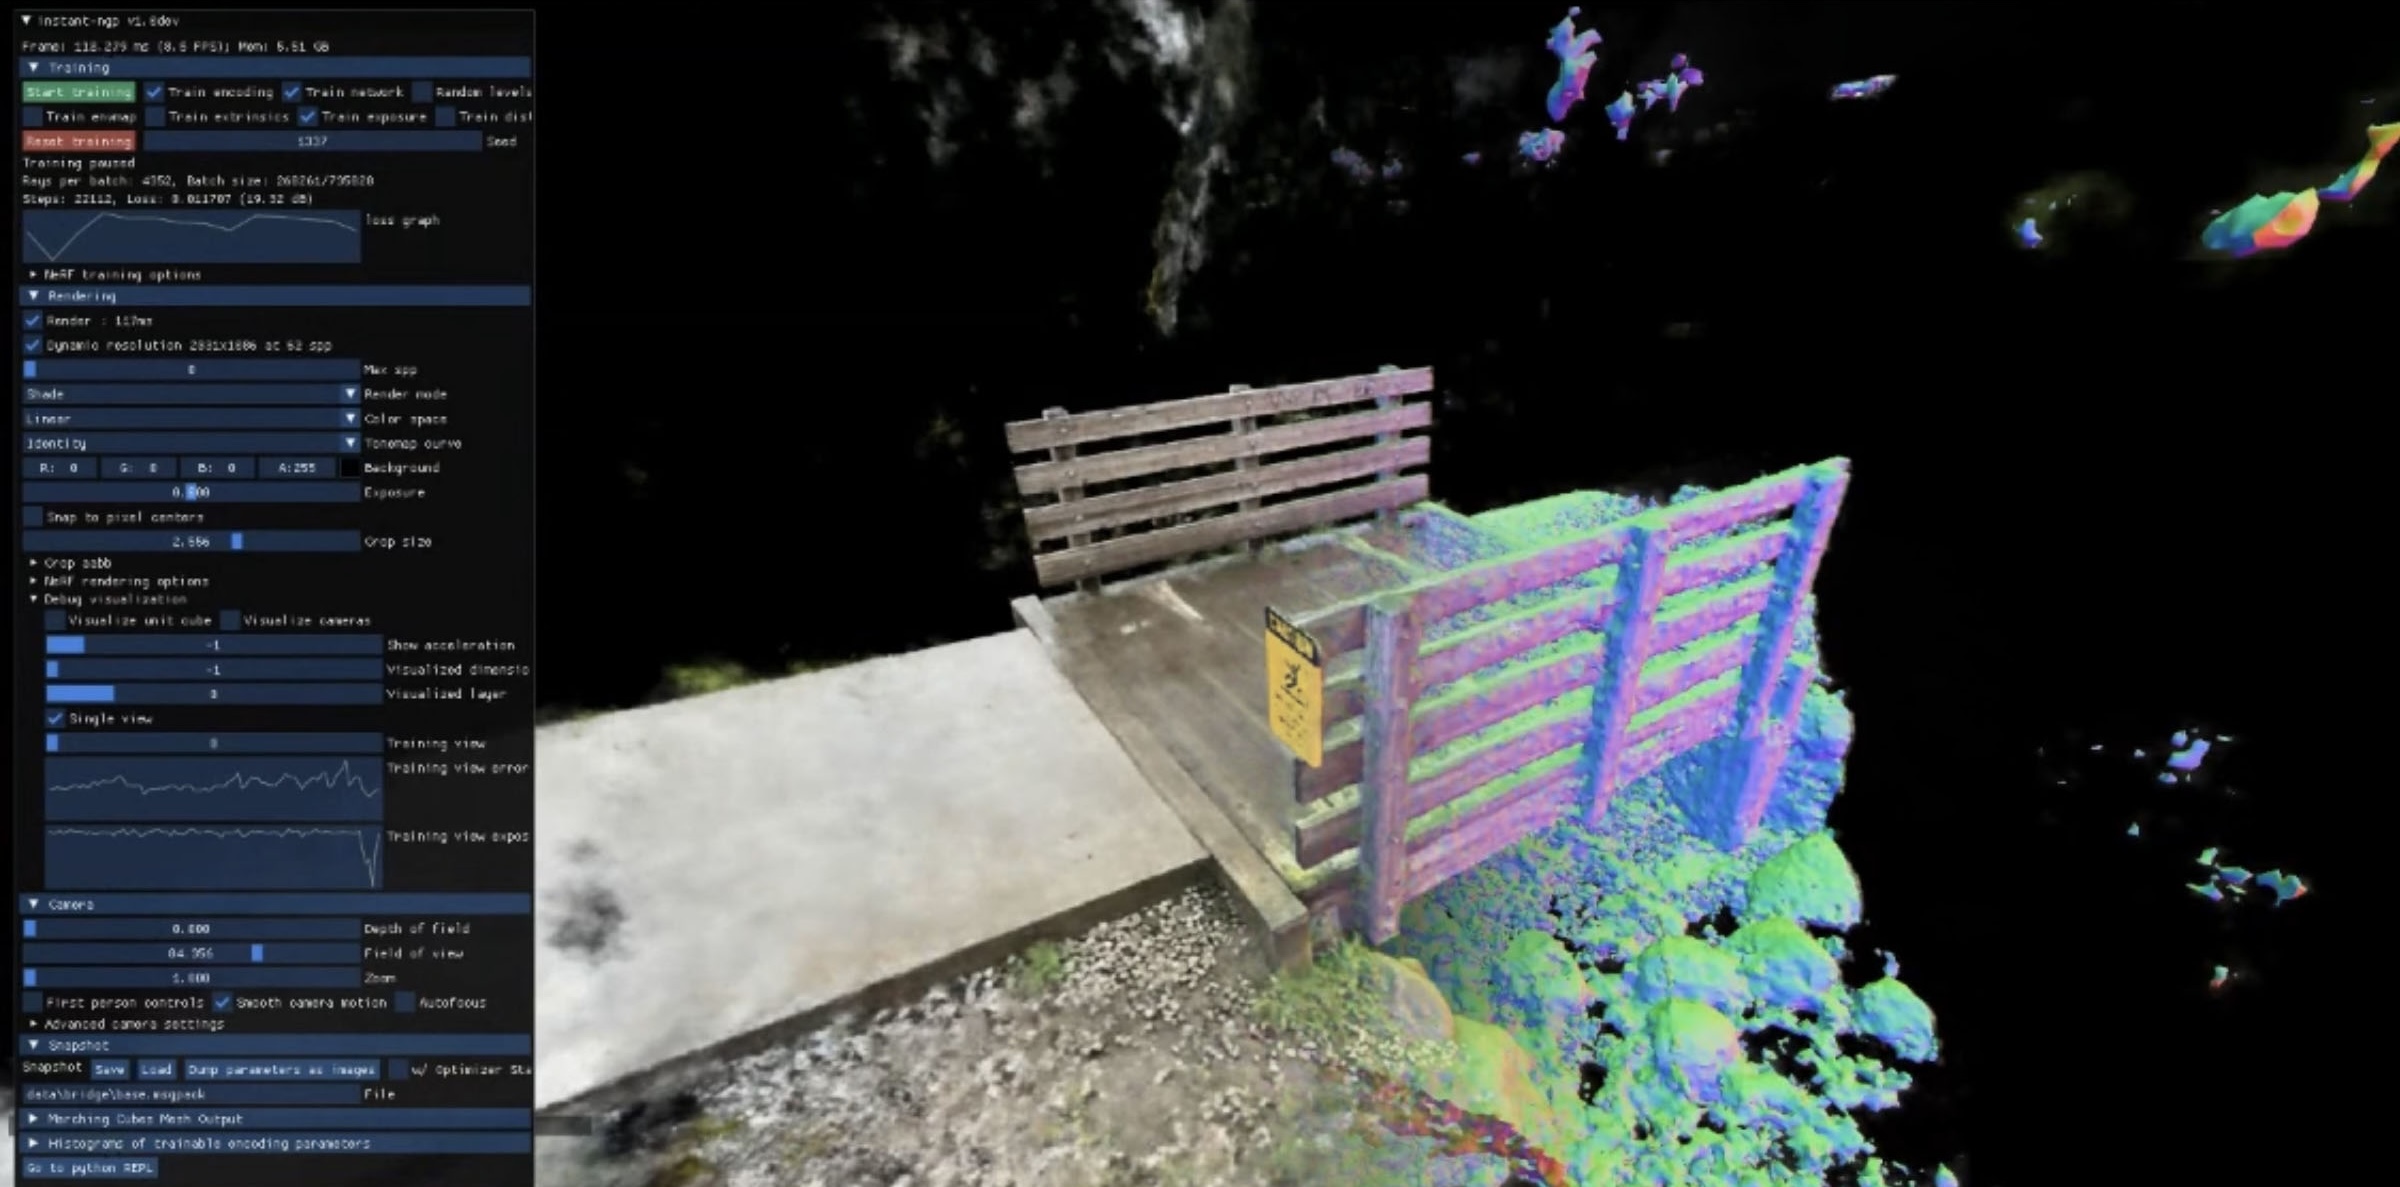
But new research from NVIDIA marries photogrammetry with artificial intelligence to create what the developers are calling an Instant Neural Radiance Field (NeRF). Not only does their method require far fewer images, as little as a few dozen according to NVIDIA, but the AI is able to better cope with the pain points of traditional photogrammetry; filling in the gaps of the occluded areas and leveraging reflections to create more realistic 3D scenes that reconstruct how shiny materials looked in their original environment.

NVIDIA-Instant-NeRF-3D-Mesh

If you’ve got a CUDA-compatible NVIDIA graphics card in your machine, you can give the technique a shot right now. The tutorial video after the break will walk you through setup and some of the basics, showing how the 3D reconstruction is progressively refined over just a couple of minutes and then can be explored like a scene in a game engine. The Instant-NeRF tools include camera-path keyframing for exporting animations with higher quality results than the real-time previews. The technique seems better suited for outputting views and animations than models for 3D printing, though both are possible.

Don’t have the latest and greatest NVIDIA silicon? Don’t worry, you can still create some impressive 3D scans using “old school” photogrammetry — all you really need is a camera and a motorized turntable.

Continue reading “NeRF: Shoot Photos, Not Foam Darts, To See Around Corners”

Pikul Servo Powered Falling Dominoes Pushing a Cube

Domino Row Goes With The Flow

Around here, we’re always excited about a new actuator design. Linear actuators are particularly hard to make cheap, fast, and good, so it’s even better when something new that we can build ourselves slides onto the scene.

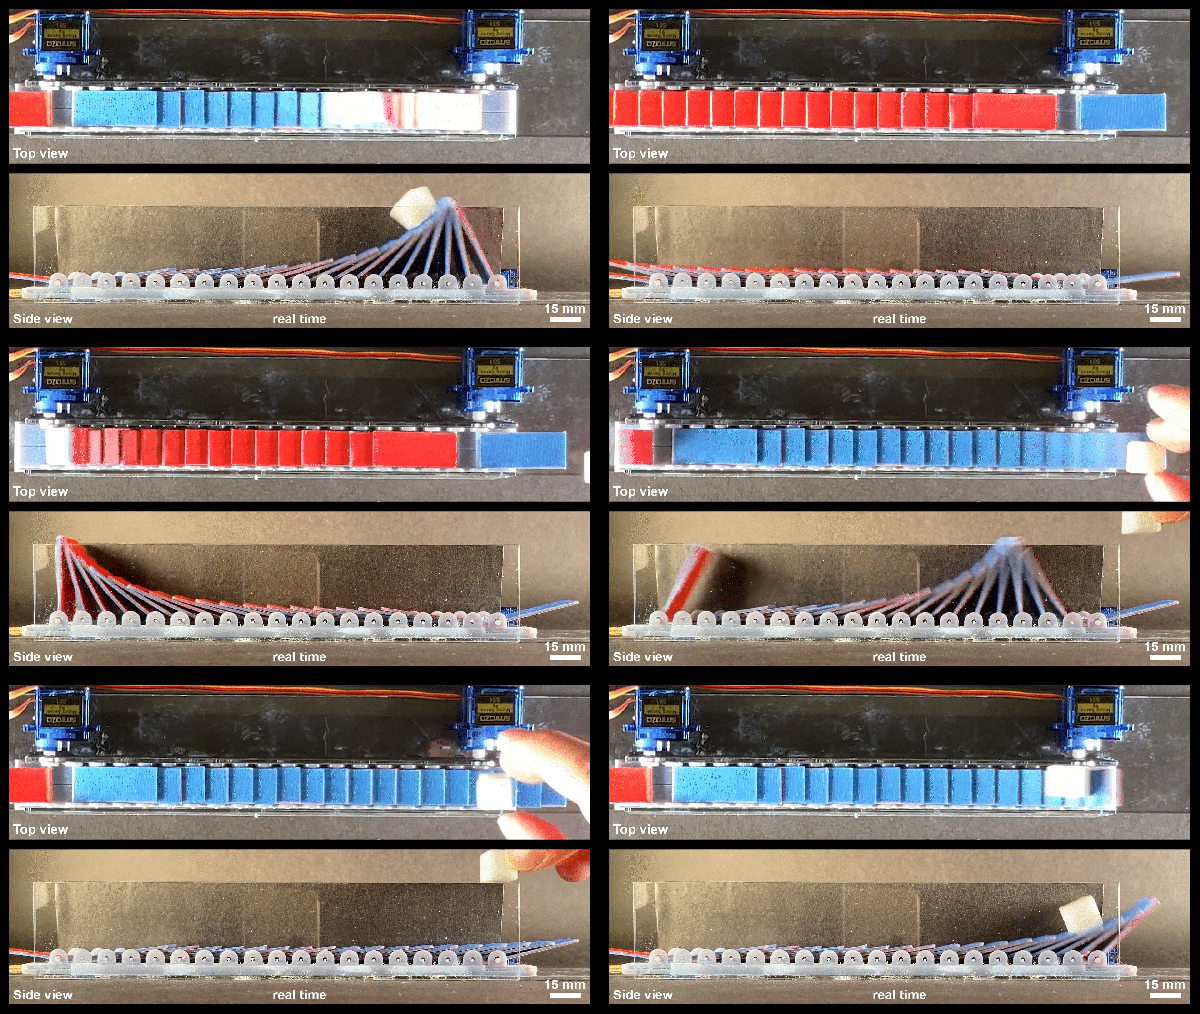
Researchers at U Penn’s Pikul Research Group took inspiration from the cascade of falling dominoes for an innovative take on linear motion. This article on IEEE Spectrum describes the similarity of the sequential tipping-over with the peristaltic motion of biological systems, including you, swallowing right now.

The motion propagation in falling dominoes, called a Soliton Wave, can be harnessed to push an object at the front of the wave, just like a surfer. See the videos after the break for examples of simple setups that any of us could recreate with laser-cut or 3D printed parts. Maybe you won’t be using them to help a robot swallow (a terrifying idea that the article suggests), but you might need a conveyor or a novel way to help a device crawl like a shrimp. The paper is behind a paywall on IEEE, though you readers likely see enough in the videos to get started, and we can’t wait to see where your dominoes will lead us next.


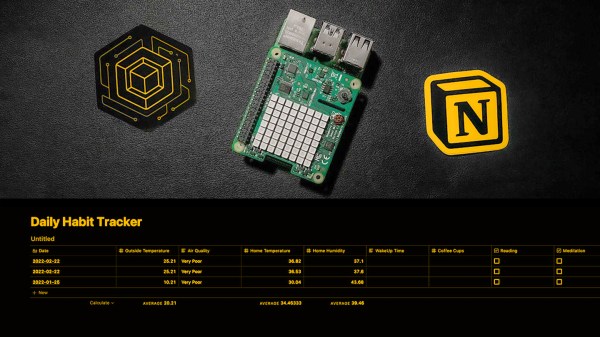
ayan-sensor2notion-dashboard+raspberryPi

Know Which Way The Wind Blows, Whether Weather Boosts Your Mood

As a quantified-self experiment, [Ayan] has tracked several daily habits and moods for a couple of years and discovered some insights. Too much coffee is followed by anxiety while listening to music leads to feelings of motivation and happiness. There was a strong correlation in the data, but [Ayan] wondered if external factors like the weather and air quality also played a role.

To find out, [Ayan] extended the custom dashboard built in Notion.so with weather data and some local sensors. Working at Balena.io (yes, the makers of the ubiquitous Raspberry Pi SD card flashing tool, Etcher), [Ayan] turned to balenaCloud to translate the data from (you guessed it) a Raspberry Pi into the dashboard via Notion’s API beta. We think Notion holds a lot of promise for all sorts of web-based dashboards as a research notebook and organizational tool. Who knows where the API will lead any interested readers?

Check out the full tutorial where [Ayan] walks you through the hardware used and each step to connect the APIs that bring it all together. [Ayan] plans to add a coffee-maker integration to automate that data entry and would welcome help getting a manual trigger set up for the data integrations.

REMOTICON 2021 // Jay Doscher Proves Tinkercad Isn’t Just For Kids

We invited [Jay Doscher] to give us a view into his process designing 3D printed parts for the impressive array of cyberdecks we’ve covered since 2019.

[Jay] got his start as a maker through woodworking in high school, getting satisfaction from bringing something from idea to reality. After a more recent class in blacksmithing and ax-making showed him what he could do when really focused, his hardware hacking really took off and his line of cyberdecks and other portable computers was born.

If you’ve heard of Tinkercad, you probably think it’s just for kids. While designed as an educational tool, [Jay] found that Autodesk’s younger sibling to the professionally powered (and priced) Fusion 360 had everything needed for making cyberdecks. If you’re willing to work around a few limitations, at the low-low price of free, Tinkercad might be right for you too.

What limitations? To start, Tinkercad is only available in a browser and online. There’s also no guarantee that it will remain free, but [Jay] notes that with its educational focus that is likely to remain the case. There is no library of common components to import while modeling. And, when your model is complete the options for exporting are limited to 2D SVGs and 3D STL, OBJ, and gaming-focused GBL formats. [Jay] has converted those to other formats for laser cutting and the STEP file a machine shop is expecting but admits that it’s something that adds complexity and is an annoyance.
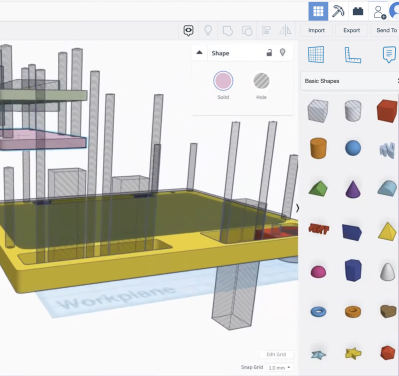
back7-TinkerCad-Alignment

In the talk, [Jay] discusses moving from his initial “cringy” explorations with Tinkercad, to his first cyberdeck, a little history on that term, and the evolution of his craft. It’s mostly a hands-on demo of how to work with Tinkercad, full of tips and tricks for the software itself and implications for 3D printing yourself, assembly, and machining by others.

While quite limited, Tinkercad still allows for boolean operations to join two volumes or the subtraction of one from another. [Jay] does a wonderful job of unpeeling the layers of operations, showing how combinations of “solids” and “holes” generated a complex assembly with pockets, stepped holes for fasteners, and multiple aligned parts for his next cyberdeck. Even if you already have a favorite CAD tool, another approach could expand your mind just like writing software in Strange Programming Languages can.

Continue reading “REMOTICON 2021 // Jay Doscher Proves Tinkercad Isn’t Just For Kids”

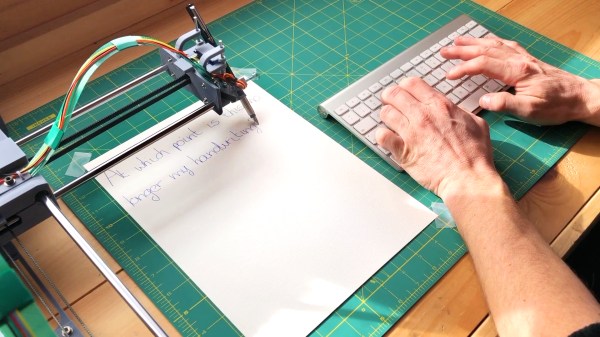
BenAkrin-PlottyBot-TypeWriterMode

PlottyBot: A DrawBot That Plots A Lot

Fire up those 3D printers because if you’re like us, you’ll want your own PlottyBot. Still, have a pile of “thank you notes” to write from recent winter holiday gift exchanges? Hoping to hand letter invitations to a wedding or other significant event? Need some new art to adorn your lock-down shelter or shop? It sounds like [Ben] could help you with that.

Besides being a handsomely designed desktop DrawBot, this project from [Ben] looks to have some solid software to run it, a community of makers who have tested the waters, and very detailed build instructions. Those include everything from a BOM with links for ordering parts to animated GIF assembly for the trickier steps.

If you’d like to graduate from “handwritten” cards and letters to something poster-sized are customization tips for expanded X and Y dimensions. As we’ve included in other recent articles, one caveat to mention is the current scarcity of the Raspberry Pi Zeros that PlottyBots require. But if you have one on hand or think you’ll be able to source one by the time you’ve 3D printed all the parts, it might just be the perfect time to add another bot to your family. As a heads up, this project is self-hosted on a solar-powered server, so maybe take turns reading the complete build log.

A nice bonus if you need help drawing something suitably complex to require a robot’s help, [Ben] also created MandalGaba which looks like an awesome online tool for drawings like the ones shown above.

Illuminating Origami Is Just Around The Corner

Pop-up greeting cards are about to get a whole lot more interesting. Researchers at Seoul National University in Korea have created glowing 3D objects with a series of prototypes that fold thin QLED (Quantum Dot LED) sheets like origami. They used a CO2 laser to etch “fold lines” in the QLED so the sheets could be formed into 3D shapes. The bends are actually rounded, but at 5μm they appear to be sharp corners and the panels continue to illuminate across the fold lines for at least 500 folds. Some glow in solid colors, while others use smaller addressable areas to create animated matrix displays of patterns and letterforms. See the short video after the break, read the Physics World article or to see all the prototypes and dig into details of the full research paper in Nature (freed from the paywall by SharedIt).

We’re not sure how soon this technique can be duplicated in our home labs, but we can’t wait to fold up our own 3D lights and matrices. Until then, check out some glowing origami you can make right now from [Charlyn Gonda] at Remoticon 2020 and earlier that year and this amazing origami lamp.

Continue reading “Illuminating Origami Is Just Around The Corner”

iPodRPi by production

IPod Mod Puts Pi Zero In New Bod

We sure love to see nicely designed products get a new lease on life. Just as the new Raspberry Pi Zero 2 was being announced, [production] was stuffing an original RPi Zero into an old iPod’s case.

[production] cites several previous, similar projects that showed how to interface with the click-wheel, a perfectly fitting color display from Waveshare, and open-source software called Rockbox to run on the pi. We all stand on the shoulders of giants.

iPodRPi by production interior wiring

Some nice innovations to look for are the Pi Zero’s micro-SD card and a micro-USB charging port aligned to the large slot left from the iPod’s original 40 pin connector. Having access for charging and reflashing the card without opening the case seems quite handy. There’s a nice sized battery too, though we wonder if a smaller battery and a Qi charger could fit in the same space. Check the project’s Hackaday.io for the parts list, and GitHub for the software side of things, and all the reference links you’ll need to build your own. It looks like [production] has plans to turn old iPods into Gameboy clones, you may want to check back for progress on that.

If you just want to rock like it’s 2004, there are options to just upgrade the battery and capacity but keep your vintage iPod too.

Continue reading “IPod Mod Puts Pi Zero In New Bod”