High Detail 3D Printing With An Airbrush Nozzle

On a fused deposition modeling (FDM) 3D printer, the nozzle size dictates how small a detail you can print. Put simply, you can’t print features smaller than your nozzle for the same reason you’d have trouble signing a check with a paint roller. If the detail is smaller than the diameter of your tool, you’re just going to obliterate it. Those who’ve been around the block a few times with their desktop 3D printer may have seen this come up in practice when their slicer refused to print lines which were thinner than the installed nozzle (0.4mm on the vast majority of printers).

Smaller nozzles exist for those looking to improve their printer’s detail on small objects, but [René Jurack] wasn’t happy with just putting a finer nozzle on a stock E3D-style hotend. In his opinion it’s still a hotend and arrangement intended for 0.4mm printing, and doesn’t quite fully realize the potential of a smaller diameter nozzle. After some experimentation, he thinks he’s found the solution by using airbrush nozzles.

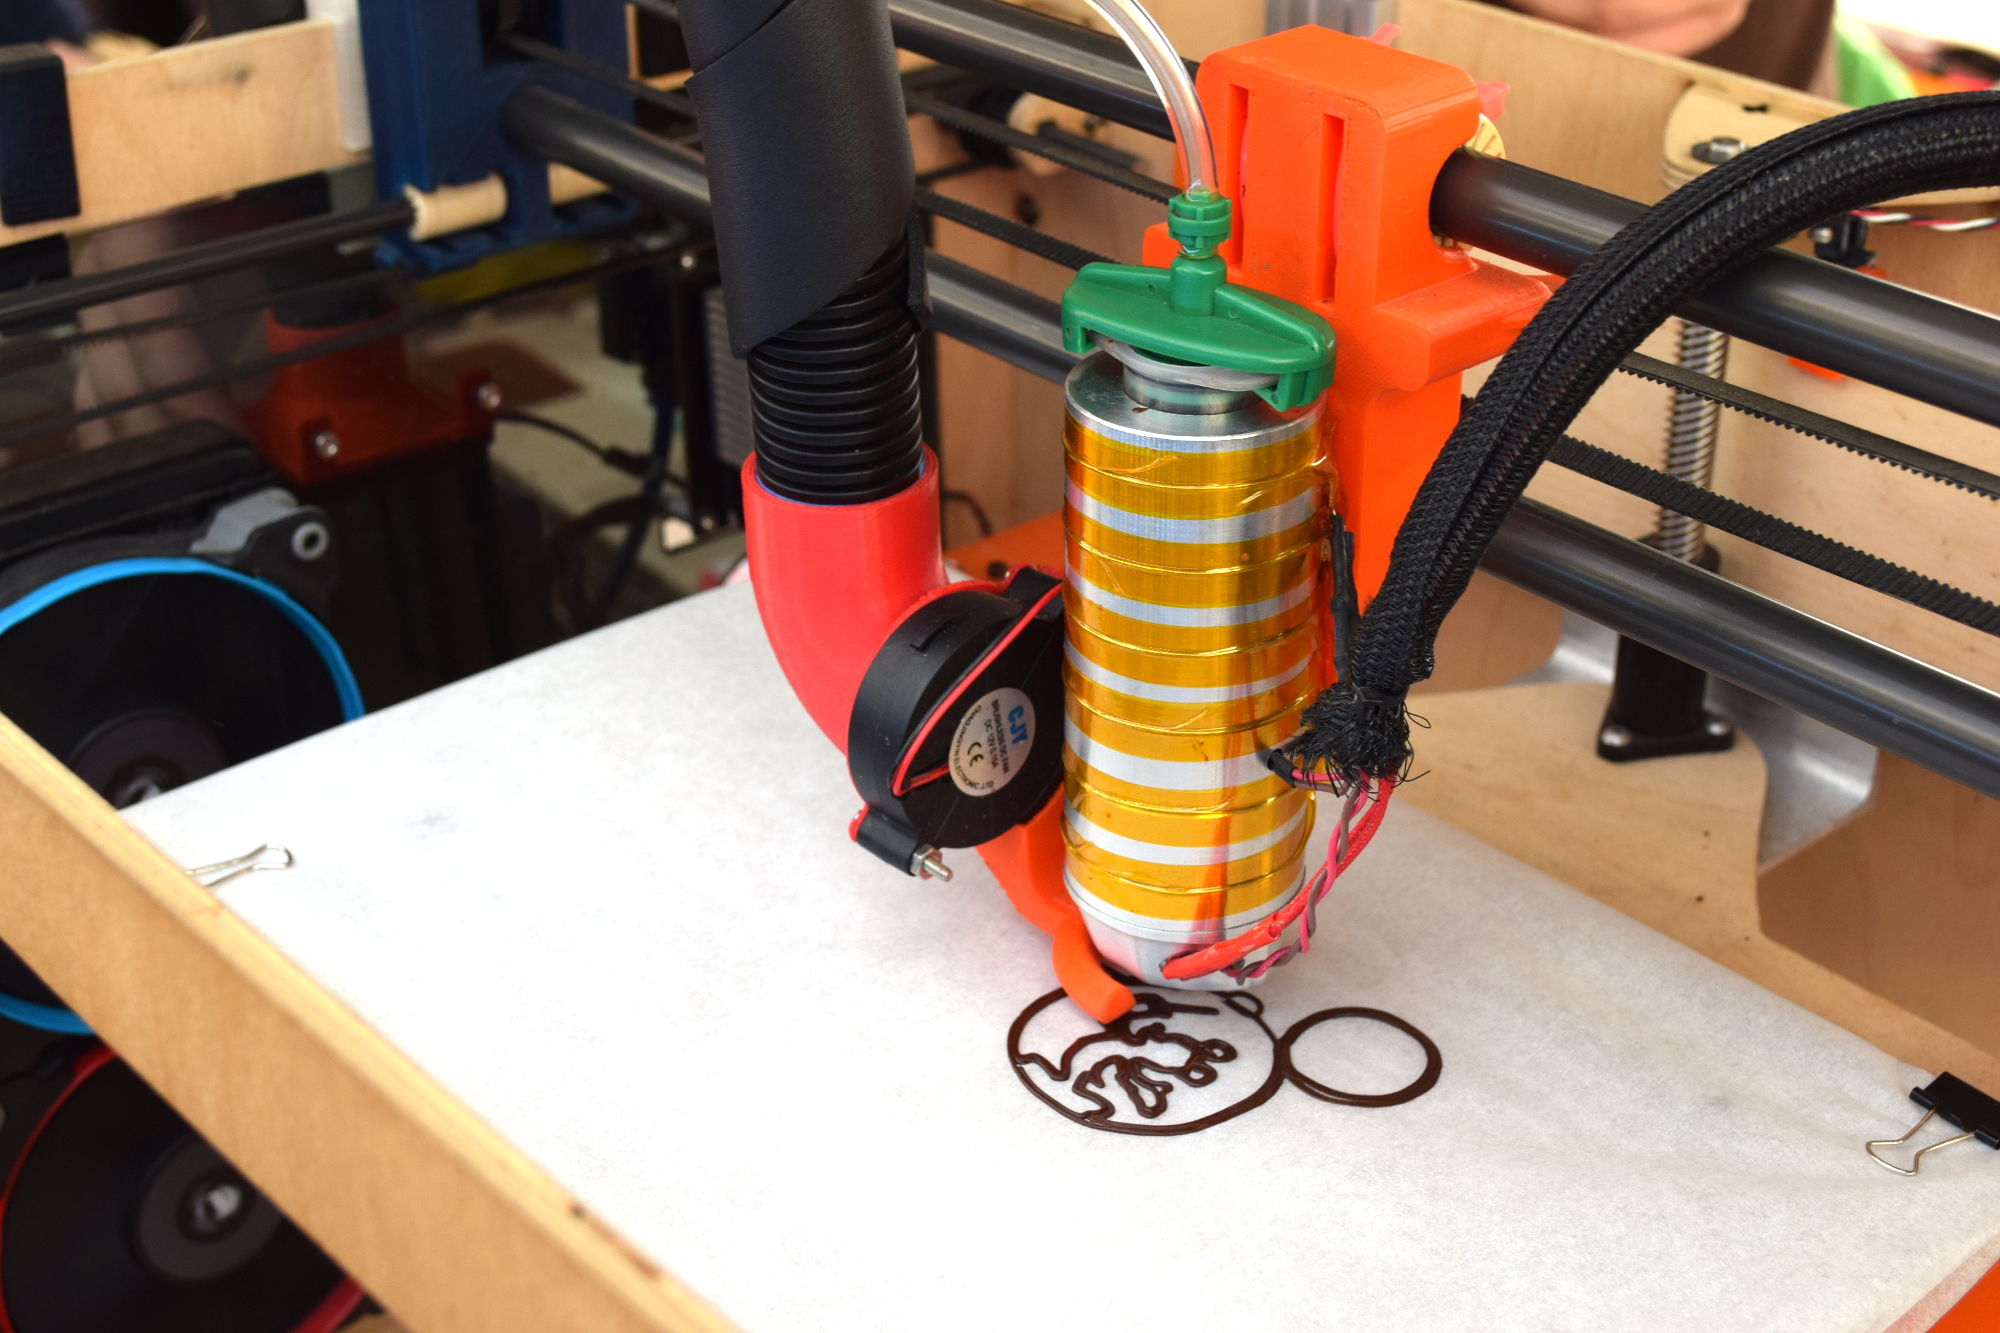
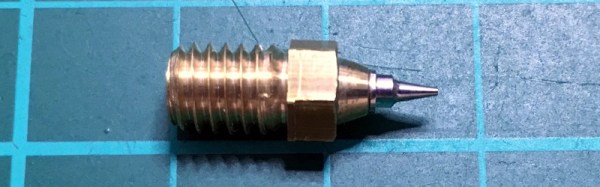
As [René] sees it, the hotend is too close to the subject being printed when using nozzles finer than 0.4mm. Since you’re working on tiny objects, the radiant heat from the body of the hotend being only a few millimeters away is enough to deform what you’re working on. But using the long and tapered airbrush nozzle, the hotend is kept at a greater distance from the print. In addition, it gives more room for the part cooling fan to hit the print with cool air, which is another critical aspect of high-detail FDM printing.

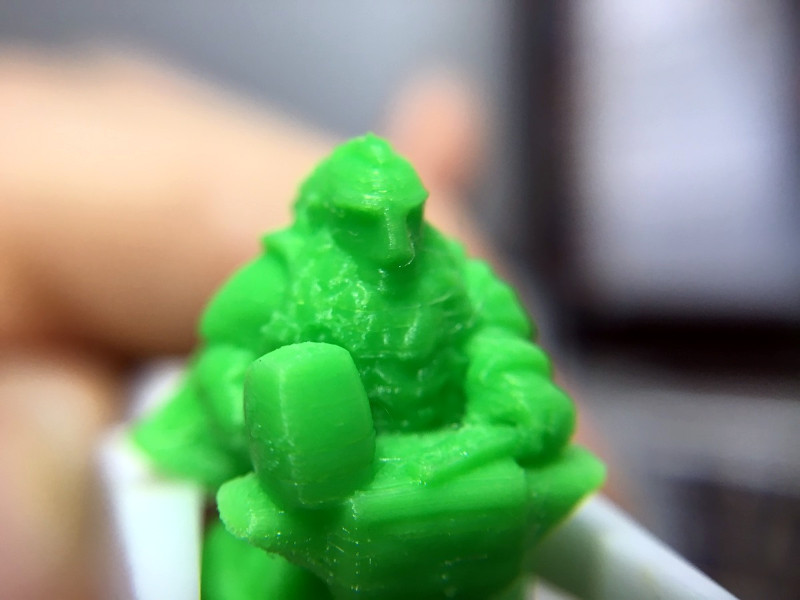
Of course, you can’t just stick an airbrush nozzle on your E3D and call it a day. As you might expect, they are tiny. So [René] designed an adapter that will let you take widely available airbrush nozzles and thread them into an M6 threaded hotend. He’s now selling the adapters, and judging by the pictures he posted, we have to say he might be onto something.

If you’re more about brute strength than finesse, you might be interested in outfitting your E3D with a ruby nozzle instead.

Continue reading “High Detail 3D Printing With An Airbrush Nozzle”

Maker Faire NY: Getting Physical With Minecraft

If you’ve been hanging around Hackaday for a while, you’ve likely seen a few attempts to bridge the real world with the voxel paradise that is Minecraft. In the past, projects have connected physical switches to virtual devices in the game, or took chunks of the game’s blocky landscape and turned it into a 3D printable file. These were interesting enough endeavors, but fairly limited in their scope. They assumed you had an existing world or creation in Minecraft that you wanted to fiddle with in a more natural way, but didn’t do much for actually playing the game.

But “Physical Minecraft” presented at the 2018 World Maker Faire in New York, offered a unique way to bring players a bit closer to their cubic counterparts. Created by [Manav Gagvani], the physical interface has players use a motion detecting wand in combination with an array of miniature Minecraft blocks to build in the virtual world.

The wand even detects various gestures to activate an array of “Spells”, which are effectively automated build commands. For example, pushing the wand forward while making a twisting motion will automatically create a tunnel out of the selected block type. This not only makes building faster in the game, but encourages the player to experiment with different gestures and motions.

A Raspberry Pi 3 runs the game and uses its onboard Bluetooth to communicate with the 3D printed wand, which itself contains a MetaWear wearable sensor board. By capturing his own moves and graphing the resulting data with a spreadsheet, [Manav] was able to boil down complex gestures into an array of integer values which he plugged into his Python code. When the script sees a sequence of values it recognizes, the relevant commands get passed onto the running instance of Minecraft.

You might assume the wand itself is detecting which material block is attached to it, but that bit of magic is actually happening in the base the blocks sit on. Rather than trying to uniquely identify each block with RFID or something along those lines, [Manav] embedded an array of reed switches into the base which are triggered by the presence of the magnet hidden in each block.

These switches are connected directly to the GPIO pins of the Raspberry Pi, and make for a very easy way to determine which block has been removed and installed on the tip of the wand. Things can get tricky if the blocks are put into the wrong positions or more than one block are removed at a time, but for the most part it’s an effective way to tackle the problem without making everything overly complex.

We’ve often talked about how kid’s love for Minecraft has been used as a way of getting them involved in STEM projects, and “Physical Minecraft” was a perfect example. There was a line of young players waiting for their turn on the wand, even though what they were effectively “playing” was the digital equivalent of tossing rocks. [Manav] would hand them the wand and explain the general idea behind his interface, reminding them that the blocks in the game are large and heavy: it’s not enough to just lower the wand, it needs to be flicked with the speed and force appropriate for the hefty objects their digital avatar is moving around.

Getting kids excited about hardware, software, and performing physically demanding activities at the same time is an exceptionally difficult task. Projects like “Physical Minecraft” show there can be more to playing games than mindless button mashing, and represent something of a paradigm shift for how we handle STEM education in an increasingly digital world.

Turn A Cheap 3D Printer Into A Cheap Laser Cutter

We know it’s hard to hear it, but the days of you being a hotshot at the local Hackerspace because you’ve got a 3D printer at home are long gone. While they’re still one of the most persnickety pieces of gear on the hacker’s bench, they’re certainly not the rarest anymore. Some of these printers are so cheap now they’re almost impulse buys. Like it or not, few people outside of your grandmother are going to be impressed when you tell them you’ve got a personal 3D printer anymore; and we wouldn’t be surprised if even granny picked up a Monoprice Mini during the last open box sale.

But while 3D printer ownership isn’t the pinnacle of geek cred it once was, at least there’s a silver lining: cheap motion platforms we can hack on. [squix] writes in to tell us about how he added a laser to his $200 USD Tevo Tarantula 3D printer, greatly expanding the machine’s capabilities without breaking the bank. The information in his write-up is pretty broadly applicable to most common 3D printer designs, so even if you don’t have a Tarantula it shouldn’t be too hard to adapt the concept.

The laser is a 2.5 W 445 nm module which is very popular with low-cost laser cutter setups. It’s a fully self-contained air cooled unit that just needs a source of 12 V to fire up. That makes it particularly well suited to retrofitting, as you don’t need to shoehorn in any extra support electronics. [squix] simply connected it to the existing power wires for the part cooling fan he added to the Tarantula previously.

You may want to check the specs for your 3D printer’s control board before attaching such a high current device to the fan connector. Best case it just overloads the board’s regulator and shuts down, worst case the magic smoke might escape. A wise precaution here might be to put a MOSFET between the board’s fan output the and the laser, but we won’t tell you how to live your life. As far as laser safety, this device should probably work inside an opaque box, or behind closed doors.

Once the laser is hanging off the fan port of your printer’s controller, you can turn it on with the normal GCode commands for fan control, M106 and M107 (to turn it on and off, respectively). You can even control the laser’s power level by adding an argument to the “on” command like: M106 S30.

Then you just need to mount the laser, and it’s more or less business as usual. Controlling a laser engraver/cutter isn’t really that different from controlling a 3D printer, so [squix] is still using OctoPrint to command the machine; the trick is giving it a “3D model” that’s just a 2D image with no Z changes to worry about. We’ve seen the process for doing that in Inkscape previously.

With this laser module going for as little as $60 USD (assuming you’ve got a 3D printer or two laying around to do the conversion on), this is a pretty cheap way to get into the subtractive manufacturing game. Next stop from there is getting one of those K40’s everyone’s talking about.

Continue reading “Turn A Cheap 3D Printer Into A Cheap Laser Cutter”

Maker Faire NY: Cocoa Press Chocolate Printer

If you haven’t figured it out by now, the hype over desktop filament printers is pretty much over. But that doesn’t mean there aren’t new avenues worth exploring that use the basic FDM printer technology. If anything, the low cost and high availability of 3D printer parts and kits makes it easier to branch off into new territory. For example, experimenting with other materials which lend themselves to being “printed” layer by layer like a thermoplastic. Materials such as cement, clay, or even chocolate.

[Ellie Weinstein] brought her Cocoa Press printer to the 2018 World Maker Faire in New York, and we have to say it’s a pretty impressive piece of engineering. Hackers have been known to throw a syringe-based paste extruder onto a regular 3D printer and try their luck with squirting out an edible object from time to time, but the Cocoa Press is truly a purpose built culinary machine.

Outwardly it features the plywood case and vaguely Makerbot-looking layout that we’ve seen plenty of times before in DIY 3D printers. It even uses the same RAMPS controller running Marlin that powers your average homebrew printer. But beyond these surface similarities, the Cocoa Press has a number of purpose-built components that make it uniquely qualified to handle the challenges of building with molten chocolate.

For one, beyond the nozzle and the walls of the syringe, nothing physically comes into contact with the chocolate to be printed; keeping the mess and chance of contamination to a minimum. The leadscrew actuated plunger used in common paste extruders is removed in favor of a purely air powered system: a compressor pumps up a small reservoir tank with filtered and dried air, and the Marlin commands which would normally rotate the extruder stepper motor are intercepted and used to trigger an air valve. These bursts of pressurized air fill the empty area above the chocolate and force it out of the 0.8 mm nozzle.

In a normal 3D printer, the “melt zone” is tiny, which allows for the heater itself to be relatively small. But that won’t work here; the entire chocolate load has to be liquefied. It’s a bit like having to keep a whole roll of PLA melted during the entire print. Accordingly, the heater on the Cocoa Press is huge, and [Ellie] even had a couple spare heaters loaded up with chocolate syringes next to the printer to keep them warm until they’re ready to get loaded up.

Of course, getting your working material hot in a 3D printer is only half the battle, you also need to rapidly cool it back down if you want it to hold its shape as new layers are placed on top of it. A normal 3D printer can generally get away with a little fan hanging next to the nozzle, but [Ellie] found the chocolate needed a bit of a chill to really solidify.

So she came up with a cooling system that makes use of water-cooled Peltier units. The cold side of the Peltier array is inside a box through which air is forced, which makes its way through an insulated hose up to the extruder, where a centrifugal fan and 3D printed manifold direct it towards the just-printed chocolate. She reports this system works well under normal circumstances, but unusually high ambient temperatures can overwhelm the cooler.

While “the man” prevented show goers from actually eating any of the machine’s creations (to give out food in New York, you must first register with the city), they certainly looked fantastic, and we’re interested in seeing where the project goes from here.

Drill Jig Helps Mount WeMos D1 Mini

As far as ESP8266 boards go, the WeMos D1 Mini is a great choice if you’re looking to get started with hackerdom’s microcontroller du jour. It’s small, well supported, and can be had ridiculously cheap. Often going for as little as $3 USD each, we buy the things in bulk just to have spares on hand. But that’s not to say it’s a perfect board. For one, it lacks the customary mounting holes which would allow you to better integrate it into finished products.

This minor annoyance was enough to spring [Martin Raynsford] into action. He noticed there was some open area on the D1 Mini’s PCB where it seemed he could drill through to add his own mount points, but of course popping holes in a modern PCB can be risky business. There’s not a lot of wiggle room between success and heartbreak, and it’s not like the diminutive D1 Mini is that easy to hold down to begin with. So he designed a laser-cut jig to allow him to rapidly add mounting holes to his D1 Mini’s assembly line style.

For those who might be skeptical, [Martin] reports he’s seen no adverse effects from drilling through the board, though does admit it’s possible the close proximity of the metal screw heads to the ESP8266’s antenna may have a detrimental effect. That said, he’s tested them in his projects out to 25 m (82 feet) with no obvious problems. He’s using a 2 mm drill bit to make his hole, and M2 x 6 mm machine screws to hold the boards down.

The jig design is released as a SVG and DXF for anyone with a laser cutter to replicate, but it shouldn’t be too difficult to extrude those designs in the Z dimension for hackers who haven’t yet jumped on the subtractive manufacturing bandwagon.

When a project makes the leap from prototype to in-house production, designing and building jigs become an essential skill. From flashing firmware to doing final checkout, the time and effort spent building a jig early on will pay for itself quickly in production.

Maker Faire NY: Developing For The Final Frontier

The cost of getting a piece of hardware into space is now cheaper than ever, thanks in no small part to the rapid progress that’s been made by commercial launch providers such as SpaceX. In the near future, as more low-cost providers come online, it should get even cheaper. Within a few years, we could be seeing per kilogram costs to low Earth orbit that are 1/10th what they were on the Space Shuttle. To be sure, this is a very exciting time to be in the business of designing and building spacecraft.

But no matter how cheap launches to orbit get, it’ll never be cheaper than simply emailing some source code up to the International Space Station (ISS). With that in mind, there are several programs which offer students the closest thing to booking passage on a Falcon 9: the chance to develop software that can be run aboard the Station. At the 2018 World Maker Faire in New York we got a chance to get up close and personal with functional replicas of the hardware that’s already on orbit, known in space parlance as “ground units”.

On display was a replica of one of the SPHERES free-flying satellites that have been on the ISS since 2006. They are roughly the size of a soccer ball and utilize CO2 thrusters and ultrasonic sensors to move around inside of the Station. Designed by MIT as a way to study spaceflight techniques such as docking and navigation without the expense and risk of using a full scale vehicle, the SPHERES satellites are perhaps the only operational spacecraft to have never been exposed to space itself.

MIT now runs the annual “Zero Robotics” competition, which tasks middle and high school students with solving a specific challenge using the SPHERES satellites. Competitors run their programs on simulators until the finals, which are conducted using the real hardware on the ISS and live-streamed to schools.

We also saw hardware from “Quest for Space”, which is a company offering curricula for elementary through high school students which include not only the ground units, but training and technical support when and if the school decides to send the code to the matching hardware on the Station. For an additional fee, they will even work with the school to design, launch, and recover a custom hardware experiment.

Their standard hardware is based on off-the-shelf platforms such as Arduino and LEGO Mindstorms EV3, which makes for an easy transition for school’s existing STEM programs. The current hardware in orbit is setup for experiments dealing with heat absorption, humidity, and convection, but “Quest for Space” notes they change out the hardware every two years to provide different experiment opportunities.

Projects such as these, along with previous efforts such as the ArduSat, offer a unique way for the masses to connect with space in ways which would have been unthinkable before the turn of the 21st century. It’s still up for debate if anyone reading Hackaday in 2018 will personally get a chance to slip Earth’s surly bonds, but at least you can rest easy knowing your software bugs can hitch a ride off the planet.

RTL-SDR Paves Way To Alexa Controlled Blinds

You’d be forgiven for occasionally looking at a project, especially one that involves reverse engineering an unknown communication protocol, and thinking it might be out of your league. We’ve all been there. But as more and more of the devices that we use are becoming wireless black boxes, we’re all going to have to get a bit more comfortable with jumping into the deep end from time to time. Luckily, there are no shortage of success stories out there that we can look at for inspiration.

A case in point are the wireless blinds that [Stuart Hinson] decided would be a lot more useful if he could control them with his Amazon Alexa. There’s plenty of documentation on how to get Alexa to do your bidding, so he wasn’t worried about that. The tricky part was commanding the wireless blinds, as all he had to go on was the frequency printed on the back of the remote.

Luckily, in the era of cheap RTL-SDR devices, that’s often all you need. [Stuart] plugged in his receiver and fired up the incredibly handy Universal Radio Hacker. Since he knew the frequency, it was just a matter of tuning in and hitting the button on the remote a couple times to get a good capture. The software then broke it down to the binary sequence the remote was sending out.

Now here’s where [Stuart] lucked out. The manufacturers took the easy way out and didn’t include any sort of security features, or even bother with acknowledging that the signal had been received. All he needed to do was parrot out the binary sequence with a standard 433MHz transmitter hooked up to an ESP8266, and the blinds took the bait. This does mean that anyone close enough can take control of these particular blinds, but that’s a story for another time.

We took a look at the Universal Radio Hacker a year or so back, and it’s good to see it picking up steam. We’ve also covered the ins and outs of creating your own Alexa skills, if you want to get a jump on that side of the project.